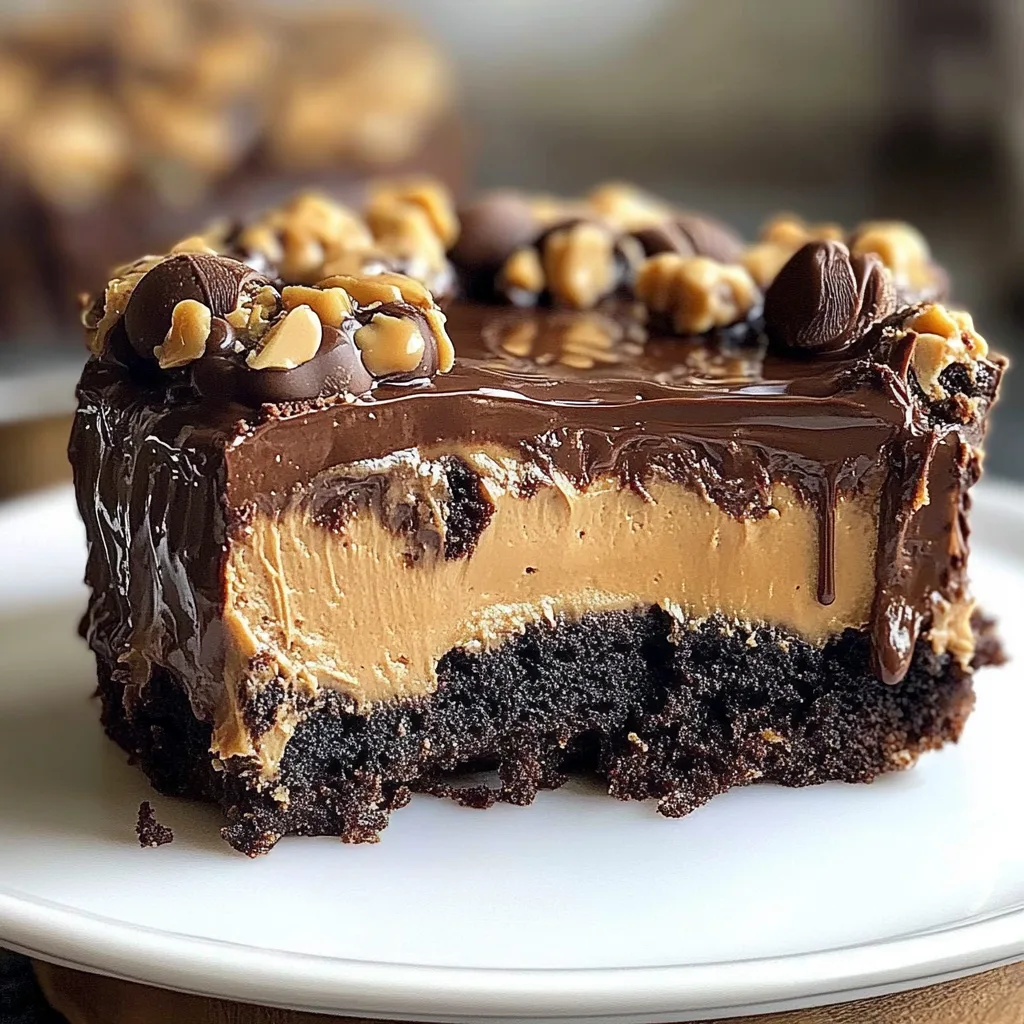
Heavenly Chocolate Peanut Butter Ooey Gooey Cake is a decadent dessert that promises an indulgent experience unlike any other. When you take your first bite, the delightful combination of rich chocolate and creamy peanut butter creates a blissful explosion of flavor in your mouth. This cake is not just your average dessert; it is an adventure of taste that brings comfort and joy to any occasion. Whether you’re hosting a family gathering or simply indulging yourself, this cake will elevate the mood and satisfy your sweet cravings.
Imagine a cake so gooey that it melts in your mouth, with layers of luscious chocolate and irresistible peanut butter flavors. This dessert is an embodiment of comfort and pleasure. As you slice into the soft, moist layers, you reveal a treasure of sweet surprises, blending textures that will leave your taste buds dancing in delight. This isn’t merely a cake; it’s a celebration of flavors and textures that makes every moment special.
With the festive season fast approaching or whenever you crave a sweet escape, this cake is your go-to recipe. It captures the essence of indulgence, making every slice a magical experience. You’ll find that it’s not just the taste that draws everyone in; it’s the warmth of shared moments and the joy of gathering around this delightful dessert. In the sections that follow, we’ll explore the charm of this recipe, how to prepare it, and tips for serving it perfectly. Get ready to experience the wonder of Heavenly Chocolate Peanut Butter Ooey Gooey Cake!
Why You’ll Love This Recipe
There are countless reasons to fall in love with Heavenly Chocolate Peanut Butter Ooey Gooey Cake. Let’s dive into some of the most compelling reasons why this recipe stands out:
1. Decadent Flavors: The rich combination of chocolate and peanut butter is simply irresistible and comforting.
2. Moist and Gooey Texture: Each layer offers a delightful ooey-gooey texture that enhances the overall experience.
3. Easy to Make: Despite its incredible taste, this cake features straightforward steps that anyone can follow.
4. Perfect for Any Occasion: Whether it’s a birthday, holiday, or casual weeknight treat, this cake is sure to impress.
5. Crowd-Pleaser: It’s a dessert that appeals to both kids and adults alike, making it a family favorite.
6. Customizable: You can easily substitute ingredients to meet dietary restrictions or personal tastes, like gluten-free or vegan options.
These aspects contribute to the cake’s reputation as a beloved dessert that leaves a lasting impression. With every bite, you’ll understand why so many people rave about this delicious dessert.
Preparation and Cooking Time
To enjoy this Heavenly Chocolate Peanut Butter Ooey Gooey Cake, you’ll need a total time commitment that works with most schedules. Here’s how the timing breaks down:
– Preparation Time: 30 minutes
– Cooking Time: 45-50 minutes
– Cooling Time: 15-20 minutes
In total, expect to spend about 1 hour and 45 minutes from start to finish. Keep in mind that your timing might vary based on your kitchen efficiency and equipment, but this estimate will serve as a reliable guide.
Ingredients
– 2 cups all-purpose flour
– 2 cups granulated sugar
– ½ cup unsweetened cocoa powder
– 1 cup whole milk
– ½ cup vegetable oil
– 3 large eggs
– 1 tablespoon baking powder
– ¼ teaspoon salt
– 1 tablespoon vanilla extract
– ½ cup creamy peanut butter (plus more for drizzling)
– 1 cup semi-sweet chocolate chips
– ½ cup chopped peanuts (optional, for topping)
– Powdered sugar, for dusting (optional)
Step-by-Step Instructions
To create your own Heavenly Chocolate Peanut Butter Ooey Gooey Cake, just follow these detailed steps:
1. Preheat the Oven: Set your oven to 350°F (175°C). Prepare a 9×13 inch baking pan by greasing it or lining it with parchment paper.
2. Mix Dry Ingredients: In a large bowl, sift together the flour, granulated sugar, cocoa powder, baking powder, and salt until well combined.
3. Combine Wet Ingredients: In a separate bowl, whisk the milk, vegetable oil, eggs, and vanilla extract until smooth.
4. Mix Mixtures: Gradually add the wet ingredients to the dry ingredients, mixing until just combined and no lumps remain.
5. Add Peanut Butter: Gently fold in the peanut butter until fully incorporated.
6. Add Chocolate Chips: Fold in the semi-sweet chocolate chips for an extra layer of chocolatey goodness.
7. Pour Batter: Pour the batter into the prepared baking pan, smoothing the top evenly with a spatula.
8. Bake: Place the pan in the preheated oven and bake for 45-50 minutes, or until a toothpick inserted in the center comes out clean or with a few moist crumbs.
9. Cool: Once baked, remove the cake from the oven and let it cool in the pan for about 15-20 minutes. Carefully transfer to a wire rack to cool completely.
10. Optional Toppings: Once cool, drizzle with more peanut butter and sprinkle with chopped peanuts and powdered sugar if desired.
Following these steps ensures that your cake turns out beautifully, with a gooey texture and rich flavor that everyone will love.
How to Serve
Serving the Heavenly Chocolate Peanut Butter Ooey Gooey Cake with thought and care will elevate its appeal. Here are some tips on how to serve it perfectly:
1. Presentation Matters: Use a decorative cake stand to enhance the visual appeal of your cake. A clean, simple presentation allows the cake to shine.
2. Pairing Options: Serve with vanilla ice cream, whipped cream, or a scoop of peanut butter mousse to complement the flavors.
3. Slice Size: Cut generous but manageable portions. Since this cake is rich, smaller slices can encourage your guests to come back for seconds.
4. Beverage Pairing: Consider serving the cake with a glass of milk, coffee, or even a bold red wine for a more adult touch.
5. Garnish: Finish each slice with a dollop of whipped cream or drizzle extra chocolate or peanut butter sauce for added flair.
By paying attention to these serving details, you ensure that your Heavenly Chocolate Peanut Butter Ooey Gooey Cake is not just a dessert, but a memorable experience for all who indulge. Enjoy the delightful battle of chocolate and peanut butter in every delicious bite!
Additional Tips
– Use Quality Ingredients: For an amazing flavor, opt for high-quality cocoa powder and chocolate chips. It truly elevates the cake.
– Adjust Baking Time: Every oven is different. Keep an eye on your cake during the last few minutes of baking to ensure it doesn’t overcook.
– Poke Holes After Baking: If you wish to make the cake even gooier, poke holes gently in the cake after it’s cooled slightly to allow extra peanut butter drizzle to soak in.
– Chill Before Serving: For a firmer slice, chill the cake in the fridge for about an hour before serving. It makes cutting easier and enhances the indulgent flavors.
Recipe Variation
Feel free to try different takes on this classic! Here are a few variations to consider:
1. Nut-Free Version: Omit the chopped peanuts entirely or replace them with sunflower seeds for a delightful crunch.
2. Different Flavors: Use a different type of nut butter, such as almond butter, instead of peanut butter for a unique flavor twist.
3. Layering with Other Flavors: Consider adding a caramel layer in between the chocolate and peanut butter layers for an added depth of flavor.
4. Gluten-Free Option: Substitute the all-purpose flour with a gluten-free baking blend to make the cake friendly for gluten-sensitive individuals.
Freezing and Storage
– Storage: To keep its freshness, store the cake in the refrigerator in an airtight container. It stays delicious for up to 4-5 days.
– Freezing: You can freeze individual slices of the cake for up to 3 months. Just ensure slices are well-wrapped to avoid freezer burn.
Special Equipment
Having the right tools makes the baking process smooth and efficient. Here’s what you need:
– Mixing Bowls: Use different sizes for dry and wet ingredients.
– Electric Mixer: A handheld or stand mixer helps in achieving a smooth batter.
– 9×13 Inch Baking Pan: This size is essential for the perfect cake thickness.
– Parchment Paper: Line your baking pan for easier cake removal after baking.
– Cooling Rack: Allows the cake to cool evenly after baking.
Frequently Asked Questions
How do I know when the cake is fully baked?
Check it by inserting a toothpick in the center of the cake. If it comes out clean or with a few moist crumbs, your cake is done.
Can I make this cake a day in advance?
Absolutely! Preparing it a day ahead allows the flavors to meld beautifully and enhances the overall taste.
Is the Heavenly Chocolate Peanut Butter Ooey Gooey Cake suitable for dietary restrictions?
You can modify the recipe easily. For example, use gluten-free flour for a gluten-free cake.
Can I replace the peanut butter?
Yes, if you have allergies or preferences, any nut or seed butter can be a great alternative.
Conclusion
The Heavenly Chocolate Peanut Butter Ooey Gooey Cake is a dessert that truly embodies indulgence. With its delightful layers of chocolate and peanut butter, this cake is perfect for any occasion. Whether you’re serving it at a festive gathering or enjoying it at home, it promises to be a crowd-pleaser. The rich flavors and gooey texture will leave everyone craving more, creating memories that last long after the last slice is gone.

Heavenly Chocolate Peanut Butter Ooey Gooey Cake: An Incredible 5-Layer Delight
- Total Time: 0 hours
Ingredients
– 2 cups all-purpose flour
– 2 cups granulated sugar
– ½ cup unsweetened cocoa powder
– 1 cup whole milk
– ½ cup vegetable oil
– 3 large eggs
– 1 tablespoon baking powder
– ¼ teaspoon salt
– 1 tablespoon vanilla extract
– ½ cup creamy peanut butter (plus more for drizzling)
– 1 cup semi-sweet chocolate chips
– ½ cup chopped peanuts (optional, for topping)
– Powdered sugar, for dusting (optional)
Instructions
To create your own Heavenly Chocolate Peanut Butter Ooey Gooey Cake, just follow these detailed steps:
1. Preheat the Oven: Set your oven to 350°F (175°C). Prepare a 9×13 inch baking pan by greasing it or lining it with parchment paper.
2. Mix Dry Ingredients: In a large bowl, sift together the flour, granulated sugar, cocoa powder, baking powder, and salt until well combined.
3. Combine Wet Ingredients: In a separate bowl, whisk the milk, vegetable oil, eggs, and vanilla extract until smooth.
4. Mix Mixtures: Gradually add the wet ingredients to the dry ingredients, mixing until just combined and no lumps remain.
5. Add Peanut Butter: Gently fold in the peanut butter until fully incorporated.
6. Add Chocolate Chips: Fold in the semi-sweet chocolate chips for an extra layer of chocolatey goodness.
7. Pour Batter: Pour the batter into the prepared baking pan, smoothing the top evenly with a spatula.
8. Bake: Place the pan in the preheated oven and bake for 45-50 minutes, or until a toothpick inserted in the center comes out clean or with a few moist crumbs.
9. Cool: Once baked, remove the cake from the oven and let it cool in the pan for about 15-20 minutes. Carefully transfer to a wire rack to cool completely.
10. Optional Toppings: Once cool, drizzle with more peanut butter and sprinkle with chopped peanuts and powdered sugar if desired.
Following these steps ensures that your cake turns out beautifully, with a gooey texture and rich flavor that everyone will love.
- Prep Time: 30 minutes
- Cook Time: 45-50 minutes
Nutrition
- Serving Size: 12 servings
- Calories: 405 kcal
- Fat: 16g
- Protein: 8g