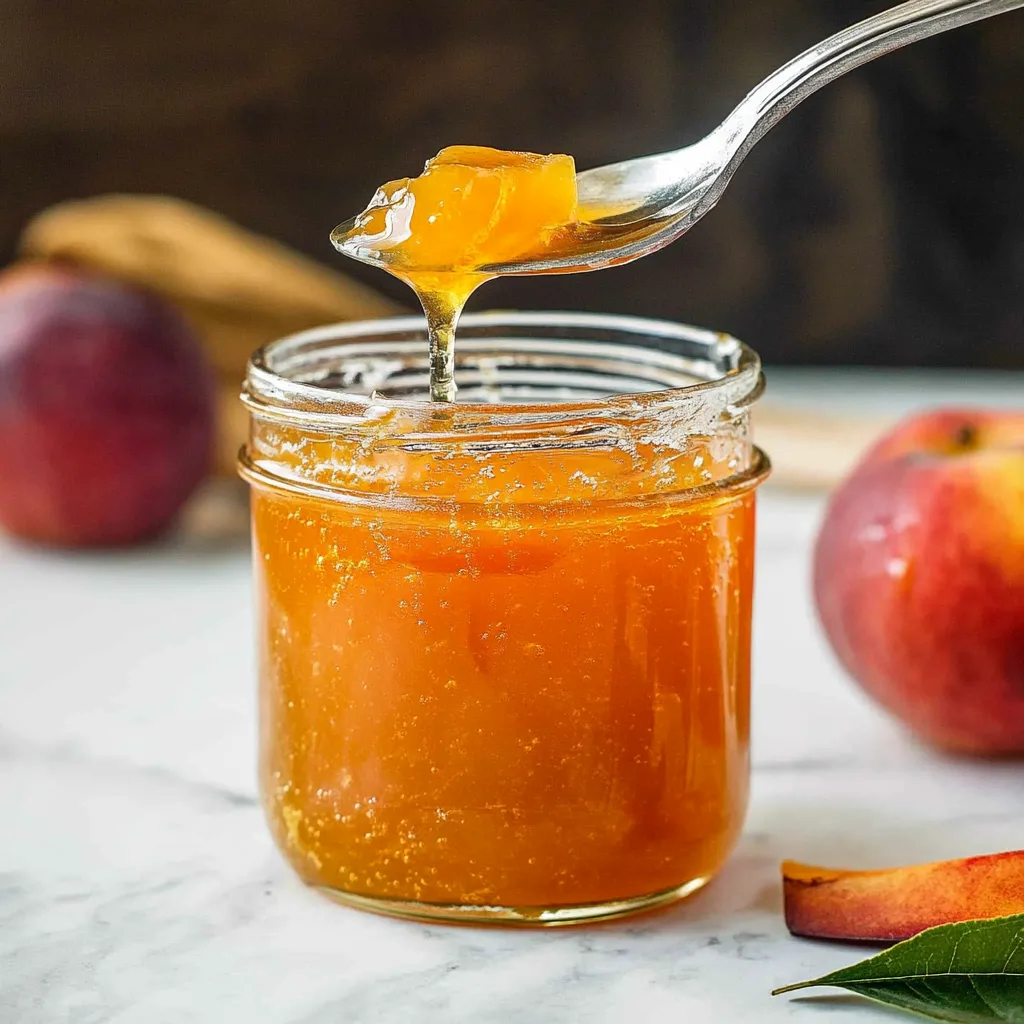
Homemade Peach Jam is a delightful treat that captures the essence of summer in a jar. The first taste of your own peach jam transports you to sun-soaked orchards, with the sweet, juicy flavor of ripe peaches blending perfectly with velvety smoothness. Not only is it delicious, but making your own jam allows you to control the sweetness and enjoy the satisfaction of crafting something special with your own hands.
If you’ve ever daydreamed about the perfect peach jam, you’re not alone. A jar of homemade jam is a symbol of love, care, and the joy of preserving flavors that would otherwise be fleeting. Imagine spreading this delightful concoction on warm toast or incorporating it into your favorite desserts. This guide will help you understand why making your own Homemade Peach Jam is a wonderful experience, how to do it step-by-step, and ways you can serve this heavenly jam.
So, how do you create the perfect jar of Homemade Peach Jam? It’s easier than you might think. With just a few simple ingredients and methods, you can enjoy this incredible treat for months to come. Get ready to embrace the wonderful world of fruit preserving, as we explore the ins and outs of making delicious peach jam.
Why You’ll Love This Recipe
Homemade Peach Jam is not only a labor of love but also an incredibly rewarding process. Here’s why you’ll fall head over heels for this recipe:
1. Flavorful Freshness: Using ripe, sun-kissed peaches allows the flavor to shine through.
2. Customizable Sweetness: You get to decide how sweet or tart you want your jam to be.
3. Simple Ingredients: Most of the ingredients are easily accessible, making it a perfect pantry project.
4. No Artificial Additives: Homemade jam is free from preservatives and artificial flavors, ensuring a healthier treat.
5. Creative Possibilities: Use it not just on bread but in desserts, glazes, or marinades.
6. A Great Gift Idea: Jars of homemade jam make excellent gifts for family and friends.
This recipe encapsulates the joy of home cooking while delivering delightful, fruity goodness straight to your table!
Preparation and Cooking Time
Creating your own Homemade Peach Jam will take approximately 1 hour of your time. Here’s how the timing breaks down:
– Preparation Time: 20 minutes (washing, peeling, and cutting peaches)
– Cooking Time: 30-40 minutes (boiling and sterilizing jars)
– Cooling Time: 10-15 minutes (allowing jars to cool and set)
These times are estimates and may vary depending on your kitchen setup and experience.
Ingredients
– 4 cups fresh ripe peaches, peeled and chopped
– 1 cup granulated sugar
– 1/4 cup lemon juice
– 1 packet (1.75 oz) fruit pectin (like Certo)
– 1/2 teaspoon cinnamon (optional, for added warmth)
– Pinch of salt
– Sterilized glass jars for storage
Step-by-Step Instructions
Creating Homemade Peach Jam requires a few simple steps. Follow this guide to ensure your jam turns out perfectly:
1. Prepare Your Jars: Sterilize glass jars and lids by boiling them in water for about 10 minutes. Remove and let them dry.
2. Prepare the Peaches: Wash, peel, and chop the peaches into small pieces.
3. Mix Ingredients: In a large pot, combine the chopped peaches, granulated sugar, lemon juice, and pinch of salt.
4. Cook the Mixture: Over medium heat, cook the mixture, stirring often until the sugar dissolves.
5. Add Pectin: Once the sugar has dissolved, gradually stir in the fruit pectin.
6. Bring to a Boil: Increase the heat and bring the mixture to a rolling boil. Let it boil for 5-10 minutes, stirring frequently until the mixture thickens.
7. Test for Consistency: To check the jam’s consistency, place a small amount on a chilled plate and let it sit for a minute. Run your finger through it; if it holds its shape, it’s ready.
8. Fill the Jars: Using a ladle, carefully pour the hot jam into the sterilized jars, leaving about 1/4 inch of space at the top.
9. Seal the Jars: Wipe the rims of the jars with a clean cloth and place the lids on top. Screw on the rings until they are fingertip-tight.
10. Cool Down: Allow the jars to cool at room temperature for about 10-15 minutes. You’ll know they’re sealed when you press the center of the lids, and they don’t pop back.
How to Serve
Serving Homemade Peach Jam can be as simple or elaborate as you wish. Here are some delightful ways to enjoy your jam:
1. Spread on Bread: Use freshly toasted bread or biscuits for a classic, comforting treat. Pair with butter for extra richness.
2. Fill Pastries: Use the jam as a filling in pastries, tarts, or croissants for a sweet surprise.
3. Mix in Yogurt: Swirl the peach jam into your morning yogurt for added flavor and texture.
4. Glaze for Meats: Use the jam as a glaze for grilled chicken or pork for a sweet and savory combination.
5. Drizzle on Ice Cream: Add a scoop of peach jam on top of vanilla ice cream or yogurt for a refreshing dessert.
6. Gift Idea: Present jars of your delicious jam as gifts for friends and family, especially during the holidays.
With these tips, you’ll be well on your way to serving up an incredible Homemade Peach Jam that will impress everyone. Enjoy your delicious creation!
Additional Tips
– Use Ripe Peaches: For the best flavor, ensure your peaches are perfectly ripe. Overripe or underripe peaches can affect the taste and texture.
– Be Mindful of Pectin: Different brands of fruit pectin may require varying amounts. Always check and follow specific instructions for best results.
– Stir Gently: When cooking the jam, stir gently to prevent burning and ensure even cooking.
– Experiment with Heat: If your jam is too thick, add a little water; if too thin, cook a bit longer to help it set.
– Label Your Jars: Don’t forget to label your jars with the date. This will help keep track of freshness, especially when giving them as gifts.
Recipe Variation
Feel free to get creative! Here are some fun variations of the Homemade Peach Jam recipe:
1. Spiced Peach Jam: Add a teaspoon of ginger or nutmeg for a warm, spicy flavor. This adds a unique twist and makes it perfect for fall.
2. Peach-Pineapple Jam: Combine equal parts of fresh peaches and crushed pineapple for a tropical flair.
3. Peach-Basil Jam: Incorporate fresh basil leaves into the cooking process for a refreshing herbal touch that pairs wonderfully with savory dishes.
4. Lower Sugar Version: Substitute sugar with honey or agave nectar to reduce sweetness while keeping it delicious.
5. Peach-Chili Jam: For a kick, add finely chopped chili peppers to the jam mixture. This sweet and spicy combination will surprise your taste buds!
Freezing and Storage
– Proper Storage: Store your jars of Homemade Peach Jam in a cool, dark place. If sealed correctly, they can last for up to a year.
– Refrigeration: Once opened, keep the jam in the refrigerator, where it will remain fresh for about 1 month.
– Freezing: You can freeze the jam for long-term storage. Ensure you leave space in the jar as the jam expands when frozen. It will last for about 6 months in the freezer.
– Thawing: To use frozen jam, simply transfer it to the fridge to thaw overnight.
Special Equipment
You’ll need a few essential tools to make making Homemade Peach Jam easier and more efficient:
– Heavy-bottomed pot: A thick pot ensures even heat distribution while cooking the jam.
– Ladle: For transferring hot jam into jars without spillage.
– Sterilizing pot: To boil jars and lids for sterilization.
– Measuring cups and spoons: For precise ingredient measurement.
– Chilled plate: For testing the jam’s consistency during cooking.
– Canning funnel: Optional, but it helps in pouring the jam into jars neatly.
Frequently Asked Questions
Can I use frozen peaches for this recipe?
Yes, frozen peaches can be used in a pinch. Thaw them beforehand and drain excess liquid for better results.
How do I know if my jam is set properly?
Test the jam’s consistency by placing a small dollop on a chilled plate. If it holds its shape, it’s ready.
Can I use a sugar substitute?
Absolutely! Just ensure that the substitute is appropriate for canning and follow the product’s instructions for usage.
What if my jam doesn’t thicken?
If the jam doesn’t thicken after cooling, you may need to cook it a little longer or add more pectin according to the package instructions.
How long does Homemade Peach Jam last?
When sealed and stored correctly, it can last up to a year in a cool, dark place.
Conclusion
Making Homemade Peach Jam is a delightful experience filled with the aroma of sweet peaches and the satisfaction of creating something perfect from scratch. Not only is it a fantastic way to preserve summer flavors, but it also allows for creativity and customization. Whether you enjoy it on toast, mixed into desserts, or as a gift, this jam is bound to become a staple in your kitchen. Don’t hesitate to try different variations, and remember to share your delicious creations with loved ones.
Homemade Peach Jam: An Amazing Ultimate Recipe for Beginners
- Total Time: 0 hours
Ingredients
– 4 cups fresh ripe peaches, peeled and chopped
– 1 cup granulated sugar
– 1/4 cup lemon juice
– 1 packet (1.75 oz) fruit pectin (like Certo)
– 1/2 teaspoon cinnamon (optional, for added warmth)
– Pinch of salt
– Sterilized glass jars for storage
Instructions
Creating Homemade Peach Jam requires a few simple steps. Follow this guide to ensure your jam turns out perfectly:
1. Prepare Your Jars: Sterilize glass jars and lids by boiling them in water for about 10 minutes. Remove and let them dry.
2. Prepare the Peaches: Wash, peel, and chop the peaches into small pieces.
3. Mix Ingredients: In a large pot, combine the chopped peaches, granulated sugar, lemon juice, and pinch of salt.
4. Cook the Mixture: Over medium heat, cook the mixture, stirring often until the sugar dissolves.
5. Add Pectin: Once the sugar has dissolved, gradually stir in the fruit pectin.
6. Bring to a Boil: Increase the heat and bring the mixture to a rolling boil. Let it boil for 5-10 minutes, stirring frequently until the mixture thickens.
7. Test for Consistency: To check the jam’s consistency, place a small amount on a chilled plate and let it sit for a minute. Run your finger through it; if it holds its shape, it’s ready.
8. Fill the Jars: Using a ladle, carefully pour the hot jam into the sterilized jars, leaving about 1/4 inch of space at the top.
9. Seal the Jars: Wipe the rims of the jars with a clean cloth and place the lids on top. Screw on the rings until they are fingertip-tight.
10. Cool Down: Allow the jars to cool at room temperature for about 10-15 minutes. You’ll know they’re sealed when you press the center of the lids, and they don’t pop back.
- Prep Time: 15 minutes
- Cook Time: 30-40 minutes
Nutrition
- Serving Size: 8 servings
- Calories: 70 kcal
- Fat: 0g
- Protein: 0g