Kefir yogurt is a deliciously creamy and probiotic-packed goodness that has been cherished for centuries. Originating from the Caucasus region, this tangy dairy product is not only a staple in many cultures, but it also carries a wealth of health benefits. By incorporating kefir yogurt into your diet, you’re not just enhancing the taste of your meals; you’re also promoting better gut health and overall wellness. With its smooth texture and unique flavor, kefir yogurt can easily become a favorite in any household.
One of the most appealing aspects of kefir yogurt is its versatility. It can be used in smoothies, salad dressings, or enjoyed on its own with a sprinkle of fruit or granola. Not only is it a nutritious option, but it’s also a fantastic base for countless recipes, making it an essential ingredient for health-conscious eaters. If you’re curious about kefir yogurt and how to make it yourself, you’re in for a treat! This article is designed to shed light on what makes this incredible food so special, helping you navigate through preparation, cooking times, and serving suggestions.
In this overview, we will delve deep into why you’ll love making kefir yogurt at home, outline the preparation and cooking times, provide a straightforward ingredients list, and give you easy-to-follow instructions. If you’re looking to create something delicious and nutritious, this kefir yogurt recipe will certainly impress your family and friends. Let’s embark on this creamy journey and discover the wonders of kefir yogurt together!
Why You’ll Love This Recipe
Kefir yogurt is an amazing addition to your culinary repertoire, and here are some compelling reasons why you’ll love this recipe:
1. Health Benefits – Kefir yogurt is packed with probiotics, which can help improve digestion and boost immunity.
2. Simplicity – This recipe requires minimal ingredients and is easy to follow, making it accessible for cooks of all levels.
3. Customizable Flavor – You can easily customize the taste by adding your favorite fruits, sweeteners, or flavorings.
4. Cost-Effective – Making kefir yogurt at home can save you money compared to store-bought options, which can be expensive.
5. Sustainability – By making it yourself, you reduce packaging waste and have more control over the ingredients.
6. Versatile Uses – You can use kefir yogurt in smoothies, dressings, baked goods, and more, adding nutritional value to various dishes.
With these factors in mind, it’s clear that kefir yogurt is not merely a food item; it’s a delightful and healthy experience waiting to happen in your kitchen!
Preparation and Cooking Time
The process of making kefir yogurt is both simple and hands-off, making it an enjoyable activity for anyone. Here’s a breakdown of the time required:
– Preparation Time: 5-10 minutes (mostly for setup)
– Fermentation Time: 12-24 hours (depending on your taste preference)
– Total Time: Approximately 24 hours (including fermentation)
This timeframe may vary based on your kitchen environment and personal preference for the yogurt’s tartness.
Ingredients
– 2 cups whole milk (or milk of choice)
– 2 tablespoons kefir grains (or store-bought kefir as a starter)
– A glass jar with a lid (for fermentation)
– A non-metal strainer (if using grains)
– A small bowl (for collecting the strained kefir)
– Optional: sweeteners, fruits, or flavorings as desired
Step-by-Step Instructions
Creating kefir yogurt is straightforward when you follow these simple steps:
1. Prepare the Jar: Start with a clean glass jar. Use a jar large enough to hold at least double the volume of your milk.
2. Add the Milk: Pour 2 cups of whole milk into the jar. Ensure the milk temperature is below 86°F (30°C) before adding kefir grains.
3. Add Kefir Grains: Gently add 2 tablespoons of kefir grains to the milk. If you’re using store-bought kefir as a starter, pour it into the milk.
4. Cover the Jar: Loosely cover the jar with a lid or a clean cloth secured with a rubber band. This allows airflow while keeping contaminants out.
5. Ferment: Place the jar in a warm, dark location, away from direct sunlight for 12-24 hours. Taste the kefir occasionally until it reaches the desired tanginess.
6. Strain the Kefir: Once fermented, pour the kefir through a non-metal strainer into a bowl to separate the grains from the liquid.
7. Store the Kefir: Transfer the freshly made kefir yogurt into a clean container and seal it. Store it in the refrigerator.
8. Reuse the Grains: Rinse the kefir grains gently with cool water and store them in a clean jar with fresh milk if you plan to make more kefir.
9. Flavor the Yogurt: Consider mixing in sweeteners, fruits, or natural flavorings to enhance your kefir yogurt.
10. Enjoy Your Kefir: Serve it chilled, and enjoy it on its own or as part of your favorite dishes!
How to Serve
To make the most of your freshly made kefir yogurt, consider the following ideas for serving:
1. Smoothie Base: Blend it with fruits and vegetables for a nutritious smoothie.
2. Breakfast Bowl: Top with granola, nuts, and fresh fruits for a delicious and filling breakfast.
3. Salad Dressing: Use it as a creamy base for dressings by mixing it with herbs, spices, or lemon juice.
4. Dip: Serve kefir yogurt as a tangy dip for veggies or as a spread on whole-grain toast.
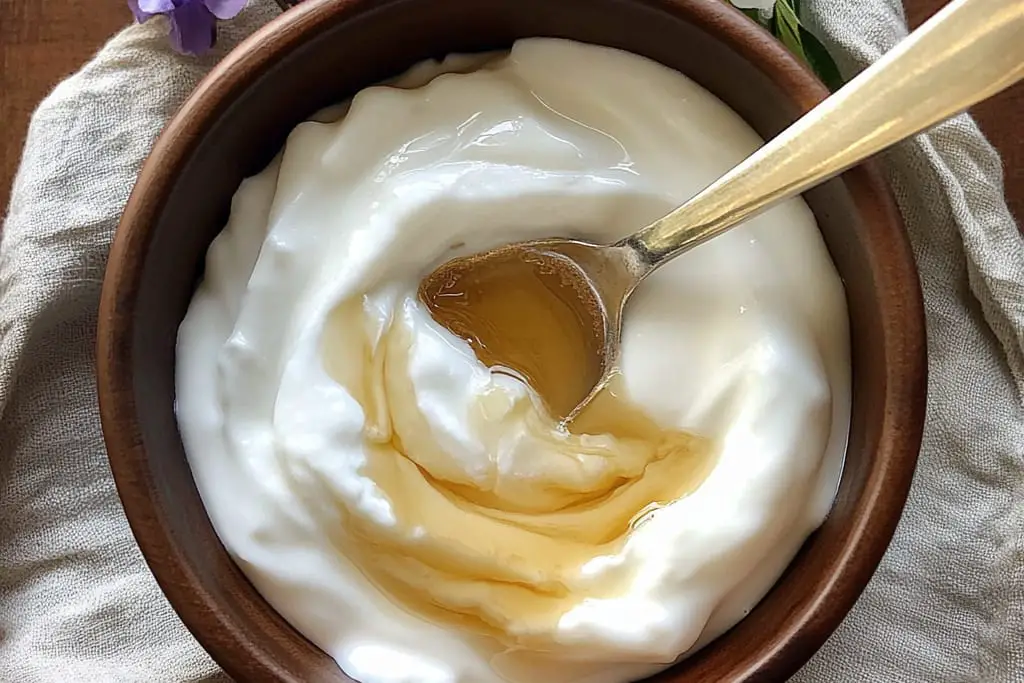
5. Dessert: Pair it with honey or maple syrup for a light dessert, or incorporate it into baked goods.
By exploring these serving suggestions, you can elevate your kefir yogurt experience and enjoy its delightful flavor and health benefits in various creative ways.
In conclusion, kefir yogurt is not only creamy and delicious but also a powerhouse of probiotics. With this amazing ultimate recipe, you can enjoy the satisfaction of making your own kefir yogurt at home, tailored precisely to your taste. Whether you’re looking to boost your health or simply enjoy a delicious dairy option, this recipe is a fantastic place to start!
Additional Tips
– Use Fresh Ingredients: Opt for fresh, high-quality milk and kefir grains for the best flavor and health benefits.
– Consistency Matters: If you prefer a thicker kefir yogurt, allow the fermentation process to continue for an extra few hours.
– Keep an Eye on Temperature: Ensure your fermentation area is consistently warm, between 68°F to 85°F (20°C to 29°C), to facilitate the best fermentation process.
– Experiment with Time: The fermentation time can be adjusted to suit your taste. A longer fermentation time will yield a tangier flavor.
Recipe Variation
There are endless possibilities to customize your kefir yogurt. Here are a few variations to try:
1. Flavored Kefir: Add vanilla extract or a pop of citrus zest for a delightful twist.
2. Fruity Infusion: Blend in pureed fruits like strawberries, mangoes, or bananas for a naturally sweet yogurt.
3. Herbed Kefir: Mix in fresh herbs like dill or chives for a savory variation perfect for dressings.
4. Nutty Addition: Incorporate crushed nuts or seeds right into the yogurt for added crunch and nutrition.
Freezing and Storage
– Storage: Keep your kefir yogurt in an airtight container in the refrigerator. It should remain fresh for about 1-2 weeks.
– Freezing: You can freeze kefir yogurt in individual portions for up to 3 months. Thaw it in the refrigerator before consuming.
Special Equipment
For making kefir yogurt, you’ll need a couple of essential tools:
– Glass Jar: A clean glass jar suitable for fermenting the yogurt.
– Non-Metal Strainer: To separate kefir grains from the yogurt.
– Small Bowl: A bowl to collect your kefir after straining.
– Rubber Band and Cloth: To cover the jar during fermentation without sealing it tightly.
Frequently Asked Questions
Can I make kefir yogurt without kefir grains?
Yes, you can use store-bought kefir as a starter. Just ensure it contains live cultures.
What if my kefir yogurt is too runny?
If it’s too thin, allow it to ferment longer or strain it through a fine mesh to thicken it up.
Is homemade kefir yogurt better than store-bought?
Homemade kefir is generally fresher, more nutritious, and free from preservatives.
Can I use non-dairy milk to make kefir yogurt?
Yes, you can use non-dairy milk like almond, coconut, or oat milk, but the texture and taste might differ slightly.
How do I know if my kefir has fermented properly?
When it’s tangy and has thickened to your desired consistency, it’s ready.
Conclusion
Kefir yogurt is a delightful exploration into homemade, nutritious dairy. Its creamy texture and probiotic richness not only contribute significantly to your overall health but also offer a versatile ingredient for countless recipes. By making kefir yogurt at home, you gain control over your ingredients and flavor, allowing for endless customization to suit your palate. Whether you enjoy it plain, fruit-flavored, or as part of a recipe, this delightful dairy product is bound to elevate your culinary experience. Dive into the world of kefir yogurt, and relish the wholesome goodness it brings to your diet!

Kefir Yogurt: An Amazing Ultimate Recipe for Creamy, Probiotic-Packed Goodness
- Total Time: 0 hours
Ingredients
– 2 cups whole milk (or milk of choice)
– 2 tablespoons kefir grains (or store-bought kefir as a starter)
– A glass jar with a lid (for fermentation)
– A non-metal strainer (if using grains)
– A small bowl (for collecting the strained kefir)
– Optional: sweeteners, fruits, or flavorings as desired
Instructions
Creating kefir yogurt is straightforward when you follow these simple steps:
1. Prepare the Jar: Start with a clean glass jar. Use a jar large enough to hold at least double the volume of your milk.
2. Add the Milk: Pour 2 cups of whole milk into the jar. Ensure the milk temperature is below 86°F (30°C) before adding kefir grains.
3. Add Kefir Grains: Gently add 2 tablespoons of kefir grains to the milk. If you’re using store-bought kefir as a starter, pour it into the milk.
4. Cover the Jar: Loosely cover the jar with a lid or a clean cloth secured with a rubber band. This allows airflow while keeping contaminants out.
5. Ferment: Place the jar in a warm, dark location, away from direct sunlight for 12-24 hours. Taste the kefir occasionally until it reaches the desired tanginess.
6. Strain the Kefir: Once fermented, pour the kefir through a non-metal strainer into a bowl to separate the grains from the liquid.
7. Store the Kefir: Transfer the freshly made kefir yogurt into a clean container and seal it. Store it in the refrigerator.
8. Reuse the Grains: Rinse the kefir grains gently with cool water and store them in a clean jar with fresh milk if you plan to make more kefir.
9. Flavor the Yogurt: Consider mixing in sweeteners, fruits, or natural flavorings to enhance your kefir yogurt.
10. Enjoy Your Kefir: Serve it chilled, and enjoy it on its own or as part of your favorite dishes!
- Prep Time: 15 minutes
- Cook Time: 12-24 hours
Nutrition
- Serving Size: 2 cups
- Calories: 100 kcal (per serving)
- Fat: 4g
- Protein: 6g