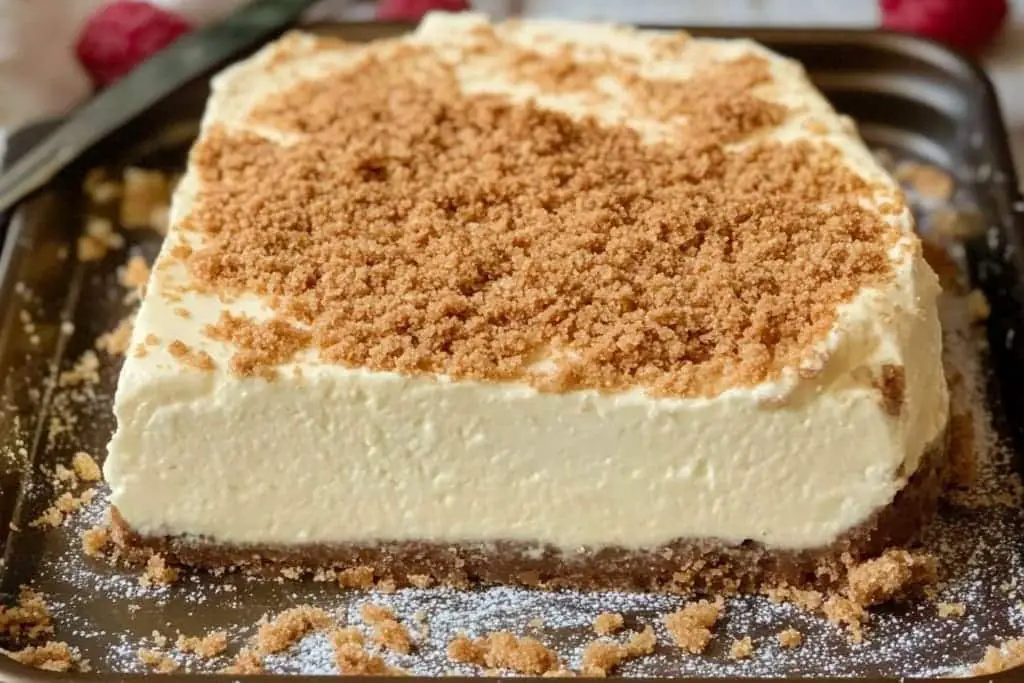
Woolworth Icebox Cheesecake is a creamy no-bake dream that has delighted families and friends for generations. Originating from the classic American diners of yesteryears, this cheesecake has become an iconic dessert, bringing comfort and joy with every bite. The combination of smooth cream cheese, sweetened condensed milk, and a buttery graham cracker crust makes this cheesecake an easy yet satisfying treat. Perfect for gatherings, holiday celebrations, or a special treat any day, this cheesecake is a timeless recipe that everyone will love.
Cheesecake lovers, rejoice! Woolworth Icebox Cheesecake is not only incredibly delicious but also remarkably simple to prepare. Unlike traditional cheesecakes requiring baking, this delightful dessert is set in the refrigerator, allowing you the freedom to focus on other aspects of your event. With its smooth texture and balanced sweetness, it delivers a perfect harmony of flavors.
Imagine serving this delightful dessert at your next family gathering or picnic. As you slice into the cheesecake, you entice everyone with its creamy goodness. You’ll witness smiles and animated discussion as your loved ones savor the luscious flavors of the Woolworth Icebox Cheesecake. Get ready to delve into an incredible recipe that will gain rave reviews from your guests, regardless of age!
Let’s embark on this delicious journey and discover why Woolworth Icebox Cheesecake should be your go-to no-bake dessert.
Why You’ll Love This Recipe
Woolworth Icebox Cheesecake is a treat that transcends the ordinary dessert experience. Here are a few captivating reasons why you will want to add this recipe to your collection:
1. No Baking Required – This recipe is perfect for novice bakers or anyone who wants a quick dessert without the fuss of baking.
2. Versatile Flavors – You can easily customize this cheesecake, whether by adding fruits, chocolate, or cookie toppings to match your mood or occasion.
3. Easy Prep – The simple ingredients and straightforward method make it easy to whip up this dessert in no time.
4. Crowd-Pleaser – With its creamy texture and rich flavor, this cheesecake appeals to palates of all ages.
5. Make-Ahead Convenience – It can be prepared a day in advance, saving you time and hassle on the day of your gathering.
6. Refreshing and Light – The chilled cheesecake is a refreshing end to any meal, especially during warmer months.
With these delightful aspects, it’s no wonder lovers of all desserts rave about Woolworth Icebox Cheesecake. Each bite adds a layer of joy, evoking nostalgia and creating new memories.
Preparation and Cooking Time
Creating Woolworth Icebox Cheesecake is a quick process! Here’s a breakdown of the time you will need:
– Preparation Time: 20 minutes
– Chilling Time: 4 hours (or overnight for best results)
This means you can have a delightful dessert ready with minimal effort, allowing you to focus on enjoying your time with family and friends.
Ingredients
– 1 ½ cups graham cracker crumbs
– ½ cup granulated sugar
– ½ cup unsalted butter, melted
– 2 cups cream cheese, softened
– 1 cup sweetened condensed milk
– ½ cup sour cream
– 1 teaspoon vanilla extract
– 2 tablespoons fresh lemon juice
– Optional toppings: Fresh fruit, chocolate shavings, or whipped cream
Step-by-Step Instructions
To create the delightful Woolworth Icebox Cheesecake, follow these simple steps:
1. Prepare the Crust: In a medium bowl, mix the graham cracker crumbs, granulated sugar, and melted butter until crumbly but combined.
2. Press the Mixture: Evenly press the mixture into the bottom of a 9-inch springform pan to form the crust. Firmly pack it down for stability.
3. Chill the Crust: Place the crust in the refrigerator for 10 minutes to set while you prepare the filling.
4. Mix the Filling: In a large mixing bowl, beat the softened cream cheese until smooth and creamy.
5. Add Sweet Ingredients: Gradually mix in the sweetened condensed milk, sour cream, vanilla extract, and lemon juice until combined and smooth.
6. Pour Filling into Crust: Remove the crust from the refrigerator and pour the filling evenly over the crust.
7. Spread Smoothly: Using a spatula, spread the filling evenly.
8. Chill: Cover the pan with plastic wrap and refrigerate for at least 4 hours or overnight for optimal firmness.
9. Release from Pan: When ready to serve, carefully loosen and remove the springform pan.
10. Garnish and Serve: Top with your choice of fresh fruit, chocolate shavings, or whipped cream, and slice to serve.
These straightforward steps guide you through the creation of a beloved cheesecake that promises to bring joy to your table.
How to Serve
To elevate your Woolworth Icebox Cheesecake experience, consider the following serving suggestions:
1. Presentation: Serve on a decorative cake stand for an elegant touch. This instantly enhances the visual appeal.
2. Accompaniments: Offer a side of fresh fruit, such as strawberries or berries, which complements the creamy cheesecake beautifully.
3. Top It Off: A light drizzle of chocolate sauce or caramel can add a decadent touch to your cheesecake slices.
4. Beverage Pairing: Pair the cheesecake with a chilled glass of milk or a refreshing iced tea for a delightful contrast.
5. Serving Style: Cut generous slices but encourage smaller portions to entice guests to come back for seconds.
By thoughtfully considering presentation and pairings, you’ll create an incredible dining experience that your guests will remember!
With its nostalgic charm, ease of preparation, and delightful flavor, Woolworth Icebox Cheesecake truly is an incredible no-bake dream. Each bite invites comfort and happiness, making it a treasured dessert for all occasions. Don’t wait—try this delightful cheesecake recipe today and treat your loved ones to a slice of joy!
Additional Tips
– Use Room Temperature Ingredients: Ensure that your cream cheese and sour cream are at room temperature before mixing. This helps achieve a smooth and creamy filling.
– Experiment with Sweetness: Taste your filling before adding to the crust. You can adjust the sweetness by adding more sweetened condensed milk or a touch of powdered sugar.
– Consider Flavor Infusions: For an additional layer of flavor, consider infusing your filling with extracts like almond or coconut for a twist.
– Stay Organized: Gather and measure all your ingredients before you begin. This streamlines the preparation process and reduces chances of forgetting an ingredient.
– Garnish Creatively: Use fresh herbs like mint along with fruits or chocolate to elevate the visual appeal and flavor profile of the cheesecake.
Recipe Variation
Feel free to switch things up! Here are a few variations to try:
1. Chocolate Woolworth Icebox Cheesecake: Incorporate melted chocolate into the filling for a decadent chocolate version. This will add a rich taste that chocolate lovers will adore.
2. Fruit-Infused Variation: Blend in fresh fruit purees, like strawberry or mango, into the filling for a refreshing burst of flavor.
3. Pumpkin Spice Cheesecake: Add pumpkin puree and spices like cinnamon and nutmeg to create a seasonal favorite. Perfect for fall gatherings!
4. Nutty Crust: Add crushed nuts such as pecans or almonds to the graham cracker crust for an extra crunch.
Freezing and Storage
– Storage: Keep the cheesecake covered in the refrigerator. It remains fresh for up to 5 days, making it an excellent option for advance preparation.
– Freezing: Woolworth Icebox Cheesecake can be frozen for up to 3 months. Wrap individual slices tightly in plastic wrap, then place them in an airtight container to prevent freezer burn.
Special Equipment
You will need a few essential tools to prepare this cheesecake successfully:
– 9-inch springform pan for assembling the cheesecake.
– Mixing bowls for preparing the crust and filling.
– Electric mixer or whisk for mixing the cheesecake filling until smooth.
– Rubber spatula for spreading the filling evenly on the crust.
Frequently Asked Questions
Q: Can I use low-fat cream cheese?
A: Yes, low-fat cream cheese can be used, but it may affect the richness of the cheesecake.
Q: How long should I chill the cheesecake?
A: For best results, chill the cheesecake for at least 4 hours, or overnight for ultimate firmness.
Q: How do I know if the cheesecake is set?
A: The filling should be firm, and a gentle shake of the pan should show minimal movement.
Q: Can I cut the recipe in half?
A: Yes, you can halve the ingredients and use a smaller pan for a smaller cheesecake.
Q: What is the best way to slice the cheesecake?
A: Use a warm, dry knife to ensure clean slices. Wipe the knife clean between cuts for a neat presentation.
Conclusion
Woolworth Icebox Cheesecake is truly a delightful dessert that captures the essence of comfort food. Its creamy texture and flexible flavor options make it a go-to recipe for any occasion. Whether it’s a family gathering, picnic, or simple weeknight treat, this no-bake cheesecake will impress everyone at the table. Enjoy making this timeless treat, and let each slice bring joy and laughter to your gatherings!

Woolworth Icebox Cheesecake: An Incredible No-Bake Dream
- Total Time: 15 minutes
Ingredients
– 1 ½ cups graham cracker crumbs
– ½ cup granulated sugar
– ½ cup unsalted butter, melted
– 2 cups cream cheese, softened
– 1 cup sweetened condensed milk
– ½ cup sour cream
– 1 teaspoon vanilla extract
– 2 tablespoons fresh lemon juice
– Optional toppings: Fresh fruit, chocolate shavings, or whipped cream
Instructions
To create the delightful Woolworth Icebox Cheesecake, follow these simple steps:
1. Prepare the Crust: In a medium bowl, mix the graham cracker crumbs, granulated sugar, and melted butter until crumbly but combined.
2. Press the Mixture: Evenly press the mixture into the bottom of a 9-inch springform pan to form the crust. Firmly pack it down for stability.
3. Chill the Crust: Place the crust in the refrigerator for 10 minutes to set while you prepare the filling.
4. Mix the Filling: In a large mixing bowl, beat the softened cream cheese until smooth and creamy.
5. Add Sweet Ingredients: Gradually mix in the sweetened condensed milk, sour cream, vanilla extract, and lemon juice until combined and smooth.
6. Pour Filling into Crust: Remove the crust from the refrigerator and pour the filling evenly over the crust.
7. Spread Smoothly: Using a spatula, spread the filling evenly.
8. Chill: Cover the pan with plastic wrap and refrigerate for at least 4 hours or overnight for optimal firmness.
9. Release from Pan: When ready to serve, carefully loosen and remove the springform pan.
10. Garnish and Serve: Top with your choice of fresh fruit, chocolate shavings, or whipped cream, and slice to serve.
These straightforward steps guide you through the creation of a beloved cheesecake that promises to bring joy to your table.
- Prep Time: 15 minutes
- Cook Time: 0 minutes
Nutrition
- Serving Size: 8
- Calories: 320 kcal
- Fat: 18g
- Protein: 5g