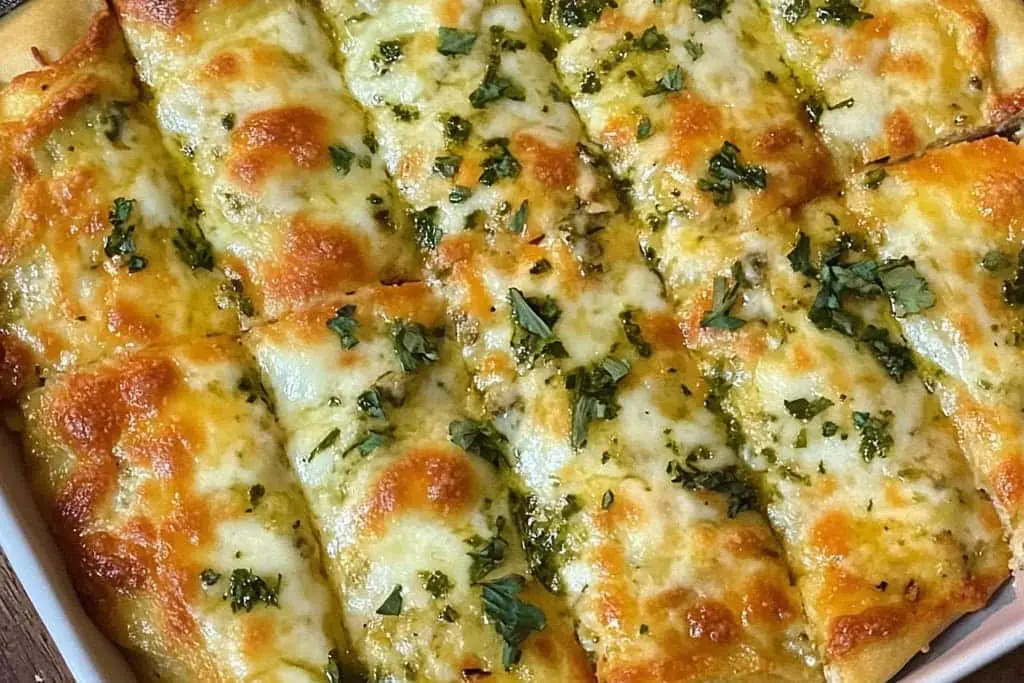
Cheesy Garlic Breadsticks are a deliciously cheesy treat that brings comfort and joy to any meal. Imagine warm, soft breadsticks, fresh out of the oven, oozing melted cheese and enveloped in the irresistible aroma of garlic. This culinary masterpiece combines simplicity and indulgence, making it the perfect side for pasta dishes, soups, or as a snack on its own.
If you’ve ever craved that gooey cheese and fragrant garlic combination, then you know just how delightful these breadsticks can be. The beauty of Cheesy Garlic Breadsticks lies not only in their amazing flavor but also in their ease of preparation. You won’t need to be a culinary expert to create them; just a few simple steps will provide you with a rewarding dish that’ll impress your family or guests.
In this article, we will explore why this recipe is a must-try, how to prepare them perfectly, and some tips on serving these delectable treats. So, let’s dive into the world of Cheesy Garlic Breadsticks and discover how you can whip up this amazing snack in no time!
Why You’ll Love This Recipe
Cheesy Garlic Breadsticks are a hit for various reasons. Here’s why you’ll adore this recipe:
1. Comfort Food: Warm and cheesy, these breadsticks provide instant comfort and satisfaction.
2. Easy to Make: The ingredients are straightforward, making it simple for anyone to recreate them.
3. Versatile Pairing: They complement a wide range of dishes, from pasta to salads.
4. Customizable: Feel free to adjust the type of cheese or spices according to your taste.
5. Perfect for Sharing: Their irresistible nature makes them great for parties or family dinners.
6. Quick Preparation: With minimal prep time, you’ll have delicious breadsticks ready in under an hour.
7. Kid-Friendly: The cheesy goodness is sure to delight children and adults alike!
With all these appealing factors, it’s clear why Cheesy Garlic Breadsticks are cherished by many. They not only fill your tummy but also warm your heart!
Preparation and Cooking Time
Making Cheesy Garlic Breadsticks is a quick process. The total time from preparation to baking is around 30-40 minutes, including:
– Preparation Time: 10-15 minutes
– Cooking Time: 20-25 minutes
These times may vary slightly based on your kitchen equipment and your level of expertise, but this guideline should help you estimate your cooking schedule.
Ingredients
– 2 cups all-purpose flour
– 1 cup warm water (about 110°F/43°C)
– 2 tablespoons sugar
– 1 tablespoon olive oil
– 1 packet (2 ¼ teaspoons) active dry yeast
– 1 teaspoon garlic powder
– ½ teaspoon salt
– 1 cup shredded mozzarella cheese
– ½ cup grated Parmesan cheese
– 2 tablespoons melted butter
– Fresh parsley for garnish (optional)
Step-by-Step Instructions
Creating Cheesy Garlic Breadsticks is straightforward when you follow these easy steps:
1. Activate the Yeast: In a bowl, mix warm water, sugar, and yeast. Let it sit for 5-10 minutes until frothy.
2. Combine Ingredients: In a large mixing bowl, combine flour, garlic powder, and salt.
3. Add Wet Ingredients: Pour the yeast mixture and olive oil into the dry ingredients. Mix until combined.
4. Knead the Dough: Transfer the dough to a floured surface and knead for about 5 minutes until smooth.
5. Let it Rise: Place the dough in a greased bowl, cover with plastic wrap, and let it rise in a warm area for 30 minutes or until doubled in size.
6. Preheat the Oven: Preheat your oven to 400°F (200°C).
7. Shape the Breadsticks: Roll the dough into a rectangle about ½ inch thick. Cut into strips using a pizza cutter or knife.
8. Transfer to Baking Sheet: Place the strips on a greased baking sheet, spacing them about an inch apart.
9. Add Cheese: Sprinkle shredded mozzarella and grated Parmesan cheese generously on top of the breadsticks.
10. Brush with Butter: Drizzle melted butter over the cheese and breadsticks for added flavor.
11. Bake: Place in the oven and bake for 15-20 minutes or until golden brown and bubbly.
12. Garnish: Optional—sprinkle fresh parsley over the top before serving for an extra touch.
Follow these steps, and you’ll end up with the most delectable Cheesy Garlic Breadsticks!
How to Serve
Serving Cheesy Garlic Breadsticks can elevate your dining experience. Here are some creative ways to present them:
1. Presentation Ideas: Use a rustic wooden board or a colorful serving platter for a visually appealing display.
2. Dipping Sauces: Offer marinara sauce or garlic butter as dips for extra flavor. A side of pesto can also be a delightful addition.
3. Accompaniments: Pair the breadsticks with a fresh salad or a hearty soup to create a complete meal.
4. Slice Generously: Serve them warm and cut into generous portions. The gooey cheese oozing from each stick is sure to entice everyone!
5. Garnish: A sprinkle of fresh herbs can enhance presentation and flavor, making them even more inviting.
By putting thought into how you serve your Cheesy Garlic Breadsticks, you’ll ensure a memorable culinary experience for everyone at the table.
—
In summary, Cheesy Garlic Breadsticks are the perfect blend of comfort and indulgence. Their ease of preparation and delicious taste should encourage you to make them a regular feature in your kitchen. So, gather your ingredients and get ready to enjoy this amazing treat! Your friends and family will be craving for more!
Additional Tips
– Use Fresh Ingredients: For the best flavor, opt for freshly grated cheeses and high-quality garlic. Fresh ingredients make a significant difference in taste.
– Experiment with Cheese: While mozzarella and Parmesan are traditional, consider adding cheddar, provolone, or even feta for unique flavor profiles.
– Make Ahead: You can prepare the dough ahead of time and let it rise in the fridge overnight. This can enhance flavor and save time on busy days.
– Monitor Baking Time: Ovens can vary, so check the breadsticks a few minutes before the recommended time to avoid over-baking.
– Serve Immediately: Cheesy Garlic Breadsticks taste best fresh out of the oven. Serve them warm for the ultimate experience.
Recipe Variation
Feel free to get creative with these breadsticks! Here are some variations to consider:
1. Herb-Infused Version: Add fresh herbs like rosemary or thyme to the dough for added flavor and aroma.
2. Spicy Option: Incorporate red pepper flakes or diced jalapeños into the cheese topping for a spicy kick.
3. Garlic Butter Toppings: Instead of brushing with melted butter, create a garlic herb butter and drizzle it on top after baking for an extra burst of flavor.
4. Cheese Lovers: Use a blend of your favorite cheeses such as Gouda, feta, or Havarti for a rich, cheesy experience.
Freezing and Storage
– Storage: Keep baked Cheesy Garlic Breadsticks in an airtight container at room temperature for up to 3 days. They can become tough if exposed to air for too long.
– Freezing: To freeze, allow the breadsticks to cool completely. Then, wrap them tightly in plastic wrap and place them in a freezer bag. They can be frozen for up to 3 months. When ready to eat, reheat in the oven until warmed through.
Special Equipment
Here are a few kitchen tools that will make preparing your Cheesy Garlic Breadsticks easier:
– Mixing Bowls: You’ll need a couple for combining ingredients and dough.
– Rolling Pin: To roll out the dough uniformly.
– Pizza Cutter or Knife: For cutting the dough into strips.
– Baking Sheet: A large baking sheet will accommodate all your breadsticks.
– Parchment Paper: Optional for lining the baking sheet for easier cleanup.
Frequently Asked Questions
Can I use store-bought dough for this recipe?
Yes, you can use store-bought pizza or bread dough as a time-saver. Just ensure to adjust the rising time as needed.
How should I reheat leftover breadsticks?
Reheat leftover breadsticks in the oven at 350°F (175°C) for about 10 minutes to revive their warmth and cheesiness.
Can I make these gluten-free?
Yes, substitute all-purpose flour with a gluten-free flour blend. Adjust the liquid as necessary to achieve the right dough consistency.
What dipping sauces go well with these breadsticks?
Marinara, garlic butter, or creamy ranch dressings make excellent dipping options. Experiment with different sauces to find your favorite.
Is it possible to turn these into a meal?
Absolutely! Serve these cheesy delights alongside a fresh salad, pasta, or as part of a charcuterie board for a delightful meal.
Conclusion
Cheesy Garlic Breadsticks transcend their role as a simple side dish; they can be a star on your dinner table. Their delightful blend of gooey cheese and aromatic garlic makes them a beloved treat for all ages. With various recipes and serving suggestions, these breadsticks are a versatile addition to any meal. Whether enjoyed fresh out of the oven or as a part of a larger spread, they are sure to impress. Gather your ingredients, follow the steps, and dive into this cheesy delight!

Cheesy Garlic Breadsticks: An Amazing Ultimate Recipe
- Total Time: 35 minutes
Ingredients
– 2 cups all-purpose flour
– 1 cup warm water (about 110°F/43°C)
– 2 tablespoons sugar
– 1 tablespoon olive oil
– 1 packet (2 ¼ teaspoons) active dry yeast
– 1 teaspoon garlic powder
– ½ teaspoon salt
– 1 cup shredded mozzarella cheese
– ½ cup grated Parmesan cheese
– 2 tablespoons melted butter
– Fresh parsley for garnish (optional)
Instructions
Creating Cheesy Garlic Breadsticks is straightforward when you follow these easy steps:
1. Activate the Yeast: In a bowl, mix warm water, sugar, and yeast. Let it sit for 5-10 minutes until frothy.
2. Combine Ingredients: In a large mixing bowl, combine flour, garlic powder, and salt.
3. Add Wet Ingredients: Pour the yeast mixture and olive oil into the dry ingredients. Mix until combined.
4. Knead the Dough: Transfer the dough to a floured surface and knead for about 5 minutes until smooth.
5. Let it Rise: Place the dough in a greased bowl, cover with plastic wrap, and let it rise in a warm area for 30 minutes or until doubled in size.
6. Preheat the Oven: Preheat your oven to 400°F (200°C).
7. Shape the Breadsticks: Roll the dough into a rectangle about ½ inch thick. Cut into strips using a pizza cutter or knife.
8. Transfer to Baking Sheet: Place the strips on a greased baking sheet, spacing them about an inch apart.
9. Add Cheese: Sprinkle shredded mozzarella and grated Parmesan cheese generously on top of the breadsticks.
10. Brush with Butter: Drizzle melted butter over the cheese and breadsticks for added flavor.
11. Bake: Place in the oven and bake for 15-20 minutes or until golden brown and bubbly.
12. Garnish: Optional—sprinkle fresh parsley over the top before serving for an extra touch.
Follow these steps, and you’ll end up with the most delectable Cheesy Garlic Breadsticks!
- Prep Time: 15 minutes
- Cook Time: 20 minutes
Nutrition
- Serving Size: 8 breadsticks
- Calories: 280 kcal
- Fat: 12g
- Protein: 12g