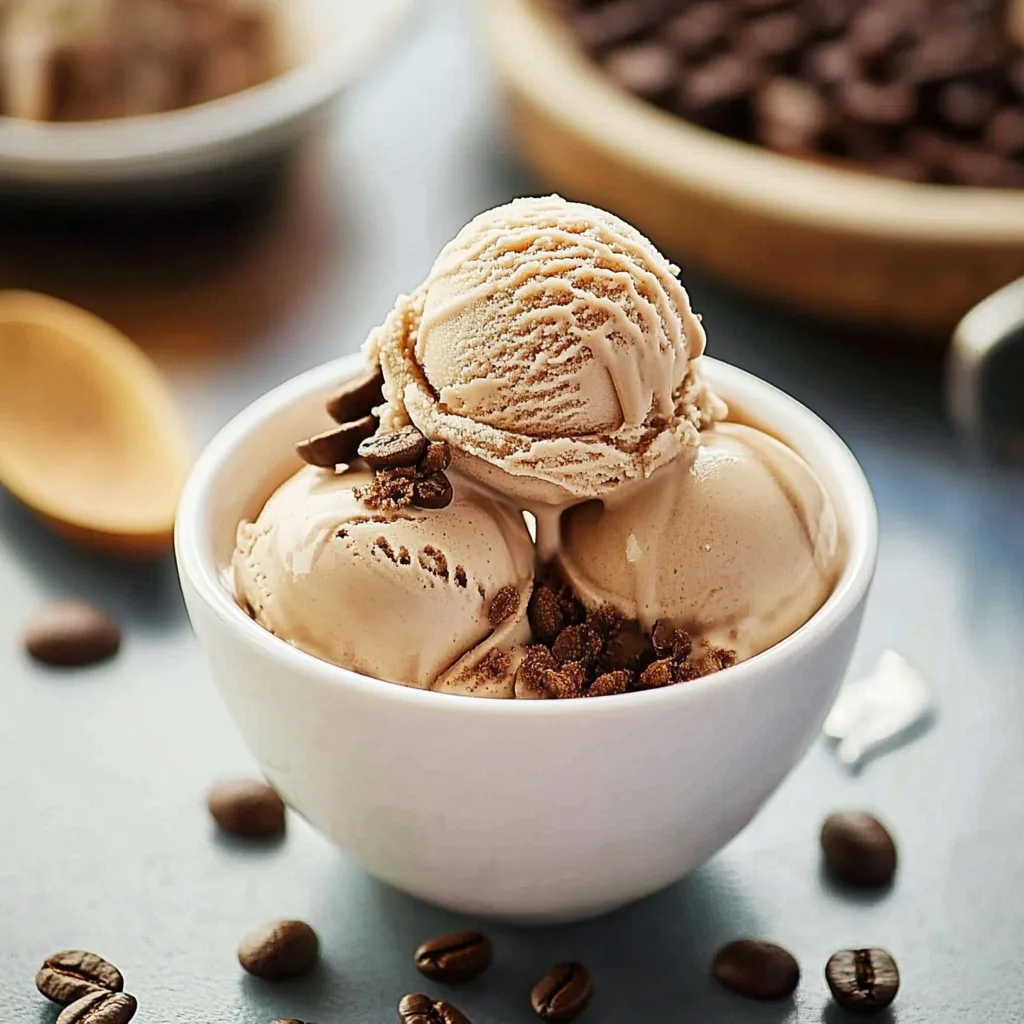
Coffee Ice Cream is a delightful treat that can elevate any afternoon or evening. This creamy, rich dessert melds the robust flavor of coffee with a silky smooth texture, promising to awaken your taste buds and satisfy your sweet tooth. If you’re passionate about coffee or an ice cream aficionado, it’s hard to resist the charm of homemade coffee ice cream. The experience of crafting it is as rewarding as savoring each spoonful.
When you make Coffee Ice Cream at home, you’re not just adding another dessert to your list; you’re embracing a culinary joy that few can match. The aroma wafting through your kitchen as you whip up this incredible dessert will excite you for what’s to come. This easy yet impressive recipe can serve as the perfect ending to dinner parties or a comforting midnight snack.
In this guide, you will learn why this recipe is a must-try, how to prepare it, and tips for serving it perfectly. Whether you’re a novice cook or a seasoned chef, making Coffee Ice Cream offers an amazing opportunity to showcase your creativity and love for desserts. Get ready to indulge in a frozen treat that’s both delicious and versatile!
Why You’ll Love This Recipe
There are countless reasons to fall in love with this Coffee Ice Cream recipe. Here are some of the incredible aspects that make it special:
1. Simple Ingredients – You likely have most ingredients already at home, making this an accessible recipe.
2. Rich Flavor – The deep, intense flavor of coffee balances perfectly with the creamy sweetness of ice cream.
3. Customizable – Easily adjust the recipe for different coffee strengths or add mix-ins like chocolate chips or nuts.
4. Perfect for Any Occasion – Whether it’s a hot summer day or a cozy winter evening, this ice cream fits seamlessly into any season.
5. Impressive Presentation – Scoops of this coffee ice cream can easily become the star of your dessert table, garnished beautifully.
6. Easy-to-Follow Instructions – No special skills required; the clear steps guide you to make it successfully.
These factors combined make this Coffee Ice Cream a truly wonderful addition to your dessert repertoire. It’s not just a treat; it’s an experience that combines indulgence, flavor, and satisfaction in every scoop!
Preparation and Cooking Time
Preparing your homemade Coffee Ice Cream is a straightforward process. Here’s a detailed breakdown of the time you will need:
– Preparation Time: 15 minutes
– Chilling Time: 2-3 hours (or overnight for best results)
– Freezing Time: 4-6 hours (until solid)
The total time for your Coffee Ice Cream from start to finish can vary, but you can estimate around 6-10 hours to include chilling and freezing time. This may seem lengthy, but most of this time is passive, allowing you to enjoy your day while awaiting your delicious treat.
Ingredients
– 2 cups heavy cream
– 1 cup whole milk
– ¾ cup granulated sugar
– 2 tablespoons instant coffee or espresso powder
– 1 tablespoon vanilla extract
– 1 tablespoon coffee liqueur (optional, for added flavor)
– A pinch of salt
Step-by-Step Instructions
Making your Coffee Ice Cream can be both fun and rewarding. Here’s how to do it step-by-step:
1. Prepare Mixture: In a mixing bowl, combine the heavy cream, whole milk, granulated sugar, instant coffee, and salt.
2. Whisk Together: Use a whisk to mix the ingredients thoroughly until the sugar and coffee dissolve completely.
3. Add Vanilla: Stir in the vanilla extract and coffee liqueur if using. Mix until well combined.
4. Chill the Mixture: Cover the bowl and place it in the refrigerator for 2-3 hours. This step helps enhance the flavors.
5. Churn: After chilling, pour the mixture into an ice cream maker. Follow your manufacturer’s instructions for churning (typically takes about 20-25 minutes).
6. Transfer to Container: Once the ice cream reaches a soft-serve consistency, transfer it to an airtight container.
7. Freeze: Freeze for an additional 4-6 hours or until it is solid enough to scoop.
8. Serve: After freezing, allow it to sit at room temperature for a few minutes before scooping into bowls or cones.
By following these steps, you will create a perfect batch of Coffee Ice Cream that everyone will rave about!
How to Serve
Presenting your homemade Coffee Ice Cream elegantly can enhance the overall experience. Here are some ideas for serving:
1. Presentation Style: Serve in waffle cones, decorative ice cream bowls, or even chilled glass cups for a fancy touch.
2. Toppings: Elevate the flavor with toppings like whipped cream, chocolate shavings, or a sprinkle of cocoa powder. A drizzle of caramel or chocolate sauce can add an amazing finish.
3. Accompaniments: Pair with espresso shots, coffee-flavored cake, or even brownies for a decadent dessert combination.
4. Portion Control: Scoop generous portions but ensure they’re not overwhelming; smaller servings invite people to come back for more.
5. Garnishing: Top each scoop with a sprig of mint to provide a fresh contrast to the rich flavor of the coffee.
By paying attention to these serving details, you’ll create a memorable coffee ice cream experience that is as delightful to the eyes as it is to the palate! Enjoy your homemade Coffee Ice Cream!
Additional Tips
– Use Quality Coffee: For the best flavor, opt for freshly brewed coffee or high-quality instant coffee. The better the coffee, the richer your ice cream will taste.
– Don’t Skip the Chilling Step: Chilling the mixture before churning is essential. This enhances the flavor and helps achieve a creamier texture.
– Taste as You Go: Feel free to adjust the sweetness or coffee flavor to match your palate. Add a bit more coffee powder or sugar if desired.
– Experiment with Mix-Ins: Consider adding chocolate chips, nuts, or even toffee bits during the last few minutes of churning for extra texture and flavor.
– Keep It Covered: When storing your Coffee Ice Cream in the freezer, cover it tightly to prevent ice crystals from forming.
Recipe Variation
Feel free to twist this traditional recipe into something uniquely yours! Here are some fun variations to consider:
1. Mocha Coffee Ice Cream: Add ¼ cup of unsweetened cocoa powder for an amazing mocha flavor that will delight chocolate lovers.
2. Coffee & Rum: Replace the coffee liqueur with dark rum for a more adult twist on this dessert.
3. Iced Coffee Cream: Whip in 1 cup of brewed coffee instead of instant coffee for a refreshing iced coffee flavor.
4. Nutty Variation: Stir in roasted almonds or hazelnuts during the churning process for a delightful crunch.
5. Dairy-Free Option: Use coconut cream and almond milk instead of heavy cream and whole milk for a tasty dairy-free version.
Freezing and Storage
– Storage: Store your Coffee Ice Cream in an airtight container to maintain its texture and flavor. It will stay fresh for about 2-3 weeks in the freezer.
– Serving: Let the ice cream sit at room temperature for a few minutes before scooping to make it easier to serve. If stored longer, it may become harder and require more time to soften up.
– Avoid Freezer Burn: To prevent freezer burn, press a piece of parchment paper against the surface of the ice cream before sealing the container.
Special Equipment
You will need a few key tools to prepare your Coffee Ice Cream successfully:
– Ice Cream Maker: A good ice cream maker will ensure that your ice cream churns properly and has the right texture.
– Mixing Bowls: At least two mixing bowls for preparing the mixture and chilling it.
– Whisk: To ensure that your ingredients mix thoroughly and the sugar dissolves completely.
– Airtight Container: To store your ice cream once it has reached the desired consistency.
Frequently Asked Questions
Can I use decaffeinated coffee for this recipe?
Yes, decaffeinated coffee works perfectly! You will still get the rich flavor without the caffeine kick.
How long does it take to churn the ice cream?
Most ice cream makers will take about 20-25 minutes to churn the coffee mixture to a soft-serve consistency.
What if I don’t have an ice cream maker?
You can whisk the mixture every 30 minutes for about 2-3 hours while it freezes to create a similar texture. However, an ice cream maker will yield better results.
Is there any way to make this recipe lower in calories?
Consider using lower-fat milk and cream substitutes, as well as reducing the amount of sugar to meet your dietary needs.
Can I add alcohol to this recipe?
Absolutely! A splash of coffee liqueur or even a bit of whiskey can enhance the flavor profile if you’re making an adult version of this ice cream.
Conclusion
Homemade Coffee Ice Cream is a delightful endeavor that promises rich flavors and a creamy texture, making it an excellent treat for any coffee lover. With simple ingredients and an easy-to-follow recipe, you can whip up this indulgent dessert at home. Whether you follow the classic recipe or try out one of the variations, there’s no doubt it will bring satisfaction to your taste buds and joy to your gathering. Enjoy the process of making your unique Coffee Ice Cream, and get ready to share it with friends and family!

Coffee Ice Cream: The Ultimate Amazing Recipe You Must Try
- Total Time: 0 hours
Ingredients
– 2 cups heavy cream
– 1 cup whole milk
– ¾ cup granulated sugar
– 2 tablespoons instant coffee or espresso powder
– 1 tablespoon vanilla extract
– 1 tablespoon coffee liqueur (optional, for added flavor)
– A pinch of salt
Instructions
Making your Coffee Ice Cream can be both fun and rewarding. Here’s how to do it step-by-step:
1. Prepare Mixture: In a mixing bowl, combine the heavy cream, whole milk, granulated sugar, instant coffee, and salt.
2. Whisk Together: Use a whisk to mix the ingredients thoroughly until the sugar and coffee dissolve completely.
3. Add Vanilla: Stir in the vanilla extract and coffee liqueur if using. Mix until well combined.
4. Chill the Mixture: Cover the bowl and place it in the refrigerator for 2-3 hours. This step helps enhance the flavors.
5. Churn: After chilling, pour the mixture into an ice cream maker. Follow your manufacturer’s instructions for churning (typically takes about 20-25 minutes).
6. Transfer to Container: Once the ice cream reaches a soft-serve consistency, transfer it to an airtight container.
7. Freeze: Freeze for an additional 4-6 hours or until it is solid enough to scoop.
8. Serve: After freezing, allow it to sit at room temperature for a few minutes before scooping into bowls or cones.
By following these steps, you will create a perfect batch of Coffee Ice Cream that everyone will rave about!
- Prep Time: 15 minutes
- Cook Time: 20-25 minutes
Nutrition
- Serving Size: 8
- Calories: 250 kcal
- Fat: 16g
- Protein: 3g