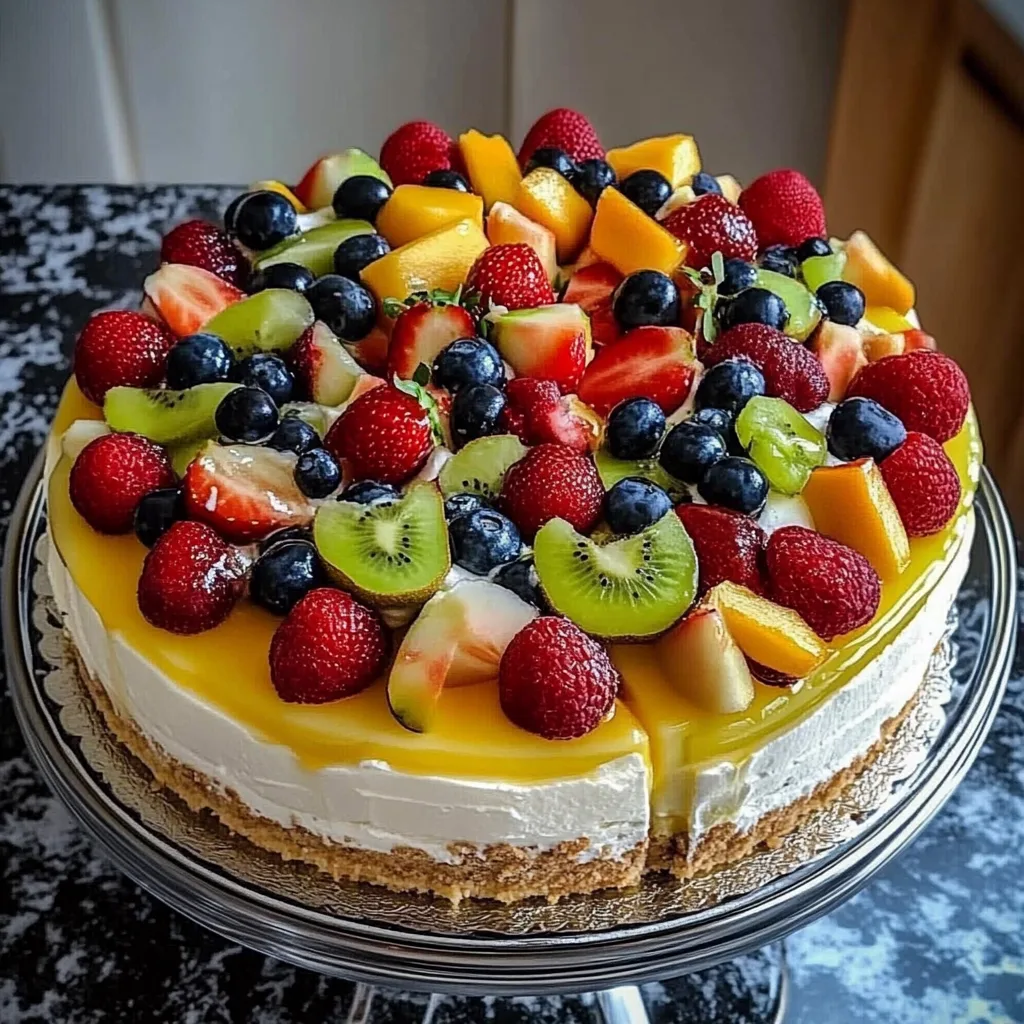
Fruit Salad Cheesecake is an amazing dessert that combines classic cheesecake with a vibrant array of colorful fruits. Its creamy texture paired with the refreshing sweetness of fresh fruit creates a dessert that will leave your taste buds dancing. This dessert not only makes for a fantastic ending to a meal but is also perfect for celebrations or just a sweet treat any day of the week. With its gorgeous presentation and delicious flavors, this cheesecake is bound to impress everyone who gets a slice!
If you’ve ever enjoyed a slice of Fruit Salad Cheesecake, you know exactly what I am talking about. The first bite introduces you to a blend of creamy, tangy cheesecake that’s perfectly balanced with the natural sweetness of fresh fruit. Each layer adds something unique, making this cheesecake a delightful experience. In this guide, you’ll find out why this recipe stands out, how to create your masterpiece, and tips on serving it beautifully. Whether you are a novice or an expert baker, the incredible flavors of this Fruit Salad Cheesecake will shine through every time you make it.
Imagine sharing this delightful cheesecake with friends and family. Picture the joy on their faces as they take their first bites! The combination of textures from the creamy filling and fresh fruits creates a wonderful harmony that is simply irresistible. Let’s explore the wonderful world of Fruit Salad Cheesecake and discover why it’s a must-try recipe!
Why You’ll Love This Recipe
There are countless reasons to love this Fruit Salad Cheesecake. Here are just a few that make this dessert a standout:
1. Flavor Explosion: Each slice delivers a burst of flavor from the rich cheesecake and sweet fruits.
2. Visual Appeal: The vibrant colors of the fruit on top make this cheesecake look as good as it tastes.
3. Perfect for Any Occasion: Whether it’s a family gathering, birthday, or holiday bash, this cheesecake suits all events.
4. Easy to Make: Despite its elegance, the steps are straightforward—ideal for both beginners and experienced bakers.
5. Versatile: You can switch up the fruits based on the season or personal preference.
6. Creamy and Refreshing: It’s a delightful treat that feels indulgent yet refreshing, making it a perfect dessert anytime.
7. No-Bake Option: This recipe can be adapted to be a no-bake cheesecake, saving time and effort.
8. Gluten-Free Potential: With a few smart substitutions, you can make this dessert gluten-free without sacrificing taste.
9. Great for Leftovers: This cheesecake keeps well in the fridge, maintaining its flavor and texture for several days.
10. Family-Friendly: Kids and adults alike will enjoy this dessert, making it a crowd-pleaser.
With these features in mind, it’s easy to see why Fruit Salad Cheesecake is adored by many. The harmony of flavors and textures combined with its visual beauty makes it an extraordinary dessert that never fails to impress!
Preparation and Cooking Time
Creating your own Fruit Salad Cheesecake requires some time, but the end result is completely worth it. Here’s how long you can expect to spend:
– Preparation Time: 30 minutes
– Chilling Time: 4 hours (or overnight for best results)
– Total Time: Approximately 4 hours and 30 minutes
This timing allows flavors to meld beautifully, resulting in a cheesecake that’s rich, creamy, and utterly delicious. Remember, the longer you chill the cheesecake, the better the texture will be!
Ingredients
– For the Cheesecake Base:
– 2 cups graham cracker crumbs
– 1/2 cup unsalted butter, melted
– 1/4 cup granulated sugar
– For the Cheesecake Filling:
– 16 oz cream cheese, softened
– 1 cup powdered sugar
– 1 teaspoon vanilla extract
– 1 cup heavy whipping cream
– For the Fruit Topping:
– 1 cup strawberries, sliced
– 1 cup blueberries
– 1 cup kiwi, peeled and sliced
– 1 cup mango, diced
– 1 cup pineapple, diced
– 1 cup grapes, halved
– For the Garnish:
– Fresh mint leaves (optional)
Step-by-Step Instructions
Creating a Fruit Salad Cheesecake can be quite fun if you follow these step-by-step instructions:
1. Prepare the Crust:
– In a bowl, combine graham cracker crumbs, melted butter, and granulated sugar. Mix until well combined.
– Press the mixture firmly into the bottom of a 9-inch springform pan to create an even layer.
2. Make the Cheesecake Filling:
– In a large mixing bowl, beat the softened cream cheese until smooth.
– Gradually add the powdered sugar and vanilla extract. Continue beating until well blended.
– In a separate bowl, whip the heavy cream until soft peaks form.
– Gently fold the whipped cream into the cream cheese mixture until fully combined.
3. Assemble the Cheesecake:
– Pour the cheesecake filling over the prepared crust. Spread it out evenly.
– Cover the cheesecake with plastic wrap and refrigerate for at least 4 hours, or overnight for best results.
4. Prepare the Fruit Topping:
– Wash and slice all the fruits as needed. Keep them in a bowl to create a colorful mix.
5. Add the Fruit:
– After the cheesecake has set, carefully remove it from the springform pan.
– Top the cheesecake with the prepared fruit mixture, pressing down gently to adhere.
6. Garnish:
– Optionally, add fresh mint leaves for added color and a pop of freshness.
7. Slice and Serve:
– Use a sharp knife to slice the cheesecake into wedges. A hot knife works best for clean slices.
How to Serve
Serving your Fruit Salad Cheesecake can be a delightful experience! Here are a few tips to ensure it looks and tastes its best:
1. Use a Cake Stand: Present your cheesecake on a beautiful cake stand to elevate its appearance.
2. Garnish Creatively: Add mint leaves or edible flowers for a stunning presentation.
3. Accompaniments: Serve with whipped cream or a drizzle of chocolate sauce for added indulgence.
4. Pairing Suggestions: Consider pairing with a refreshing lemonade or herbal tea for a perfect complement.
5. Leftover Storage: Store any leftovers in an airtight container in the refrigerator for up to 5 days.
By following these serving suggestions, you’ll create a memorable experience for anyone lucky enough to enjoy your Fruit Salad Cheesecake!
Additional Tips
– Use Fresh Fruits: The quality of your fruits significantly affects the overall taste. Opt for ripe, seasonal fruits for the best flavor and texture.
– Chill Your Mixing Bowls: Chilling the bowl for the whipped cream can help achieve better peaks when whipping. This ensures a light and fluffy cheesecake filling.
– Pre-Chill the Springform Pan: If you’re making a no-bake version, placing your springform pan in the freezer for a few minutes before filling it helps to set the crust better.
– Experiment with Toppings: Besides the traditional fruit topping, consider adding a layer of fruit preserves or a drizzle of fruit coulis over the top for an extra layer of flavor.
– Portion Control: This cheesecake can be rich! Consider cutting smaller slices for a perfect balance between indulgence and satisfaction.
Recipe Variation
You can customize this Fruit Salad Cheesecake to match your taste preferences. Here are a few fun variations to try:
1. Chocolate Fruit Cheesecake: Add cocoa powder to the cheesecake filling and top with chocolate-dipped fruit.
2. Nutty Delight: Incorporate chopped nuts like almonds or pecans into the crust for added texture and flavor.
3. Citrus Twist: Use citrus fruits such as oranges or grapefruit for a refreshing zesty flavor that pairs well with the creaminess of the cheesecake.
4. Swap Dairy: Use Greek yogurt instead of cream cheese for a lighter version without losing the creamy taste.
5. Layered Delight: Instead of a single layer of fruit, alternate layers of cheesecake filling and various fruit mixtures in your assembly for a more dynamic visual and flavor profile.
Freezing and Storage
– Refrigeration: Store your Fruit Salad Cheesecake in the fridge for up to 5 days. Cover it with plastic wrap or place it in an airtight container to maintain freshness.
– Freezing: You can freeze individual slices of cheesecake for up to 3 months. Make sure they are well-wrapped in plastic wrap, followed by aluminum foil, to avoid freezer burn. Thaw in the refrigerator before serving.
Special Equipment
Having the right tools can make your cheesecake-making experience smoother. Here’s what you’ll need:
– Springform Pan: This is essential for making and serving your cheesecake easier.
– Mixing Bowls: Use various sizes for different mixtures.
– Electric Mixer: For achieving that smooth cheesecake filling.
– Spatula: For spreading the cheesecake filling evenly.
– Chopping Board and Knife: For preparing your fresh fruit toppings.
Frequently Asked Questions
Can I make this cheesecake a day in advance?
Yes, making the cheesecake a day ahead allows the flavors to develop and gives it a better texture.
Is it necessary to chill the cheesecake overnight?
Chilling overnight is ideal, but it can be set for at least 4 hours if you are pressed for time.
Can I use frozen fruits in the recipe?
Fresh fruits are recommended for the best texture and taste, but if frozen fruits are all you have, thaw them and drain excess liquid before using.
What if I cannot find graham cracker crumbs?
You can substitute them with crushed digestive biscuits or other cookies for the crust.
How can I tell when the cheesecake is done?
Since this is a no-bake cheesecake, checking for set consistency is key. It should be firm to the touch but not overly stiff.
Conclusion
Fruit Salad Cheesecake is a spectacular dessert that brings together the rich and creamy texture of cheesecake with the freshness of colorful fruits. Each layer contributes to a delightful experience that is visually stunning and deliciously satisfying. Whether you are celebrating a special occasion or indulging in a sweet craving, this cheesecake will always be a hit. With a few simple steps, you can create a beautiful, layered masterpiece that will impress friends and family time and time again.

Fruit Salad Cheesecake: An Incredible Ultimate Recipe with 10 Layers of Delight
- Total Time: 30 minutes
Ingredients
– For the Cheesecake Base:
– 2 cups graham cracker crumbs
– 1/2 cup unsalted butter, melted
– 1/4 cup granulated sugar
– For the Cheesecake Filling:
– 16 oz cream cheese, softened
– 1 cup powdered sugar
– 1 teaspoon vanilla extract
– 1 cup heavy whipping cream
– For the Fruit Topping:
– 1 cup strawberries, sliced
– 1 cup blueberries
– 1 cup kiwi, peeled and sliced
– 1 cup mango, diced
– 1 cup pineapple, diced
– 1 cup grapes, halved
– For the Garnish:
– Fresh mint leaves (optional)
Instructions
Creating a Fruit Salad Cheesecake can be quite fun if you follow these step-by-step instructions:
1. Prepare the Crust:
– In a bowl, combine graham cracker crumbs, melted butter, and granulated sugar. Mix until well combined.
– Press the mixture firmly into the bottom of a 9-inch springform pan to create an even layer.
2. Make the Cheesecake Filling:
– In a large mixing bowl, beat the softened cream cheese until smooth.
– Gradually add the powdered sugar and vanilla extract. Continue beating until well blended.
– In a separate bowl, whip the heavy cream until soft peaks form.
– Gently fold the whipped cream into the cream cheese mixture until fully combined.
3. Assemble the Cheesecake:
– Pour the cheesecake filling over the prepared crust. Spread it out evenly.
– Cover the cheesecake with plastic wrap and refrigerate for at least 4 hours, or overnight for best results.
4. Prepare the Fruit Topping:
– Wash and slice all the fruits as needed. Keep them in a bowl to create a colorful mix.
5. Add the Fruit:
– After the cheesecake has set, carefully remove it from the springform pan.
– Top the cheesecake with the prepared fruit mixture, pressing down gently to adhere.
6. Garnish:
– Optionally, add fresh mint leaves for added color and a pop of freshness.
7. Slice and Serve:
– Use a sharp knife to slice the cheesecake into wedges. A hot knife works best for clean slices.
- Prep Time: 30 minutes
- Cook Time: 0 minutes
Nutrition
- Serving Size: 12 slices
- Calories: 350 kcal
- Fat: 19g
- Protein: 5g