Homemade Chocolate-Covered Ice Cream is a delightful treat that you can easily prepare in your kitchen. This recipe promises an incredible fusion of creamy ice cream and rich, velvety chocolate. It’s the ultimate indulgence for hot summer days or any time you crave something sweet and satisfying. Furthermore, nothing beats the satisfaction of making your own desserts at home. You’ll enjoy every delightful bite of your very own creation!
If you’ve ever purchased chocolate-covered ice cream bars from the store, you understand their allure. However, making Homemade Chocolate-Covered Ice Cream allows you to customize every aspect. Choose your favorite ice cream flavor, adjust the chocolate coating’s thickness, and even add toppings to make each treat unique. This homemade version isn’t just about taste; it’s also about the experience of creating something amazing for yourself and your loved ones.
In this guide, we will break down the process of making this scrumptious dessert. We’ll discuss why this recipe stands out and share tips on how to serve it beautifully. By the end, you’ll be excited to try your hand at Homemade Chocolate-Covered Ice Cream and wow your friends and family.
Why You’ll Love This Recipe
Homemade Chocolate-Covered Ice Cream is a beloved dessert for countless reasons. Here’s what makes this recipe so special:
1. Customization: You have complete control over the flavor and toppings. Whether you prefer vanilla, chocolate, or even mint, the possibilities are endless.
2. Fresh Ingredients: Homemade means you know exactly what’s in your dessert. No preservatives or artificial flavors here!
3. Fun Activity: Making this treat can be a fun activity with friends or family, especially kids who will love the chocolate dipping process.
4. Perfect for Any Occasion: Be it a hot summer day, birthday parties, or picnics, these treats are sure to delight everyone.
5. Guilt-Free Indulgence: You control the sugar and ingredients, making it easier to enjoy an indulgent dessert without any guilt.
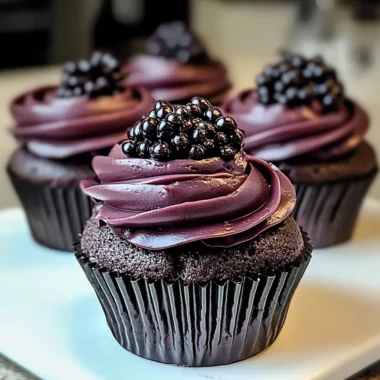
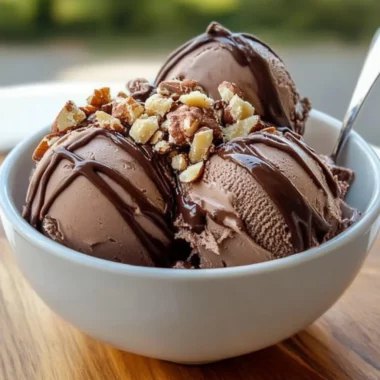
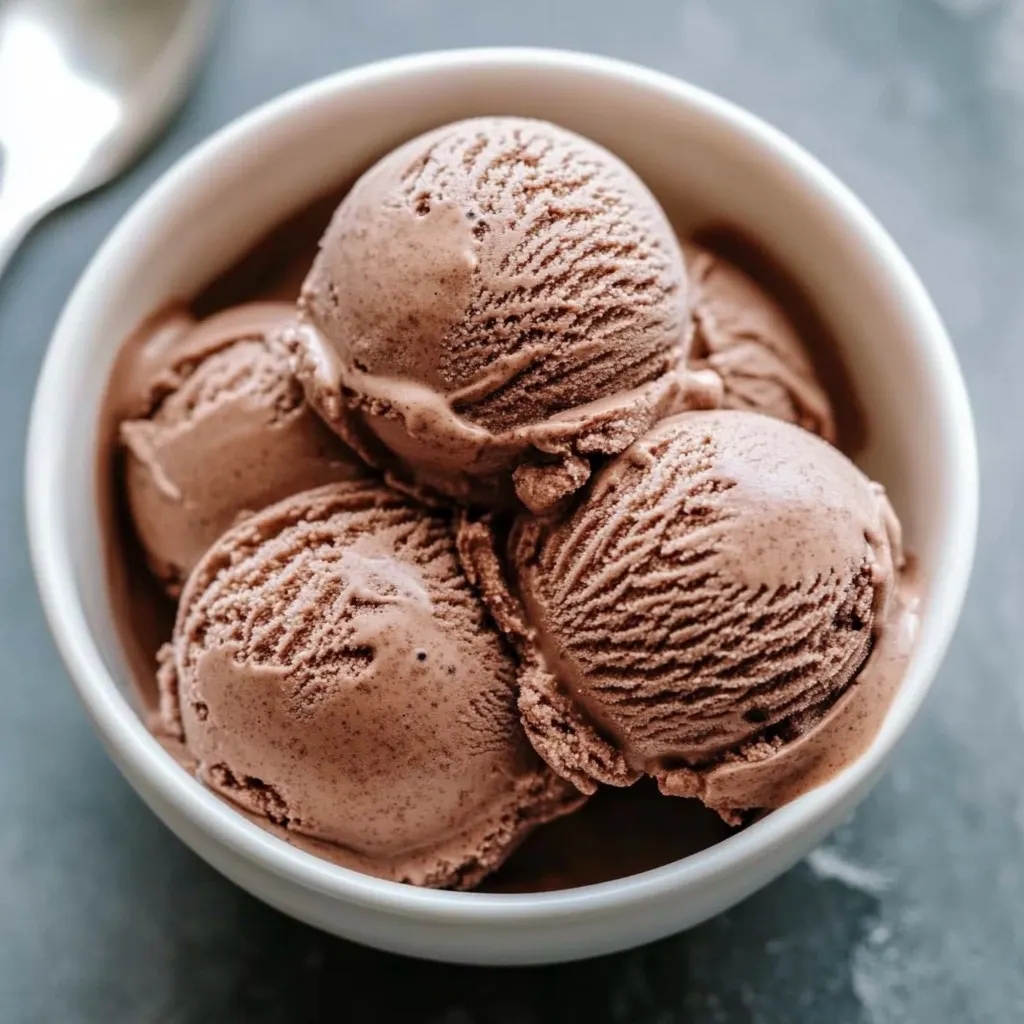
6. Visual Appeal: The glossy chocolate coating combined with colorful sprinkles or nuts makes for a stunning dessert presentation.
With these factors in mind, you’ll understand why Homemade Chocolate-Covered Ice Cream is so adored.
Preparation and Cooking Time
Making Homemade Chocolate-Covered Ice Cream requires some planning, but it’s worth the time. Below is a breakdown of the total time needed.
– Preparation Time: 30 minutes
– Freezing Time: 4 hours
– Total Time: Approximately 4 hours and 30 minutes
Note that the vast majority of this time is for freezing, so while you do have some active prep time, most of it is just waiting for the ice cream to set.
Ingredients
– 2 cups heavy cream
– 1 cup whole milk
– ¾ cup granulated sugar
– 1 tablespoon vanilla extract
– 1 cup semi-sweet chocolate chips
– 2 tablespoons coconut oil (or vegetable oil)
– Toppings (optional): crushed nuts, rainbow sprinkles, sea salt, or chopped dried fruits
Step-by-Step Instructions
Creating Homemade Chocolate-Covered Ice Cream is straightforward when you follow these steps:
1. Prepare the Ice Cream Base: In a large mixing bowl, combine the heavy cream, whole milk, granulated sugar, and vanilla extract. Whisk until the sugar is fully dissolved.
2. Churn the Ice Cream: Pour the mixture into an ice cream maker and churn as directed, usually about 20-25 minutes, until it reaches a soft-serve consistency.
3. Transfer to Containers: Spoon the churned ice cream into a suitable container, cover it, and place it in the freezer for at least 4 hours to become firm.
4. Melt the Chocolate Coating: In a microwave-safe bowl, combine the semi-sweet chocolate chips and coconut oil. Microwave in 30-second intervals, stirring in between, until fully melted and smooth.
5. Prepare for Dipping: Remove the ice cream from the freezer. Let it sit at room temperature for a few minutes to soften slightly for easier dipping.
6. Dip the Ice Cream: Use a scoop to form balls of ice cream or cut rectangular bars from the set ice cream. Dip each piece into the melted chocolate until fully coated.
7. Add Toppings: If desired, sprinkle your choice of toppings immediately after dipping while the chocolate is still wet.
8. Set the Coating: Place the dipped ice creams on a parchment-lined baking sheet. Return them to the freezer for at least 30 minutes to allow the chocolate to set.
9. Serve or Store: Enjoy immediately, or store them in an airtight container in the freezer for later.
By following these steps, you will successfully create your own Homemade Chocolate-Covered Ice Cream.
How to Serve
The presentation of your Homemade Chocolate-Covered Ice Cream can elevate the whole experience. Here are some ideas:
1. Displaying: Arrange the chocolate-covered ice cream on a beautiful serving platter. Consider using a cake stand for an elegant touch.
2. Accompaniments: Offer a variety of toppings on the side—from crushed nuts to colorful sprinkles. This lets guests personalize their treats.
3. Pairing Beverages: These delicious desserts pair well with various beverages. Consider serving with refreshing iced tea, coffee, or a glass of your favorite dessert wine.
4. Creative Serving Styles: Provide fancy sticks for a more fun presentation. You could also place them in cups for a more contemporary look.
5. Personal Touch: Write names or fun facts about your ice cream flavors on cards and display them next to each serving for a festive touch.
Serving Homemade Chocolate-Covered Ice Cream with thoughtfulness makes the experience memorable for both you and your guests!
Additional Tips
– Experiment with Ice Cream Flavors: Besides classic options like chocolate and vanilla, feel free to try unique flavors like pistachio or coffee.
– Choose the Right Chocolate: For a richer taste, opt for high-quality chocolate. Dark chocolate offers a nice contrast to the sweetness of the ice cream.
– Serve Immediately: For the best experience, serve the ice cream immediately after dipping. This ensures the chocolate is still slightly warm and the outer layer is crisp.
– Use the Right Temperature: Ensure your chocolate coating is warm, not hot, when you dip the ice cream. This helps to achieve a smooth coating.
– Consider Flavor Infusions: Adding ingredients like peppermint extract or espresso powder to the chocolate for a flavor twist can take your dessert to the next level.
Recipe Variation
There are countless ways to customize your Homemade Chocolate-Covered Ice Cream. Here are a few fun variations:
1. Healthier Option: Use low-fat ice cream or yogurt instead of traditional ice cream for a lighter dessert.
2. Nutty Coating: Mix crushed nuts into the melted chocolate for a delightful crunch.
3. Gourmet Touch: Drizzle caramel or chocolate sauce over the top of the coated ice cream for added sweetness.
4. Fruit Explosion: Incorporate fresh fruit or fruit puree into the ice cream base for a refreshing twist.
5. Layered Ice Cream Bars: Create ice cream bars with layers of different flavors before dipping in chocolate for a visually appealing treat.
Freezing and Storage
– Storage: Keep your Homemade Chocolate-Covered Ice Cream in an airtight container in the freezer. It can last up to two weeks without a loss in flavor or texture.
– Freezing Tip: When freezing, make sure the ice cream is well-coated with chocolate to prevent ice crystals from forming and to maintain its creamy texture.
Special Equipment
To successfully create this tasty dessert, you will need the following equipment:
– Ice Cream Maker: Essential for churning the ice cream base.
– Mixing Bowls: For mixing your ingredients together.
– Microwave-Safe Bowls: For melting the chocolate and oil together.
– Baking Sheet: To place the dipped ice cream bars while they set.
– Parchment Paper: To line the baking sheet, ensuring easy release once frozen.
Frequently Asked Questions
Can I use store-bought ice cream?
Yes! You can use store-bought ice cream if you’re short on time. Just make sure it’s a flavor you love.
What chocolate works best for coating?
Semi-sweet or dark chocolate works best for coating as they create a nice balance with sweet ice cream.
How long does it take for the chocolate coating to set?
The chocolate coating generally takes about 30 minutes in the freezer to set properly.
Can I make these ice cream bars in advance?
Absolutely! They can be made ahead of time and stored in the freezer for later enjoyment.
What if I have leftover chocolate?
You can save leftover chocolate by letting it cool and solidify. It can be re-melted later for another use.
Conclusion
Homemade Chocolate-Covered Ice Cream is not only a fantastic summertime treat but also a fun activity that adds a personal touch to your dessert experiences. This simple yet indulgent recipe allows for endless customization options, making it perfect for any occasion. Friends and family will love the unique flavors you create, and the joy of making this dessert from scratch adds a special touch to every bite. So gather your ingredients and get ready to enjoy a delicious homemade treat that will leave everyone asking for more!

Homemade Chocolate-Covered Ice Cream: An Amazing Ultimate Recipe
- Total Time: 4 hours 15 minutes
Ingredients
– 2 cups heavy cream
– 1 cup whole milk
– ¾ cup granulated sugar
– 1 tablespoon vanilla extract
– 1 cup semi-sweet chocolate chips
– 2 tablespoons coconut oil (or vegetable oil)
– Toppings (optional): crushed nuts, rainbow sprinkles, sea salt, or chopped dried fruits
Instructions
Creating Homemade Chocolate-Covered Ice Cream is straightforward when you follow these steps:
1. Prepare the Ice Cream Base: In a large mixing bowl, combine the heavy cream, whole milk, granulated sugar, and vanilla extract. Whisk until the sugar is fully dissolved.
2. Churn the Ice Cream: Pour the mixture into an ice cream maker and churn as directed, usually about 20-25 minutes, until it reaches a soft-serve consistency.
3. Transfer to Containers: Spoon the churned ice cream into a suitable container, cover it, and place it in the freezer for at least 4 hours to become firm.
4. Melt the Chocolate Coating: In a microwave-safe bowl, combine the semi-sweet chocolate chips and coconut oil. Microwave in 30-second intervals, stirring in between, until fully melted and smooth.
5. Prepare for Dipping: Remove the ice cream from the freezer. Let it sit at room temperature for a few minutes to soften slightly for easier dipping.
6. Dip the Ice Cream: Use a scoop to form balls of ice cream or cut rectangular bars from the set ice cream. Dip each piece into the melted chocolate until fully coated.
7. Add Toppings: If desired, sprinkle your choice of toppings immediately after dipping while the chocolate is still wet.
8. Set the Coating: Place the dipped ice creams on a parchment-lined baking sheet. Return them to the freezer for at least 30 minutes to allow the chocolate to set.
9. Serve or Store: Enjoy immediately, or store them in an airtight container in the freezer for later.
By following these steps, you will successfully create your own Homemade Chocolate-Covered Ice Cream.
- Prep Time: 15 minutes
- Cook Time: 4 hours
Nutrition
- Serving Size: 6
- Calories: 320 kcal
- Fat: 22g
- Protein: 3g