Introduction
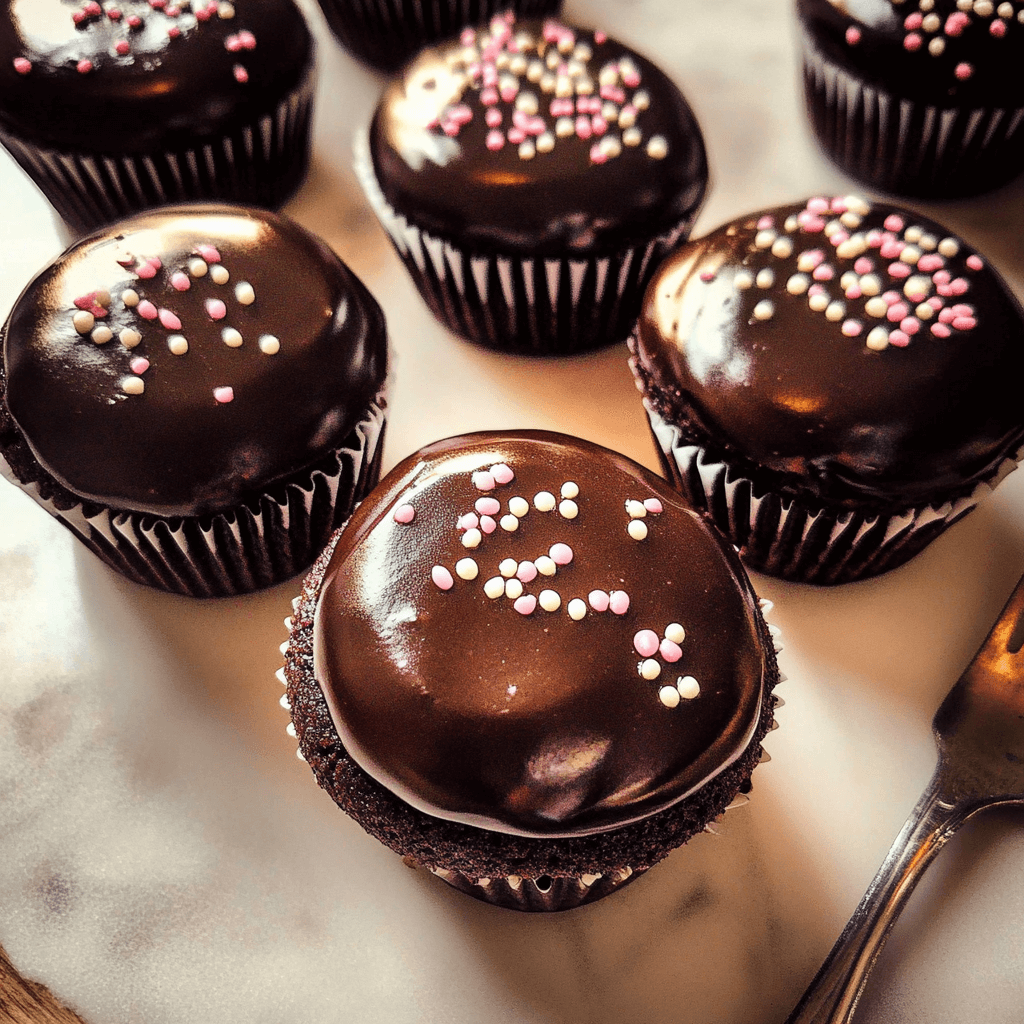
Homemade Hostess Cupcakes bring back the nostalgic joy of childhood treats, but with a homemade touch that elevates them to a whole new level of deliciousness. These cupcakes are more than just a dessert; they’re a trip down memory lane, offering a perfect balance of moist chocolate cake, creamy filling, and a glossy chocolate ganache. Making these at home allows you to control the ingredients and ensure they’re made with the love and care that store-bought versions often lack.
There’s something truly special about creating these iconic cupcakes from scratch. From the aroma of baking chocolate to the satisfaction of piping the creamy filling, every step is a rewarding experience. The first time I made these, the look of pure delight on my family’s faces was priceless. The rich, chocolatey flavor and the soft, cloud-like filling made them an instant hit.
Homemade Hostess Cupcakes are perfect for parties, birthdays, or simply as a weekend treat. They’re surprisingly easy to make and offer a delightful project for bakers of all skill levels. Whether you’re a seasoned baker or just starting out, this recipe is sure to impress. Get ready to create a batch of cupcakes that will have everyone asking for more!
Perfect for:
- Birthday parties
- School bake sales
- Weekend baking projects
- Family gatherings
- Chocolate lovers
Why You’ll Love These Homemade Hostess Cupcakes
Here’s why you’ll love making Homemade Hostess Cupcakes, and why they’ll quickly become a favorite in your kitchen:
- Nostalgic Delight: Recreates the iconic Hostess Cupcakes flavor with a homemade touch.
- Moist and Chocolatey: Features a tender, moist chocolate cake that’s rich in flavor.
- Creamy Filling: The sweet, fluffy filling perfectly complements the chocolate cake.
- Glossy Ganache: Topped with a smooth, decadent chocolate ganache for an extra layer of indulgence.
- Easy to Customize: Adaptable to different dietary needs and flavor preferences.
Preparation and Cooking Time
- Total Time: 1 hour 30 minutes
- Preparation Time: 45 minutes
- Cooking Time: 18-20 minutes
- Servings: 12 cupcakes
- Calories per serving: Approximately 350-400 calories
- Key Nutrients: (per cupcake)
- Carbohydrates: 45g
- Fat: 20g
- Protein: 4g
Ingredients
Gather these ingredients to make your Homemade Hostess Cupcakes:
For the Chocolate Cupcakes:
- 1 ½ cups all-purpose flour
- ¾ cup unsweetened cocoa powder
- 1 ½ cups granulated sugar
- 1 ½ teaspoons baking soda
- ¾ teaspoon baking powder
- ¾ teaspoon salt
- ¾ cup buttermilk, room temperature
- ½ cup vegetable oil
- 2 large eggs, room temperature
- 2 teaspoons vanilla extract
- ¾ cup hot water
Cream Filling:
- ½ cup (1 stick) unsalted butter, softened
- 3 cups powdered sugar
- ½ cup vegetable shortening
- ¼ cup milk
- 2 teaspoons vanilla extract
- Pinch of salt
Chocolate Ganache:
- 8 ounces semi-sweet chocolate, finely chopped
- ¾ cup heavy cream
- 1 tablespoon light corn syrup
Ingredient Highlights
- Cocoa Powder: Provides a rich, deep chocolate flavor.
- Buttermilk: Adds moisture and tenderness to the cake.
- Vegetable Shortening: Creates a stable and fluffy cream filling.
- Semi-Sweet Chocolate: Offers a balanced sweetness for the ganache.
- Heavy Cream: Creates a smooth and glossy ganache.
Step-by-Step Instructions
Here’s how to make Homemade Hostess Cupcakes:
Prepare the Chocolate Cupcakes:
- Preheat Oven: Preheat your oven to 350°F (175°C) and line a 12-cup muffin tin with cupcake liners.
- Combine Dry Ingredients: In a large bowl, whisk together the flour, cocoa powder, sugar, baking soda, baking powder, and salt.
- Combine Wet Ingredients: In a separate bowl, whisk together the buttermilk, vegetable oil, eggs, and vanilla extract.
- Combine Wet and Dry: Gradually add the wet ingredients to the dry ingredients, mixing until just combined.
- Add Hot Water: Slowly pour in the hot water, mixing until the batter is smooth. The batter will be thin.
- Fill Cupcake Liners: Fill each cupcake liner about two-thirds full.
- Bake: Bake for 18-20 minutes, or until a toothpick inserted into the center comes out clean.
- Cool: Let the cupcakes cool in the muffin tin for 5 minutes, then transfer them to a wire rack to cool completely.
Make the Cream Filling:
- Cream Butter and Shortening: In a large bowl, cream together the softened butter and vegetable shortening until smooth and fluffy.
- Add Powdered Sugar: Gradually add the powdered sugar, one cup at a time, mixing on low speed until combined.
- Add Milk and Vanilla: Add the milk, vanilla extract, and salt. Beat on medium speed until the filling is light and fluffy.
- Transfer to Piping Bag: Transfer the filling to a piping bag fitted with a large round tip.
Prepare the Chocolate Ganache:
- Heat Heavy Cream: In a small saucepan, heat the heavy cream over medium heat until it just begins to simmer.
- Pour Over Chocolate: Place the chopped chocolate in a heatproof bowl. Pour the hot heavy cream over the chocolate, and let it sit for 1 minute.
- Stir Until Smooth: Stir gently until the chocolate is melted and the ganache is smooth and glossy. Add the light corn syrup and stir to combine.
- Cool Slightly: Let the ganache cool slightly until it thickens to a pourable consistency.
Assemble the Cupcakes:
- Create Filling Hole: Use a small knife or cupcake corer to create a hole in the center of each cupcake, removing a small cone of cake.
- Fill with Cream: Pipe the cream filling into the hole of each cupcake, filling it to the top.
- Dip in Ganache: Dip the top of each cupcake into the cooled chocolate ganache, allowing the excess to drip off.
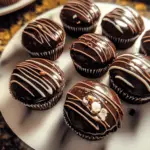
- Add Squiggle (Optional): If desired, transfer some of the remaining ganache to a small piping bag fitted with a small round tip and pipe a squiggle across the top of each cupcake.
- Chill: Place the assembled cupcakes in the refrigerator for at least 30 minutes to allow the ganache to set.
How to Serve Homemade Hostess Cupcakes
Homemade Hostess Cupcakes can be served in various ways to enhance their presentation and flavor:
- Chilled: Serve the cupcakes chilled for the best texture and flavor.
- Individual Plates: Place each cupcake on a small plate for an elegant presentation.
- Cupcake Stand: Display the cupcakes on a tiered cupcake stand for parties and gatherings.
- With Milk or Coffee: Pair with a glass of cold milk or a warm cup of coffee.
- Party Favors: Wrap individual cupcakes in cellophane bags as party favors.
Additional Tips for Homemade Hostess Cupcakes
Follow these tips for the best Homemade Hostess Cupcakes:
- Room Temperature Ingredients: Use room temperature ingredients (eggs, buttermilk, butter) for better emulsification and a more consistent batter.
- Don’t Overmix: Be careful not to overmix the cupcake batter, as this can result in tough cupcakes.
- Cool Completely: Ensure the cupcakes are completely cool before filling and frosting to prevent the filling and ganache from melting.
- Proper Piping Technique: Practice piping the cream filling to achieve a neat and even distribution.
- Adjust Ganache Consistency: If the ganache is too thick, add a tablespoon of hot cream. If it’s too thin, let it cool for a few more minutes.
Recipe Variations for Homemade Hostess Cupcakes
Here are 10 variations to customize your Homemade Hostess Cupcakes:
- Peanut Butter Filling: Add ¼ cup of peanut butter to the cream filling for a peanut butter twist.
- Mint Chocolate Ganache: Add a few drops of peppermint extract to the chocolate ganache.
- Espresso Chocolate Cupcakes: Add 1 teaspoon of espresso powder to the cupcake batter for a mocha flavor.
- Vanilla Bean Filling: Use vanilla bean paste instead of vanilla extract in the cream filling.
- Salted Caramel Ganache: Drizzle salted caramel sauce over the chocolate ganache.
- Gluten-Free Cupcakes: Use a gluten-free flour blend for the cupcakes.
- Dairy-Free Filling: Use a dairy-free butter substitute and almond milk in the cream filling.
- Dark Chocolate Ganache: Use dark chocolate instead of semi-sweet chocolate for a richer ganache.
- Orange Zest Cupcakes: Add orange zest to the cupcake batter for a citrusy flavor.
- Double Chocolate Cupcakes: Add chocolate chips to the cupcake batter for extra chocolatey goodness.
Freezing and Storage for Homemade Hostess Cupcakes
- Freezing: You can freeze the unfrosted cupcakes for up to 2 months. Wrap them tightly in plastic wrap and then in foil. Thaw completely before filling and frosting.
- Storage: Store the filled and frosted cupcakes in an airtight container in the refrigerator for up to 3 days. Bring to room temperature before serving for the best flavor and texture.
Special Equipment for Homemade Hostess Cupcakes
Here are some items that make preparing Homemade Hostess Cupcakes easier:
- Muffin Tin: Essential for baking the cupcakes evenly.
- Cupcake Liners: Prevents the cupcakes from sticking to the muffin tin.
- Electric Mixer: Helps to cream the butter and sugar and whip the cream filling.
- Measuring Cups and Spoons: Ensures precise measurements of ingredients.
- Whisk: Used for combining dry ingredients and mixing wet ingredients.
- Rubber Spatula: For scraping down the sides of the bowl and folding ingredients.
- Piping Bag: Used for piping the cream filling into the cupcakes.
- Large Round Piping Tip: Creates a neat and even filling in the cupcakes.
- Saucepan: Used for heating the heavy cream for the ganache.
- Heatproof Bowl: For melting the chocolate and making the ganache.
FAQ Section for Homemade Hostess Cupcakes
- Can I use cake flour instead of all-purpose flour?
Yes, you can use cake flour for a more tender cupcake. Substitute it in equal amounts. - Can I use regular milk instead of buttermilk?
Yes, you can use regular milk. Add 1 tablespoon of lemon juice or white vinegar to 1 cup of milk and let it sit for 5 minutes to create a substitute for buttermilk. - Can I make the ganache ahead of time?
Yes, you can make the ganache ahead of time and store it in the refrigerator for up to 3 days. Reheat gently in the microwave or over a double boiler before using. - Can I use different types of chocolate for the ganache?
Yes, you can use milk chocolate or dark chocolate depending on your preference. - How do I prevent the ganache from cracking?
Make sure the cupcakes are completely cool before dipping them in the ganache. Also, avoid chilling the cupcakes for too long, as this can cause the ganache to crack. - Can I make these cupcakes without vegetable shortening?
Yes, you can substitute the vegetable shortening with butter, but the filling might not be as stable. - What can I use if I don’t have a piping bag?
You can use a zip-top bag and cut off one of the corners to create a makeshift piping bag.
Homemade Hostess Cupcakes
- Total Time: 1 hour 30 minutes
- Yield: 12 cupcakes 1x
Description
Homemade Hostess Cupcakes bring back the nostalgic joy of childhood treats, but with a homemade touch that elevates them to a whole new level of deliciousness. These cupcakes are more than just a dessert; they’re a trip down memory lane, offering a perfect balance of moist chocolate cake, creamy filling, and a glossy chocolate ganache. Making these at home allows you to control the ingredients and ensure they’re made with the love and care that store-bought versions often lack.
Ingredients
For the Chocolate Cupcakes:
- 1 ½ cups all-purpose flour
- ¾ cup unsweetened cocoa powder
- 1 ½ cups granulated sugar
- 1 ½ teaspoons baking soda
- ¾ teaspoon baking powder
- ¾ teaspoon salt
- ¾ cup buttermilk, room temperature
- ½ cup vegetable oil
- 2 large eggs, room temperature
- 2 teaspoons vanilla extract
- ¾ cup hot water
Cream Filling:
- ½ cup (1 stick) unsalted butter, softened
- 3 cups powdered sugar
- ½ cup vegetable shortening
- ¼ cup milk
- 2 teaspoons vanilla extract
- Pinch of salt
Chocolate Ganache:
- 8 ounces semi-sweet chocolate, finely chopped
- ¾ cup heavy cream
- 1 tablespoon light corn syrup
Instructions
Prepare the Chocolate Cupcakes:
-
Preheat Oven: Preheat your oven to 350°F (175°C) and line a 12-cup muffin tin with cupcake liners.
-
Combine Dry Ingredients: In a large bowl, whisk together the flour, cocoa powder, sugar, baking soda, baking powder, and salt.
-
Combine Wet Ingredients: In a separate bowl, whisk together the buttermilk, vegetable oil, eggs, and vanilla extract.
-
Combine Wet and Dry: Gradually add the wet ingredients to the dry ingredients, mixing until just combined.
-
Add Hot Water: Slowly pour in the hot water, mixing until the batter is smooth. The batter will be thin.
-
Fill Cupcake Liners: Fill each cupcake liner about two-thirds full.
-
Bake: Bake for 18-20 minutes, or until a toothpick inserted into the center comes out clean.
-
Cool: Let the cupcakes cool in the muffin tin for 5 minutes, then transfer them to a wire rack to cool completely.
Make the Cream Filling:
-
Cream Butter and Shortening: In a large bowl, cream together the softened butter and vegetable shortening until smooth and fluffy.
-
Add Powdered Sugar: Gradually add the powdered sugar, one cup at a time, mixing on low speed until combined.
-
Add Milk and Vanilla: Add the milk, vanilla extract, and salt. Beat on medium speed until the filling is light and fluffy.
-
Transfer to Piping Bag: Transfer the filling to a piping bag fitted with a large round tip.
Prepare the Chocolate Ganache:
-
Heat Heavy Cream: In a small saucepan, heat the heavy cream over medium heat until it just begins to simmer.
-
Pour Over Chocolate: Place the chopped chocolate in a heatproof bowl. Pour the hot heavy cream over the chocolate, and let it sit for 1 minute.
-
Stir Until Smooth: Stir gently until the chocolate is melted and the ganache is smooth and glossy. Add the light corn syrup and stir to combine.
-
Cool Slightly: Let the ganache cool slightly until it thickens to a pourable consistency.
Assemble the Cupcakes:
-
Create Filling Hole: Use a small knife or cupcake corer to create a hole in the center of each cupcake, removing a small cone of cake.
-
Fill with Cream: Pipe the cream filling into the hole of each cupcake, filling it to the top.
-
Dip in Ganache: Dip the top of each cupcake into the cooled chocolate ganache, allowing the excess to drip off.
-
Add Squiggle (Optional): If desired, transfer some of the remaining ganache to a small piping bag fitted with a small round tip and pipe a squiggle across the top of each cupcake.
-
Chill: Place the assembled cupcakes in the refrigerator for at least 30 minutes to allow the ganache to set.
- Prep Time: 45 minutes
Nutrition
- Calories: 350-400 kcal
- Fat: 20g
- Carbohydrates: 45g
- Protein: 4g
Conclusion for Homemade Hostess Cupcakes
Homemade Hostess Cupcakes are a delightful way to recreate a classic treat with a homemade touch. This recipe offers a perfect combination of moist chocolate cake, creamy filling, and a rich chocolate ganache that’s sure to impress. Whether you’re baking for a special occasion or simply craving a nostalgic dessert, these cupcakes are a guaranteed crowd-pleaser.
The satisfaction of making these cupcakes from scratch is truly rewarding. From mixing the batter to piping the filling and dipping them in ganache, every step is filled with joy. Homemade Hostess Cupcakes are more than just a dessert; they’re a labor of love that brings happiness to everyone who enjoys them.
So, gather your ingredients, preheat your oven, and get ready to embark on a baking adventure. You’ll be amazed at how easy and fun it is to create these iconic cupcakes at home. Don’t forget to share your delicious creations and tag me on social media—I love seeing how you make it your own! Enjoy every satisfying bite!