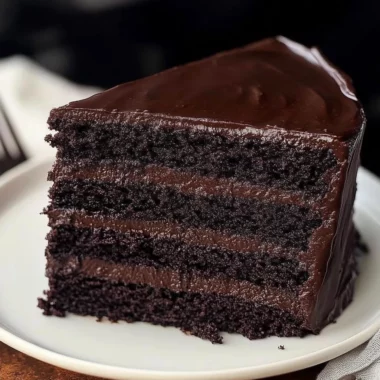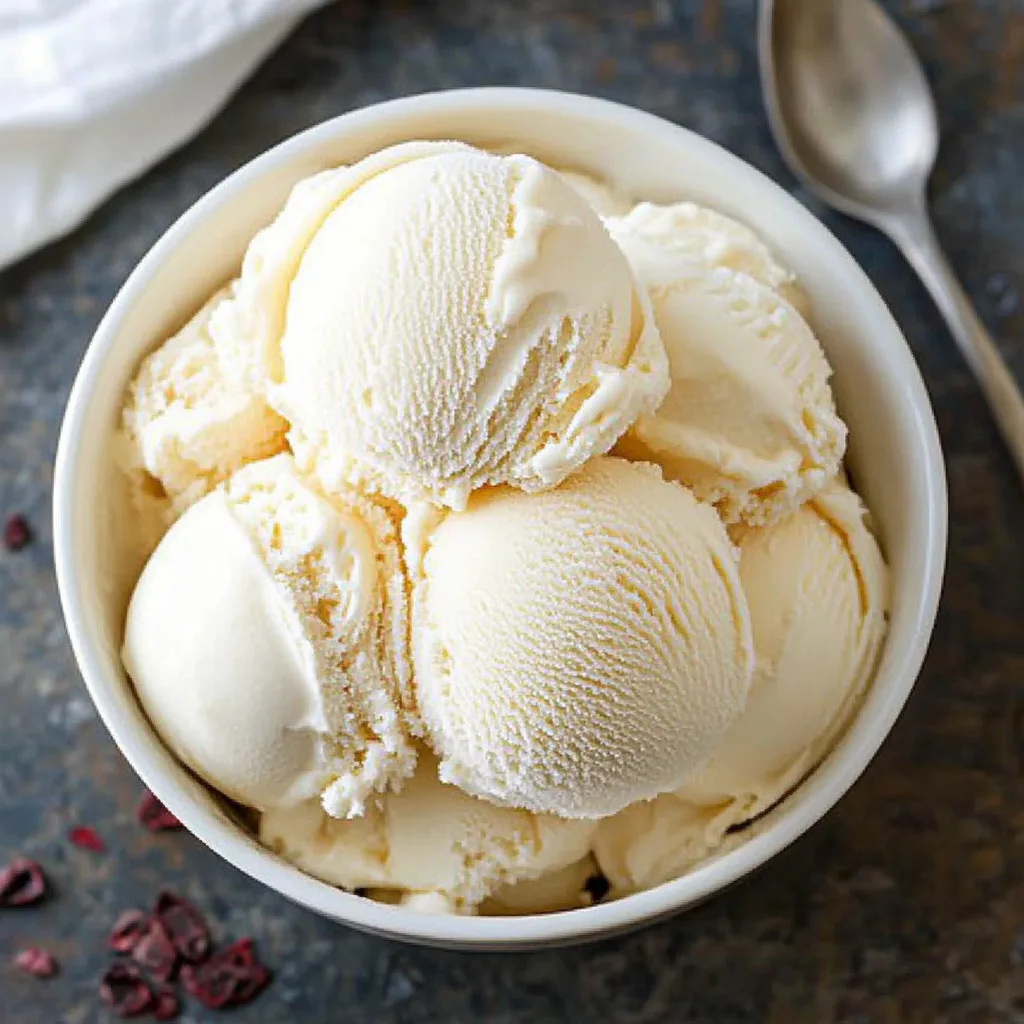
Homemade ice cream is a delightful treat that brings the joy of creamy, frozen flavors right to your kitchen. There’s something magical about creating your own ice cream, allowing you to customize flavors and textures. This incredible dessert can make any occasion special, whether you’re hosting a summer BBQ or simply enjoying a cozy evening at home. You will love the process as much as the end product, and your family and friends will be thrilled to share in your fantastic creation.
If you’ve ever dreamed of tasting a rich, velvety scoop of ice cream made just the way you like it, homemade ice cream is a must-try. This recipe offers a delightful blend of simplicity and decadence, making it approachable for novice cooks and a hit with experienced enthusiasts. The creamy base, combined with your choice of flavors, allows for endless creativity in the kitchen. You can experiment with fruits, chocolates, nuts, and even exotic spices to find the perfect blend.
One of the best parts about homemade ice cream is that it can be adapted to fit any dietary preferences, making it a versatile choice for everyone at your table. Whether you prefer classic vanilla bean, rich chocolate fudge, or even a fruity sorbet, this guide has got you covered. Let’s jump into why you’ll love making your own homemade ice cream and how you can easily whip it up.
Why You’ll Love This Recipe
Homemade ice cream is not just a treat; it’s an experience! Here are some reasons that elevate this recipe:
1. Custom Flavors: You can create any flavor combination that excites your taste buds. From classic chocolate to unique lavender honey, the possibilities are endless.
2. Control Over Ingredients: With homemade ice cream, you know exactly what goes into your dessert. You can choose fresh, organic ingredients and avoid preservatives.
3. It’s Fun for All Ages: Making ice cream can be a fun family activity. Kids will love mixing and pouring, and everyone can enjoy tasting the final product.
4. Perfect for Any Occasion: Homemade ice cream is ideal for summer parties, birthdays, or just a cozy night in. It’s sure to impress guests and family alike.
5. Creative Twists: You can easily incorporate mix-ins like cookies, fruits, or even swirls of caramel and fudge for extra excitement.
6. Absolutely Delicious: There is an undeniable satisfaction that comes with eating something you created yourself. The fresh taste of homemade ice cream is unbeatable.
These factors are just a few reasons why many people rave about homemade ice cream. Once you indulge in your creation, you will surely understand the excitement!
Preparation and Cooking Time
Making homemade ice cream does require some preparation, but the effort is well worth it. Here’s a breakdown of the time required:
– Preparation Time: 10 minutes
– Chilling Time: 2 to 4 hours (or overnight)
– Churning Time: 20-30 minutes
These times can vary based on your ice cream maker and preferences, but this gives you a general idea of how long to set aside for this fun activity.
Ingredients
– 2 cups heavy cream
– 1 cup whole milk
– ¾ cup granulated sugar
– 1 tablespoon pure vanilla extract
– A pinch of salt
– Optional: 1 cup mix-ins (chocolate chips, fruit, nuts, etc.)
Step-by-Step Instructions
Creating your own homemade ice cream is straightforward. Just follow these easy steps:
1. Combine Ingredients: In a large mixing bowl, combine the heavy cream, whole milk, sugar, vanilla extract, and salt. Whisk until the sugar is dissolved.
2. Chill the Mixture: Place the bowl in the refrigerator for at least 2 hours. For the best results, chill it overnight. This helps to develop the flavors.
3. Prepare Your Ice Cream Maker: Make sure your ice cream maker’s bowl is frozen, if applicable. Check the manufacturer’s instructions for specific guidelines.
4. Churn the Ice Cream: Pour the chilled mixture into the ice cream maker. Turn it on and let it churn for about 20-30 minutes or until it reaches a soft-serve consistency.
5. Add Mix-Ins: If you want to incorporate any mix-ins (like chocolate chips or nuts), add them in the last few minutes of churning.
6. Transfer to a Container: Once finished, transfer the ice cream into an airtight container. Smooth the top with a spatula.
7. Freeze: Place the container in the freezer for at least 2-4 hours until the ice cream is firm.
8. Enjoy: Scoop into bowls and savor every bite of your homemade creation!
These steps will help you make a refreshing batch of homemade ice cream that is creamy and delicious!
How to Serve
To make serving your homemade ice cream even more delightful, consider the following tips:
1. Presentation: Serve the ice cream in elegant bowls or cones for a classic touch. Garnish with fresh fruit, mint leaves, or a drizzle of chocolate sauce for added flair.
2. Pairing: Combine your ice cream with complementary desserts like brownies, pie, or fruit tarts for a luxurious dessert experience.
3. Temperature Sensitivity: Ensure that your ice cream is slightly softened before serving. Leave it out at room temperature for a few minutes to make scooping easier.
4. Flavor Combinations: Encourage guests to mix and match flavors. A scoop of vanilla cherry alongside a scoop of chocolate fudge could be a heavenly combination!
5. Utensils: Supply warm water for scooping tools, as it can make serving much easier.
Bringing your homemade ice cream to life in a thoughtful way will enhance the enjoyment for both you and your lucky guests! Enjoy every moment of your delicious creation!
Additional Tips
– Use Fresh Ingredients: High-quality, fresh ingredients make a noticeable difference in flavor. Opt for organic dairy and ripe fruits when possible.
– Keep It Clean: Ensure all utensils and equipment are clean and dry to avoid contamination, which can affect the ice cream’s texture.
– Experiment with Sweeteners: You can replace granulated sugar with honey, maple syrup, or agave for different tastes and health benefits.
– Pre-Chill the Ice Cream Maker: If your ice cream maker requires pre-freezing, make sure it’s been in the freezer long enough before use.
– Test Flavors: Before fully committing to a new flavor, create a small test batch to see if the combination works for you.
Recipe Variation
You can easily modify the basic recipe to create different flavors and textures. Here are a few delightful variations to try:
1. Chocolate Ice Cream: Add ½ cup of unsweetened cocoa powder to the base mixture for a rich chocolate treat.
2. Mint Chocolate Chip: Add 1 teaspoon of peppermint extract and fold in 1 cup of chocolate chips during the last few minutes of churning.
3. Fruit Sorbet: Replace the dairy with 2 cups of pureed fruit (like strawberries or mango) and increase the sugar to 1 cup for a refreshing sorbet alternative.
4. Coffee Flavor: Mix in ½ cup of brewed espresso or strong coffee to the base mixture for a delicious caffeine kick.
5. Nutty Ice Cream: Add 1 cup of finely chopped nuts to the mixture. Experiment with different nuts like pistachios or walnuts for unique flavors.
Freezing and Storage
– Storage: Keep homemade ice cream in an airtight container to minimize air exposure and prevent ice crystals from forming. It can last for 2-3 weeks in the freezer.
– Serving: If the ice cream is too hard, let it sit at room temperature for a few minutes before scooping. This softens it without compromising texture.
– Portioning: For easier serving later, consider scooping your ice cream into individual portions and freezing them in muffin tins or silicone molds.
Special Equipment
For making homemade ice cream efficiently, consider the following equipment:
– Ice Cream Maker: A dedicated machine can simplify the churning process and improve the texture of the ice cream.
– Mixing Bowls: Have at least two bowls for mixing and chilling your base ingredients.
– Whisk: A good whisk is essential for mixing ingredients smoothly.
– Spatula: Use a rubber spatula for transferring ingredients and scraping the bowl clean.
– Airtight Container: Make sure to have suitable containers on hand for storing ice cream once it’s churned.
Frequently Asked Questions
Can I make homemade ice cream without an ice cream maker?
Yes! You can use a blender or food processor to churn the base. After mixing, pour it into a container and freeze, stirring every 30 minutes until it reaches the desired consistency.
How can I make my ice cream creamier?
Using a higher fat content in base ingredients, such as heavy cream or whole milk, helps achieve a creamier texture. Additionally, adding a couple of tablespoons of alcohol can help reduce the formation of ice crystals, resulting in smoother ice cream.
What if my ice cream becomes icy?
Icy texture can occur from improper storage or environmental changes in the freezer. Ensure the ice cream is stored in an airtight container and that your freezer maintains a consistent temperature below 0°F (-18°C).
How can I incorporate mix-ins without them sinking to the bottom?
Add mix-ins in the last 5 minutes of churning to help distribute them evenly throughout the ice cream.
Why did my ice cream not churn properly?
The most common reason is that the ice cream mixture wasn’t cold enough before churning. Always ensure that your mixture is adequately chilled and that your ice cream maker’s bowl is frozen beforehand if required.
Conclusion
Homemade ice cream is a delightful experience that not only brings joy but allows for endless creativity in flavors and styles. By following this ultimate recipe, you’ll not only be able to indulge in a creamy, delicious dessert but also impress family and friends with your newfound skills. Whether you choose classic flavors or adventurous variations, the satisfaction of enjoying a treat made by your own hands is unbeatable. Embrace the process of making homemade ice cream, and savor every delicious scoop!

Homemade Ice Cream: The Amazing Ultimate Recipe for All Ages
- Total Time: 35 minutes
Ingredients
– 2 cups heavy cream
– 1 cup whole milk
– ¾ cup granulated sugar
– 1 tablespoon pure vanilla extract
– A pinch of salt
– Optional: 1 cup mix-ins (chocolate chips, fruit, nuts, etc.)
Instructions
Creating your own homemade ice cream is straightforward. Just follow these easy steps:
1. Combine Ingredients: In a large mixing bowl, combine the heavy cream, whole milk, sugar, vanilla extract, and salt. Whisk until the sugar is dissolved.
2. Chill the Mixture: Place the bowl in the refrigerator for at least 2 hours. For the best results, chill it overnight. This helps to develop the flavors.
3. Prepare Your Ice Cream Maker: Make sure your ice cream maker’s bowl is frozen, if applicable. Check the manufacturer’s instructions for specific guidelines.
4. Churn the Ice Cream: Pour the chilled mixture into the ice cream maker. Turn it on and let it churn for about 20-30 minutes or until it reaches a soft-serve consistency.
5. Add Mix-Ins: If you want to incorporate any mix-ins (like chocolate chips or nuts), add them in the last few minutes of churning.
6. Transfer to a Container: Once finished, transfer the ice cream into an airtight container. Smooth the top with a spatula.
7. Freeze: Place the container in the freezer for at least 2-4 hours until the ice cream is firm.
8. Enjoy: Scoop into bowls and savor every bite of your homemade creation!
These steps will help you make a refreshing batch of homemade ice cream that is creamy and delicious!
- Prep Time: 15 minutes
- Cook Time: 20 minutes
Nutrition
- Serving Size: 6
- Calories: 370 kcal
- Fat: 30g
- Protein: 4g