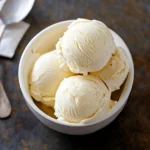
Homemade Vanilla Ice Cream is a timeless treat that brings joy with every scoop. The smooth, rich texture paired with the sweet, aromatic flavor is simply irresistible. Making your own homemade ice cream allows you to control the ingredients, ensuring an amazing dessert experience that is both delicious and satisfying. Plus, there’s something incredibly rewarding about crafting this classic treat from scratch. Whether you’re serving it on a hot summer day or enjoying it during the winter months, homemade vanilla ice cream is sure to delight everyone.
If you’ve ever purchased store-bought ice cream, you know it can’t quite compare to the freshness of a homemade version. The first time you taste it, you’ll likely agree that this dessert transcends the average scoop. This recipe not only gives you the basics of making ice cream but also invites you to play with flavors and toppings. Whether you’re an experienced home chef or a complete beginner, this incredible recipe will assure you a hefty scoop of joy. Get ready to impress your family and friends with your very own homemade vanilla ice cream!
In the sections that follow, we’ll dive into why this recipe is a must-try, how long it takes to prepare, the simple ingredients you’ll need, and a step-by-step guide to making ice cream that will have everyone asking for more.
Why You’ll Love This Recipe
Homemade Vanilla Ice Cream is beloved by many for several compelling reasons. Here are just a few:
1. Fresh Ingredients – You know exactly what’s going into your ice cream, leaving out any preservatives or artificial ingredients.
2. Customizable – Feel free to experiment by adding in your favorite mix-ins, such as chocolate chips, fruit, or nuts.
3. Simple Process – The steps are straightforward, making it easy for anyone to follow along.
4. Perfect for Any Occasion – Whether it’s for a birthday, summer barbecue, or a cozy family night, ice cream is always a hit.
5. Satisfies Sweet Cravings – There’s nothing quite like indulging in a rich bowl of homemade vanilla ice cream.
These aspects highlight why so many ice cream enthusiasts love to make their own version at home.
Preparation and Cooking Time
Making homemade vanilla ice cream typically involves minimal active cooking time but requires some freezing time to set perfectly. Here’s a breakdown of the time needed:
– Preparation Time: 15 minutes
– Chilling Time: 1 to 2 hours (for the custard)
– Freezing Time: 4 to 6 hours (for the ice cream)
In total, you’re looking at about 4 to 6 hours from start to finish, but the actual hands-on time is quite short.
Ingredients
– 2 cups heavy cream
– 1 cup whole milk
– ¾ cup granulated sugar
– 1 tablespoon pure vanilla extract
– ½ teaspoon salt
– 4 large egg yolks (optional for custard base)
Step-by-Step Instructions
Creating your very own homemade vanilla ice cream can be a delightful experience. Follow these simple steps to achieve the perfect treat:
1. Combine Dairy: In a medium saucepan, combine the heavy cream and whole milk. Heat over low-medium heat until the mixture is warm but not boiling.
2. Mix Sugar: Stir in the granulated sugar and salt until fully dissolved. Remove from heat.
3. Make a Custard (Optional): If using egg yolks for a custard base, in a separate bowl, whisk together the egg yolks. Gradually add a small amount of the warm cream mixture to the yolks to temper them, then slowly pour the yolk mixture back into the saucepan. Cook over low heat until the custard thickens slightly (about 5-7 minutes).
4. Flavor It Up: Stir in the vanilla extract, mixing well to ensure an even distribution of flavor.
5. Chill the Mixture: Transfer the mixture to a bowl and refrigerate for at least 1-2 hours until completely chilled.
6. Churn in Ice Cream Maker: Pour the chilled mixture into an ice cream maker and churn according to the manufacturer’s instructions, usually around 20-25 minutes.
7. Transfer to Freezer Container: Once the ice cream has thickened, transfer it to an airtight container.
8. Freeze: Place in the freezer for at least 4-6 hours to firm up further.
9. Serve: Scoop and enjoy your homemade vanilla ice cream!
How to Serve
Serving homemade vanilla ice cream can be just as fun as making it. Consider the following ideas to elevate your serving experience:
1. Best Presentation: Serve in waffle cones or elegant bowls for a polished look.
2. Delicious Toppings: Offer a variety of toppings, including sprinkles, chocolate syrup, fresh fruit, or whipped cream.
3. Sundae Bar: Create a sundae bar with various toppings for your guests to customize their own desserts.
4. Pair with Desserts: This ice cream pairs wonderfully with brownies, pie, or cake for added indulgence.
5. Creative Flavors: If you feel adventurous, mix in various flavors or swirl in sauces right before freezing!
With these simple serving suggestions, you can turn any occasion into a delightful ice cream celebration. Enjoy your homemade masterpiece!
Additional Tips
– Use Quality Vanilla: Opt for pure vanilla extract instead of synthetic flavoring for an authentic taste.
– Pre-Chill Your Ice Cream Maker: If possible, chill your ice cream maker’s bowl overnight for better consistency.
– Keep It Natural: Consider using organic ingredients to enhance flavors and ensure a wholesome dessert.
– Experiment with Sweeteners: Feel free to use honey or agave syrup for a different sweetness profile.
– Make It Dairy-Free: Use coconut cream or almond milk in place of dairy to cater to different dietary needs.
Recipe Variation
Mix things up with these delightful variations of homemade vanilla ice cream:
1. Chocolate Swirl: Melt dark chocolate and create swirls in your churned ice cream before freezing.
2. Berry Infusion: Add a cup of fresh or frozen berries into the mixture before churning for a fruity twist.
3. Coffee Flavor: Stir in a tablespoon of instant coffee or espresso powder to the cream mixture for a coffee-flavored ice cream.
4. Minty Fresh: Add a few drops of peppermint extract during the flavoring step to create a refreshing mint ice cream.
5. Spiced Pumpkin: Incorporate pumpkin puree and a blend of spices for a seasonal treat that’s perfect for fall.
Freezing and Storage
– Storage: Ensure your homemade ice cream is kept in an airtight container in the freezer. It will stay fresh for about 1-2 weeks.
– Avoid Ice Crystals: To prevent ice crystals from forming, press a piece of parchment paper directly on the surface before sealing the container.
– Scoop with Ease: If the ice cream is too hard, let it sit at room temperature for a few minutes before scooping.
Special Equipment
To create your delicious homemade vanilla ice cream, you’ll need a few essential tools:
– Ice cream maker
– Medium saucepan for mixing ingredients
– Whisk for combining the egg yolks (if used)
– Mixing bowls for cooling and preparing the mixture
– Airtight container for freezing
Frequently Asked Questions
How can I make my ice cream smoother?
Ensure that your mixture is chilled thoroughly before churning it. This can significantly improve the texture.
Can I use a blender instead of an ice cream maker?
Yes, you can use a high-powered blender to mix ingredients but the texture will differ. You might need to periodically stir the mixture while it freezes.
What can I do if my ice cream is too hard after freezing?
Let the ice cream sit at room temperature for several minutes before serving. This will soften it enough for easy scooping.
Is it safe to eat raw egg yolks in the custard?
If you are concerned about using raw eggs, consider pasteurized eggs or opt for an egg-free recipe.
Can I make this ice cream without an ice cream maker?
Absolutely! Pour the mixture into a shallow dish, freeze, and stir every 30 minutes for the first 2-3 hours to break up the ice crystals.
Conclusion
Homemade vanilla ice cream is a charming delicacy that will undoubtedly elevate your dessert repertoire. With its creamy texture and delightful flavor, it’s perfect for any gathering or a simple treat at home. By following this comprehensive recipe, you’ll not only impress your loved ones but also experience the joy of creating something delicious from scratch. Enjoy every scoop of your homemade vanilla ice cream!
Homemade Vanilla Ice Cream: An Incredible Ultimate Recipe
- Total Time: 22 minutes
Ingredients
– 2 cups heavy cream
– 1 cup whole milk
– ¾ cup granulated sugar
– 1 tablespoon pure vanilla extract
– ½ teaspoon salt
– 4 large egg yolks (optional for custard base)
Instructions
Creating your very own homemade vanilla ice cream can be a delightful experience. Follow these simple steps to achieve the perfect treat:
1. Combine Dairy: In a medium saucepan, combine the heavy cream and whole milk. Heat over low-medium heat until the mixture is warm but not boiling.
2. Mix Sugar: Stir in the granulated sugar and salt until fully dissolved. Remove from heat.
3. Make a Custard (Optional): If using egg yolks for a custard base, in a separate bowl, whisk together the egg yolks. Gradually add a small amount of the warm cream mixture to the yolks to temper them, then slowly pour the yolk mixture back into the saucepan. Cook over low heat until the custard thickens slightly (about 5-7 minutes).
4. Flavor It Up: Stir in the vanilla extract, mixing well to ensure an even distribution of flavor.
5. Chill the Mixture: Transfer the mixture to a bowl and refrigerate for at least 1-2 hours until completely chilled.
6. Churn in Ice Cream Maker: Pour the chilled mixture into an ice cream maker and churn according to the manufacturer’s instructions, usually around 20-25 minutes.
7. Transfer to Freezer Container: Once the ice cream has thickened, transfer it to an airtight container.
8. Freeze: Place in the freezer for at least 4-6 hours to firm up further.
9. Serve: Scoop and enjoy your homemade vanilla ice cream!
- Prep Time: 15 minutes
- Cook Time: 7 minutes
Nutrition
- Serving Size: 6
- Calories: 250 kcal
- Fat: 18g
- Protein: 3g