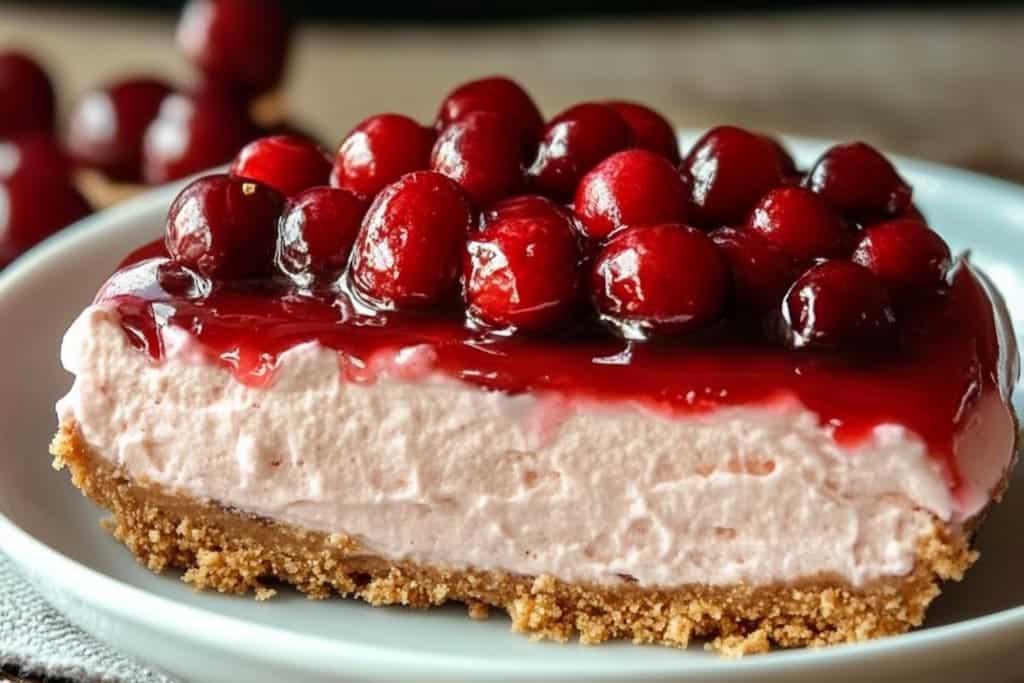
No-Bake Cherry Cheesecake Lush is a creamy and decadent dessert that will wow your taste buds and elevate any gathering. This delightful dessert combines layers of velvety cream cheese, cherry pie filling, and a crunchy crust that will entice anyone who takes a bite. Not only is this recipe simple to prepare, but it also requires no baking, making it an ideal choice for hot summer days or impromptu celebrations. The combination of sweet and tangy flavors is sure to impress your family and friends, making it a go-to recipe that evokes feelings of happiness and indulgence.
Imagine a dessert so luscious and appealing that everyone at the table can’t resist a second serving. No-Bake Cherry Cheesecake Lush captures that essence beautifully, with its vibrant cherry topping contrasting perfectly against the smooth, creamy base. This dessert is not just about taste; it’s a multi-layered treat that offers a feast for the eyes as well.
Whether you’re hosting a weekend barbecue, celebrating a holiday, or simply wanting a sweet treat at home, this No-Bake Cherry Cheesecake Lush will fit the occasion perfectly. Let’s dive into the reasons why this dessert stands out, how you can make it, and the best way to serve this irresistible treat!
Why You’ll Love This Recipe
No-Bake Cherry Cheesecake Lush is a crowd-pleaser and offers several reasons to fall in love with it:
1. Simple Ingredients – Most ingredients are pantry staples, making it easy and convenient to whip up.
2. No-Bake – This dessert requires no baking, saving you time and keeping your kitchen cooler on warm days.
3. Versatile Layers – You can easily customize the layers with different flavors of pie filling or even add fruit.
4. Quick Preparation – Assemble in about 30 minutes, making it a fantastic last-minute dessert option.
5. Impressive Presentation – The layered look is beautiful and makes a stunning visual impact at any gathering.
6. Great Make-Ahead Option – It can be prepared a day in advance, allowing the flavors to meld together beautifully.
With so many appealing features, it’s easy to see why No-Bake Cherry Cheesecake Lush captures hearts wherever it goes. Each spoonful you take is a decadent experience filled with delightful flavors and creamy textures.
Preparation and Cooking Time
The following breakdown outlines the time required to make this delicious No-Bake Cherry Cheesecake Lush:
– Preparation Time: 30 minutes
– Chilling Time: 4-6 hours (or overnight)
– Total Time: Approximately 4 hours and 30 minutes (including chilling)
This timeline gives you a good idea of how to fit this recipe into your schedule, ensuring it’s ready when you need it!
Ingredients
– 1 ½ cups graham cracker crumbs
– ½ cup granulated sugar
– ½ cup unsalted butter, melted
– 1 (8-ounce) package cream cheese, softened
– 1 cup powdered sugar
– 1 (12-ounce) container whipped topping, thawed
– 1 (21-ounce) can cherry pie filling
– 1 teaspoon vanilla extract
– Optional: Fresh cherries for garnish
Step-by-Step Instructions
Creating No-Bake Cherry Cheesecake Lush is straightforward. Follow these steps for the perfect dessert:
1. Prepare the Crust: In a medium bowl, mix graham cracker crumbs, granulated sugar, and melted butter until combined. Press this mixture into the bottom of a 9×13-inch baking dish to form the crust.
2. Make the Cream Cheese Layer: In a large bowl, beat the softened cream cheese and powdered sugar together until smooth. Add in the vanilla extract and mix until fully incorporated.
3. Incorporate Whipped Topping: Gently fold in the thawed whipped topping into the cream cheese mixture until well combined. This will give the cheesecakey layers their fluffiness.
4. Layer the Cream Cheese Mixture: Spread half of the cream cheese mixture evenly over the crust in the baking dish.
5. Add Cherry Filling: Spoon half of the cherry pie filling over the cream cheese layer, spreading it evenly to cover.
6. Repeat Layers: Add the remaining cream cheese mixture on top of the cherry layer, smoothing it out. Finish with the remaining cherry pie filling, ensuring an even layer on top.
7. Chill: Cover the dish with plastic wrap and refrigerate for at least 4-6 hours, or overnight, to allow the layers to set properly.
8. Serve: Once set, slice into squares and, if desired, garnish with fresh cherries before serving.
These simple yet effective steps will lead you to create a stunning No-Bake Cherry Cheesecake Lush that will leave everyone craving more.
How to Serve
Serving No-Bake Cherry Cheesecake Lush can enhance your dessert presentation. Follow these tips for an impressive serving experience:
1. Presentation Plate: Use a unique serving dish or cake stand to elevate the look of the dessert. A decorative platter can add a touch of elegance.
2. Garnishes: Consider garnishing each slice with a fresh cherry or a dollop of whipped cream for an extra creamy element.
3. Serving Sizes: Cut the dessert into small squares to encourage guests to take multiple servings, creating an atmosphere of indulgence.
4. Beverage Pairing: This delicious dessert pairs wonderfully with coffee, tea, or a glass of chilled dessert wine for a luxurious touch.
By paying attention to how you serve No-Bake Cherry Cheesecake Lush, you can elevate the dining experience for everyone. Remember, the key is not just in the taste but also in the presentation!
In conclusion, No-Bake Cherry Cheesecake Lush is an amazing and decadent dessert that surely deserves a spot in your recipe repertoire. Its stunning visual appeal, alongside its creamy textures and delicious flavors, makes it a versatile choice for any occasion. Don’t hesitate to try this simple and delightful dessert; you’ll find that it quickly becomes a favorite among family and friends!
Additional Tips
– Use Quality Cream Cheese: For a smoother and creamier texture, choose a high-quality cream cheese. This will make a noticeable difference in the final flavor of your No-Bake Cherry Cheesecake Lush.
– Pat Down the Crust: When pressing the graham cracker crust into the dish, use the bottom of a measuring cup for even pressure. This ensures a well-formed base that holds together once set.
– Chilling is Key: Allow the dessert ample chilling time. A minimum of 4-6 hours is crucial for the layers to set properly and for the flavors to meld together.
– Experiment with Toppings: Beyond cherry pie filling, consider using other fruits or even chocolate sauce for a different flavor profile. Fresh berries can add a delightful tartness.
Recipe Variation
Feel free to explore these delightful variations of No-Bake Cherry Cheesecake Lush:
1. Different Fruit Fillings: Swap the cherry pie filling for blueberry, strawberry, or raspberry for a unique take on this classic dessert.
2. Chocolate Lover’s Version: Incorporate melted chocolate into the cream cheese mixture for a rich chocolate layer. Top with chocolate shavings for presentation.
3. Nutty Crunch Layer: Add a layer of crushed nuts, like walnuts or pecans, between the cream cheese layer and cherry filling for added texture and flavor.
4. Key Lime Dream: Substitute lime juice for the vanilla extract in the cream cheese layer and use key lime pie filling instead of cherry for a refreshing twist.
Freezing and Storage
– Storage: To keep your No-Bake Cherry Cheesecake Lush fresh, store it in an airtight container in the refrigerator. It will stay good for 4-5 days.
– Freezing: You can freeze this dessert for up to 3 months. Cut it into squares and wrap tightly in plastic wrap, followed by aluminum foil to prevent freezer burn.
Special Equipment
To prepare your No-Bake Cherry Cheesecake Lush, you’ll need a few essential tools:
– 9×13-inch baking dish
– Mixing bowls
– Electric mixer (for the cream cheese layer)
– Rubber spatula (for folding in whipped topping)
– Measuring cups and spoons
Frequently Asked Questions
Can I make this dessert vegan?
Yes! You can use dairy-free cream cheese and whipped topping alternatives, along with a vegan crust made from crushed vegan cookies.
How should I serve it?
For best presentation, slice into small squares and use a spatula to serve. Garnish each square with fresh cherries or a sprig of mint.
What can I do if my cream cheese mixture is lumpy?
Make sure your cream cheese is at room temperature before mixing. If lumps persist, blend the mixture with an electric mixer until smooth.
Can I use a store-bought crust?
Absolutely! A store-bought graham cracker crust can save time, just make sure it fits the dimensions of your baking dish.
Is this dessert gluten-free?
You can make it gluten-free by substituting the graham cracker crumbs with gluten-free crackers or oatmeal.
Conclusion
The No-Bake Cherry Cheesecake Lush is a delightful addition to any dessert table. With its creamy layers and luscious cherry topping, it’s not just a treat for the palate but also a feast for the eyes. This dessert is easy to prepare, requiring no baking and minimal effort. Perfect for warm days or special occasions, each bite is a bite of pure bliss. With customizable options and straightforward instructions, this dessert guarantees to impress everyone who tries it.
No-Bake Cherry Cheesecake Lush: An Amazing Ultimate Recipe
- Total Time: 30 minutes
Ingredients
– 1 ½ cups graham cracker crumbs
– ½ cup granulated sugar
– ½ cup unsalted butter, melted
– 1 (8-ounce) package cream cheese, softened
– 1 cup powdered sugar
– 1 (12-ounce) container whipped topping, thawed
– 1 (21-ounce) can cherry pie filling
– 1 teaspoon vanilla extract
– Optional: Fresh cherries for garnish
Instructions
Creating No-Bake Cherry Cheesecake Lush is straightforward. Follow these steps for the perfect dessert:
1. Prepare the Crust: In a medium bowl, mix graham cracker crumbs, granulated sugar, and melted butter until combined. Press this mixture into the bottom of a 9×13-inch baking dish to form the crust.
2. Make the Cream Cheese Layer: In a large bowl, beat the softened cream cheese and powdered sugar together until smooth. Add in the vanilla extract and mix until fully incorporated.
3. Incorporate Whipped Topping: Gently fold in the thawed whipped topping into the cream cheese mixture until well combined. This will give the cheesecakey layers their fluffiness.
4. Layer the Cream Cheese Mixture: Spread half of the cream cheese mixture evenly over the crust in the baking dish.
5. Add Cherry Filling: Spoon half of the cherry pie filling over the cream cheese layer, spreading it evenly to cover.
6. Repeat Layers: Add the remaining cream cheese mixture on top of the cherry layer, smoothing it out. Finish with the remaining cherry pie filling, ensuring an even layer on top.
7. Chill: Cover the dish with plastic wrap and refrigerate for at least 4-6 hours, or overnight, to allow the layers to set properly.
8. Serve: Once set, slice into squares and, if desired, garnish with fresh cherries before serving.
These simple yet effective steps will lead you to create a stunning No-Bake Cherry Cheesecake Lush that will leave everyone craving more.
- Prep Time: 30 minutes
- Cook Time: 0 minutes
Nutrition
- Serving Size: 12 servings
- Calories: 320 kcal
- Fat: 13g
- Protein: 4g