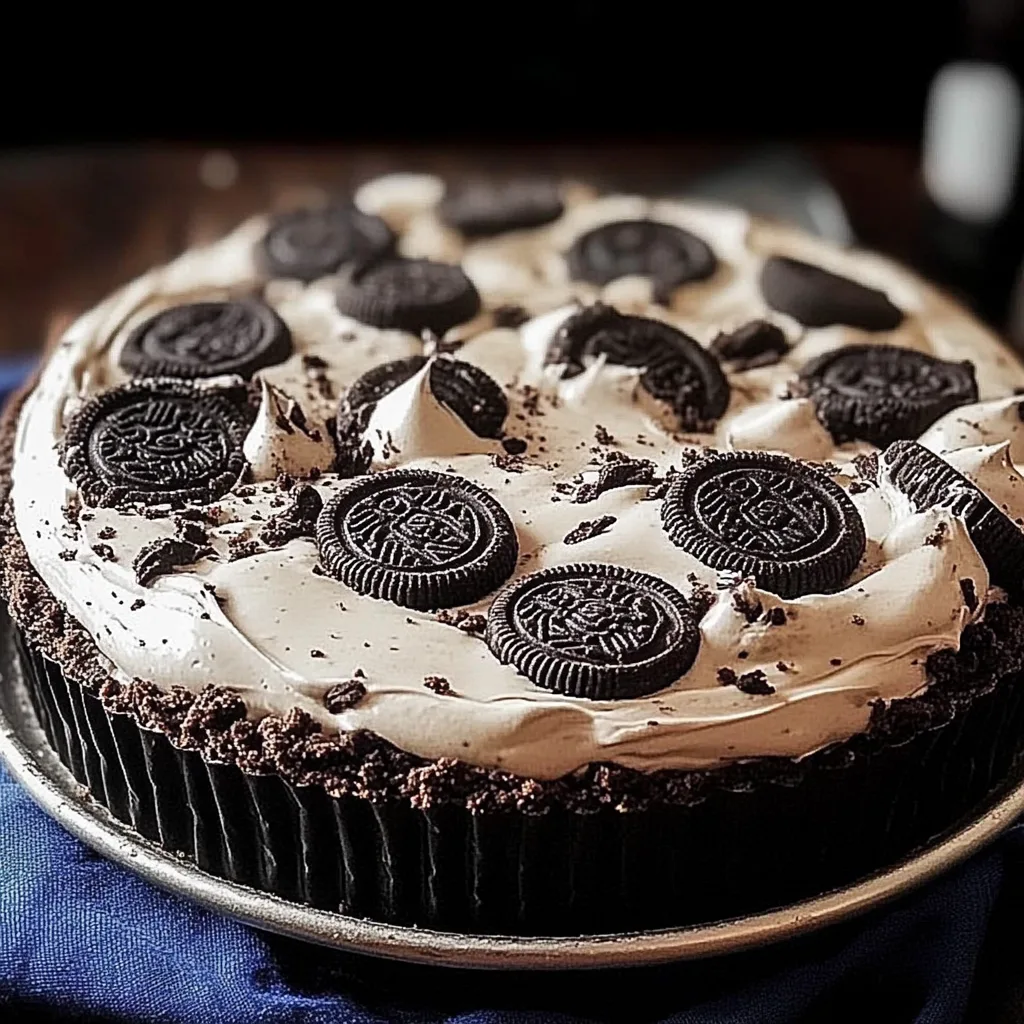
No-Bake Oreo Mud Pie is an incredible dessert that brings together rich flavors and a delightful cookie crust to create a treat that everyone will love. This indulgent pie requires no baking, making it an accessible option for all kinds of occasions. With its creamy filling and chocolatey goodness, it immediately captivates the senses and delivers a wonderful experience for your taste buds. Best of all, it’s perfect for both casual gatherings and special celebrations.
Imagine biting into a luscious slice of No-Bake Oreo Mud Pie, where velvety layers of cream and chocolate harmonize with the crunch of Oreos. This dessert is not just a dessert; it’s a celebration of flavors and textures that meld together flawlessly. If you’re in search of a quick and easy sweet treat that will leave an impression, look no further. This guide will take you through everything you need to know to create this delightful pie, from its simple preparation to serving suggestions.
When you think about dessert, the first things that come to mind might be complicated recipes, lengthy baking times, and elaborate presentations. However, the No-Bake Oreo Mud Pie flips these expectations on their head. It combines simple ingredients to create an amazing dessert that requires minimal effort yet delivers maximum satisfaction. You don’t have to be a professional chef to whip this up, making it an inviting option for bakers of all skill levels. So, let’s dive into what makes No-Bake Oreo Mud Pie a must-try recipe!
Why You’ll Love This Recipe
No-Bake Oreo Mud Pie embodies everything we crave in dessert—deliciousness, texture, and ease. Here are some reasons you’ll fall head over heels for this recipe:
1. No-Baking Required: Save time and energy! This pie requires no baking, making it a breeze to prepare.
2. Rich Flavor: The combination of chocolate, cream, and Oreo cookies creates an irresistible flavor explosion.
3. Versatile: You can customize the filling by adding layers of different flavors or toppings to suit your taste.
4. Perfect for Any Occasion: Whether it’s a birthday party, family gathering, or just a casual evening at home, this pie fits right in.
5. Easy Instructions: Even novice bakers will find the step-by-step guide simple to follow.
6. Crowd-Pleasing Dessert: Its delightful appearance and incredible flavor make it a hit among family and friends.
These elements ensure that your experience with No-Bake Oreo Mud Pie is one to remember. With each bite, you’re not just enjoying dessert; you’re treating yourself to an extraordinary blend of flavors that evokes pure happiness.
Preparation and Cooking Time
Creating the No-Bake Oreo Mud Pie is a straightforward process that can be completed swiftly, allowing you to enjoy your dessert without a lengthy wait. Here’s how the time breaks down:
– Preparation Time: 20 minutes
– Chilling Time: 4 hours (or overnight for best results)
– Total Time: 4 hours and 20 minutes (including chilling)
These times can vary slightly based on your kitchen setup, but the framework provides a good estimate for your scheduling.
Ingredients
– 24 Oreo cookies (plus additional for garnish)
– 1/2 cup unsalted butter, melted
– 1 package (8 oz) cream cheese, softened
– 1 cup powdered sugar
– 2 cups heavy whipping cream
– 1 cup chocolate ganache (prepared or store-bought)
– 1 tsp vanilla extract
– 1/4 cup chocolate chips (optional, for garnish)
Step-by-Step Instructions
Preparing No-Bake Oreo Mud Pie is a fun and simple process. Follow these steps for an outstanding result:
1. Prepare Crust: Crush 24 Oreo cookies in a food processor or by hand until they form fine crumbs. Combine crumbs with the melted butter until well-mixed. Press the mixture firmly into the bottom of a 9-inch pie dish to create the crust. Set aside.
2. Mix Cream Cheese: In a medium bowl, beat the softened cream cheese with an electric mixer until smooth and creamy. Gradually add the powdered sugar, mixing until combined.
3. Add Whipping Cream: In a separate bowl, whip the heavy cream until stiff peaks form. Gently fold the whipped cream into the cream cheese mixture until combined. This will add a light and airy texture to your filling.
4. Combine Layers: Carefully spread half of the cream cheese filling evenly over the Oreo crust you prepared. Then, drizzle half of the chocolate ganache over the filling. Repeat the layers with the remaining filling and ganache.
5. Chill: Cover the pie with plastic wrap and refrigerate for at least 4 hours, preferably overnight. This step allows the pie to set properly, enhancing the flavors.
6. Garnish: Before serving, crush a few extra Oreo cookies and sprinkle them on top of the pie as a garnish. For an added touch of sweetness, you may also sprinkle chocolate chips over the top.
How to Serve
Serving No-Bake Oreo Mud Pie can turn a simple dessert into a memorable experience. Here are some tips to make your serving stand out:
1. Presentation: Use a pie server or spatula to cut neat slices and present them on individual dessert plates. A beautiful pie dish enhances the visual appeal!
2. Accompaniments: Consider pairing the pie with fresh whipped cream, berries, or a drizzle of additional chocolate ganache for an extra touch of flavor.
3. Serving Size: Ensure the slices are generous but not overwhelming, as this pie is rich and satisfying. Smaller portions encourage guests to come back for seconds!
4. Chilled Bonus: Serve the pie cold for the best experience. Chilled desserts can be particularly refreshing and delightful, especially in warmer weather.
By keeping these serving tips in mind, you can elevate the experience of enjoying No-Bake Oreo Mud Pie, ensuring that it is just as impressive as it is delicious!
Additional Tips
– Use Quality Ingredients: For the best flavor, choose high-quality Oreo cookies and cream cheese. The creaminess of the cheese elevates the overall taste.
– Chill Thoroughly: Allowing the pie to chill for at least four hours—or overnight—ensures it sets perfectly, enhancing flavor and texture.
– Garnish Creatively: Get creative with your garnishes! Consider using mini Oreo cookies or chocolate shavings for added flair.
– Experiment with Layers: Don’t hesitate to introduce different layers of flavor or consistency in your filling. A layer of peanut butter or caramel adds an exciting twist.
– Keep it Fresh: If you’re making this dessert ahead of time, cover it securely to prevent it from absorbing odors from the fridge.
Recipe Variation
Feel free to switch things up! Here are a few variations to try:
1. Mint Oreo Twist: Use mint-flavored Oreo cookies for a refreshing variation. This gives the pie a tasty minty kick.
2. Peanut Butter Layer: Add a layer of creamy peanut butter between the chocolate filling layers for a delightful peanut butter-chocolate combination.
3. Fruit Addition: Incorporate a layer of fresh raspberries or strawberries between the layers for a burst of fruity flavor.
4. Vegan Option: Replace cream cheese with a vegan alternative and use dairy-free whipped cream to make a delicious vegan No-Bake Oreo Mud Pie.
Freezing and Storage
– Storage: Keep the No-Bake Oreo Mud Pie covered in the refrigerator to maintain its freshness. It can last for up to 5 days.
– Freezing: You can freeze this pie for up to 3 months. Ensure you wrap it properly to prevent freezer burn and thaw in the refrigerator before serving.
Special Equipment
You will need a few essential tools to prepare this delightful pie successfully:
– Food processor or rolling pin for crushing Oreos
– Mixing bowls to combine the ingredients
– Electric mixer for a smooth filling
– 9-inch pie dish to assemble and set the pie
– Plastic wrap to cover and chill the pie
Frequently Asked Questions
How can I tell if the pie is set?
Gently shake the pie dish; if the filling is firm and does not jiggle, it is set and ready to serve.
Can I make this recipe gluten-free?
Yes! Use gluten-free Oreo cookies to make the pie suitable for a gluten-free diet.
How should I serve the pie?
Serve the pie cold for the best experience. You can accompany it with additional whipped cream or fresh fruit for added flavor.
How long does it take for this pie to chill?
The pie should chill for at least 4 hours, but for the best flavor, it’s recommended to let it sit overnight.
Can I use homemade ganache?
Absolutely! A homemade chocolate ganache can add a personal touch, enhancing the flavor even more.
Conclusion
No-Bake Oreo Mud Pie is the perfect balance of creamy and crunchy, making it an irresistible dessert for any occasion. Its ease of preparation and decadent flavor profile ensure it will be a hit among family and friends. Whether you are hosting a celebration or simply want to treat yourself, this dessert will deliver a delightful experience. Don’t hesitate to get creative with variations and presentation, as this pie is versatile and inviting. Satisfaction is just a slice away!

No-Bake Oreo Mud Pie: The Ultimate Amazing Recipe
- Total Time: 0 hours
Ingredients
– 24 Oreo cookies (plus additional for garnish)
– 1/2 cup unsalted butter, melted
– 1 package (8 oz) cream cheese, softened
– 1 cup powdered sugar
– 2 cups heavy whipping cream
– 1 cup chocolate ganache (prepared or store-bought)
– 1 tsp vanilla extract
– 1/4 cup chocolate chips (optional, for garnish)
Instructions
Preparing No-Bake Oreo Mud Pie is a fun and simple process. Follow these steps for an outstanding result:
1. Prepare Crust: Crush 24 Oreo cookies in a food processor or by hand until they form fine crumbs. Combine crumbs with the melted butter until well-mixed. Press the mixture firmly into the bottom of a 9-inch pie dish to create the crust. Set aside.
2. Mix Cream Cheese: In a medium bowl, beat the softened cream cheese with an electric mixer until smooth and creamy. Gradually add the powdered sugar, mixing until combined.
3. Add Whipping Cream: In a separate bowl, whip the heavy cream until stiff peaks form. Gently fold the whipped cream into the cream cheese mixture until combined. This will add a light and airy texture to your filling.
4. Combine Layers: Carefully spread half of the cream cheese filling evenly over the Oreo crust you prepared. Then, drizzle half of the chocolate ganache over the filling. Repeat the layers with the remaining filling and ganache.
5. Chill: Cover the pie with plastic wrap and refrigerate for at least 4 hours, preferably overnight. This step allows the pie to set properly, enhancing the flavors.
6. Garnish: Before serving, crush a few extra Oreo cookies and sprinkle them on top of the pie as a garnish. For an added touch of sweetness, you may also sprinkle chocolate chips over the top.
- Prep Time: 20 minutes
- Cook Time: –
Nutrition
- Serving Size: 8
- Calories: 350 kcal
- Fat: 20g
- Protein: 4g