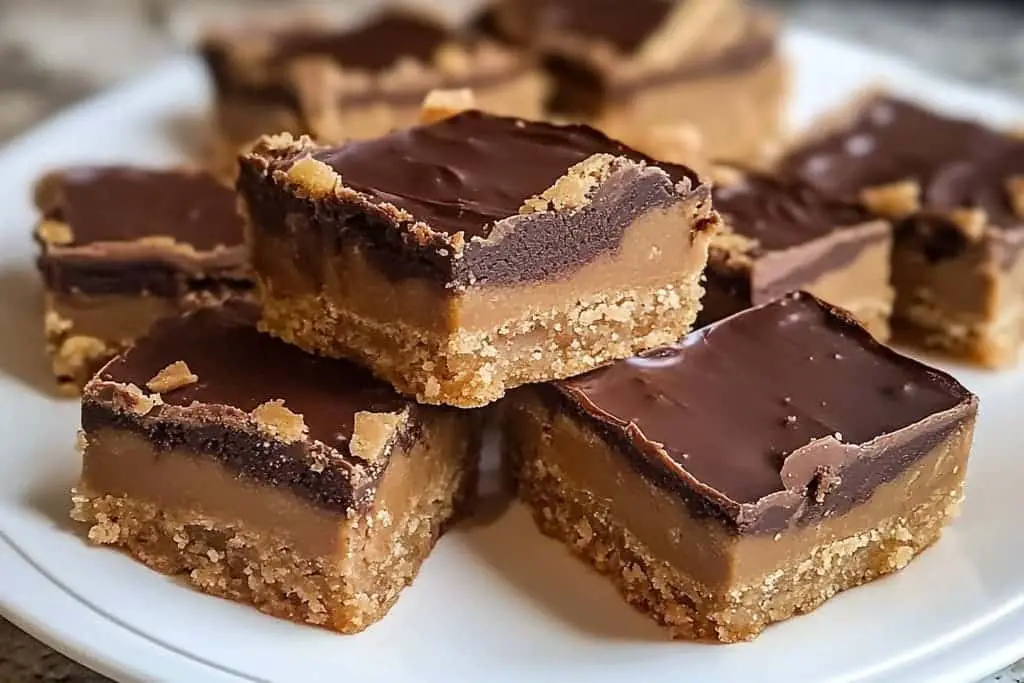
No Bake Reese’s Bars are an amazing treat that every peanut butter lover should try. This delightful dessert features layers of creamy peanut butter and rich chocolate, offering an incredible combination that will satisfy your sweet tooth. Whether you’re hosting a gathering or just indulging yourself, these bars are a no-fuss way to enjoy a decadent dessert without turning on the oven.
The best part about No Bake Reese’s Bars is their simplicity. With just a few ingredients and minimal preparation time, you can create a delicious dessert that impresses everyone. From the first bite, you’ll experience the sweet, nutty flavor of peanut butter paired with the smoothness of chocolate. This explosion of flavors makes them a perfect indulgence for any occasion.
Moreover, these bars are versatile, allowing you to customize them to your liking. You can add more layers, sprinkle toppings, or even change the chocolate type! In this guide, you will discover both the preparation process and the love that goes into making No Bake Reese’s Bars. Get ready to treat yourself and your friends to an unforgettable dessert experience that’s easy to whip up and hard to resist!
Why You’ll Love This Recipe
No Bake Reese’s Bars provide a delightful blend of textures and flavors that will make your taste buds dance. Here are some reasons why you’ll fall head over heels for this recipe:
1. Quick and Easy: With straightforward steps, this recipe is perfect for beginners and busy cooks alike.
2. No Baking Required: Say goodbye to waiting for the oven! These bars set in the fridge, making preparation hassle-free.
3. Irresistible Flavor: Peanut butter and chocolate combine for an amazing taste that chocolate and nut butter lovers crave.
4. Customizable: Feel free to add nuts, sprinkles, or even different kinds of chocolate for added flair.
5. Sharing is Caring: These bars are the perfect sweet treat to share at family gatherings, parties, or potlucks.
6. Versatile Dessert: Serve these bars as a snack, after-school treat, or dessert for dinner parties; they fit any occasion perfectly.
With these appealing elements in mind, you can see how No Bake Reese’s Bars have won over many fans. Each bite reveals layers of flavor, experiencing the joy of homemade treats without the hassle of baking.
Preparation and Cooking Time
Making No Bake Reese’s Bars is quick and easy, allowing you to enjoy your treat in no time. Here is a breakdown of the required time:
– Preparation Time: 20 minutes
– Chilling Time: 1 hour
– Total Time: 1 hour and 20 minutes
These times may vary slightly based on individual kitchen efficiency, but this serves as a solid guideline. You’ll find that most of the time is devoted to chilling the bars, ensuring they set perfectly before you indulge.
Ingredients
– 1 cup graham cracker crumbs
– 1 cup powdered sugar
– ½ cup unsweetened cocoa powder
– 1 cup creamy peanut butter
– ½ cup unsalted butter, softened
– 1 cup semi-sweet chocolate chips
– 1 tablespoon vegetable oil (optional, for smoother chocolate)
Step-by-Step Instructions
Creating No Bake Reese’s Bars can be a straightforward process by following these simple steps:
1. Prepare the Pan: Line an 8×8-inch baking pan with parchment paper, leaving some overhang for easy removal.
2. Mix Base Ingredients: In a bowl, combine the graham cracker crumbs, powdered sugar, and cocoa powder, mixing until fully combined.
3. Add Peanut Butter and Butter: In another mixing bowl, cream together the peanut butter and softened butter until well blended.
4. Combine Mixtures: Gradually add the dry mixture to the peanut butter mixture, stirring until you achieve a thick, cohesive dough.
5. Press into Pan: Pour the mixture into the prepared baking pan. Press it down evenly, ensuring a smooth surface.
6. Melt Chocolate: In a microwave-safe bowl, melt the chocolate chips. Stir in vegetable oil if desired for a smoother consistency.
7. Spread Chocolate Layer: Once melted, pour the chocolate over the pressed mixture in the pan, spreading it evenly.
8. Chill: Cover the pan and refrigerate for at least an hour until the chocolate layer is firm.
9. Slice Bars: Once set, remove the bars from the pan using the parchment paper. Cut into squares or rectangles.
10. Serve: Enjoy your homemade No Bake Reese’s Bars as a delicious sweet treat!
How to Serve
When it comes to serving No Bake Reese’s Bars, consider the following tips to enhance your experience:
1. Presentation: Arrange the bars on a decorative plate for an eye-catching display that invites guests to try them.
2. Accompaniments: Serve with a glass of cold milk or hot coffee for a delightful balance that complements the bars’ sweetness.
3. Storage Tips: Keep any leftover bars in an airtight container in the fridge for up to a week. You can also freeze them for longer storage.
4. Garnishing Touch: Add a sprinkle of sea salt on top before serving for a contrast that elevates the flavor.
By taking these serving suggestions into account, you’ll create a lasting impression when presenting No Bake Reese’s Bars to family and friends. Enjoy these delightful treats and watch them vanish quickly at your next gathering or family dessert night!
No Bake Reese’s Bars are sure to become a go-to dessert. With their amazing combination of chocolate and peanut butter, they offer every bit of indulgence you can desire without any effort. Make your batch today and share the joy of these bars with those you love!
Additional Tips
– Use Quality Ingredients: For the best flavor, opt for high-quality cocoa powder and semi-sweet chocolate chips.
– Let Ingredients Reach Room Temperature: Allow the butter and peanut butter to soften fully for easier mixing and better flavor integration.
– Experiment with Toppings: Consider adding crushed peanuts, a drizzle of caramel, or even a sprinkle of sea salt on top for a flavor boost.
– Portion Control: Cut the bars into smaller pieces to help with portion control, especially since these bars can be quite rich.
– Serve Cold: These bars taste best when served fresh from the refrigerator, as the chocolate remains firm and the layers hold together better.
Recipe Variation
Feel free to switch things up! Here are some variations to try:
1. Nutty Delight: Add chopped peanuts or walnuts to the peanut butter mixture for added crunch and flavor.
2. Chocolate Lover’s Dream: Use dark chocolate chips instead of semi-sweet for a richer chocolate experience.
3. Peppermint Twist: Add a few drops of mint extract to the chocolate layer around the holidays for a festive flavor.
4. Crunchy Texture: Mix in crushed pretzels or rice krispies into the peanut butter layer for an added crunch.
5. Vegan Version: Substitute regular butter with vegan butter and use dairy-free chocolate chips to make this dessert vegan-friendly.
Freezing and Storage
– Storage: Keep the No Bake Reese’s Bars covered in the refrigerator, where they can last for up to a week. Ensure they’re in an air-tight container.
– Freezing: You can also freeze these bars. Wrap them tightly in plastic wrap and store them in a freezer-safe container. They can last for up to three months. When ready to enjoy, thaw them in the refrigerator overnight.
Special Equipment
You will need a few essential tools to prepare this easy dessert successfully:
– Mixing Bowls: A large bowl for dry ingredients and a medium bowl for wet ingredients.
– Electric Mixer: For effortlessly combining the peanut butter and butter.
– Parchment Paper: To line your baking pan for easy removal.
– 8×8-inch Baking Pan: This is the ideal size for your No Bake Reese’s Bars.
– Measuring Cups and Spoons: Accurate measurements are crucial for the perfect balance of flavors.
Frequently Asked Questions
How can I tell if my bars are set?
Once chilled for at least an hour, the chocolate layer should be firm to the touch. You can also gently poke the edge to see if it holds the shape.
Can I make these bars in advance?
Absolutely! These bars can be made ahead of time. Just store them in the refrigerator until you’re ready to serve.
What if I’m allergic to peanuts?
Feel free to substitute the creamy peanut butter with almond butter or sunflower seed butter to create a nut-free version.
Can I use chunky peanut butter instead of creamy?
Yes, using chunky peanut butter will give your bars extra texture, offering a delightful crunch in every bite.
What’s the best way to slice the bars?
For clean slices, use a sharp knife and clean it between cuts. It helps to wipe the knife to avoid sticky residue on the blade.
Conclusion
No Bake Reese’s Bars are an unforgettable treat for all peanut butter enthusiasts. With their creamy texture, rich chocolate layer, and simplicity in preparation, these bars are sure to be a hit at any gathering or cozy night in. Easy to customize and perfect for sharing, these bars will quickly become a favorite dessert that you’ll want to revisit time and time again. Make your batch today, and enjoy the delightful combination of flavors in every bite!

No Bake Reese’s Bars: An Amazing Ultimate Dessert for Peanut Butter Lovers
- Total Time: 15 minutes
Ingredients
– 1 cup graham cracker crumbs
– 1 cup powdered sugar
– ½ cup unsweetened cocoa powder
– 1 cup creamy peanut butter
– ½ cup unsalted butter, softened
– 1 cup semi-sweet chocolate chips
– 1 tablespoon vegetable oil (optional, for smoother chocolate)
Instructions
Creating No Bake Reese’s Bars can be a straightforward process by following these simple steps:
1. Prepare the Pan: Line an 8×8-inch baking pan with parchment paper, leaving some overhang for easy removal.
2. Mix Base Ingredients: In a bowl, combine the graham cracker crumbs, powdered sugar, and cocoa powder, mixing until fully combined.
3. Add Peanut Butter and Butter: In another mixing bowl, cream together the peanut butter and softened butter until well blended.
4. Combine Mixtures: Gradually add the dry mixture to the peanut butter mixture, stirring until you achieve a thick, cohesive dough.
5. Press into Pan: Pour the mixture into the prepared baking pan. Press it down evenly, ensuring a smooth surface.
6. Melt Chocolate: In a microwave-safe bowl, melt the chocolate chips. Stir in vegetable oil if desired for a smoother consistency.
7. Spread Chocolate Layer: Once melted, pour the chocolate over the pressed mixture in the pan, spreading it evenly.
8. Chill: Cover the pan and refrigerate for at least an hour until the chocolate layer is firm.
9. Slice Bars: Once set, remove the bars from the pan using the parchment paper. Cut into squares or rectangles.
10. Serve: Enjoy your homemade No Bake Reese’s Bars as a delicious sweet treat!
- Prep Time: 15 minutes
- Cook Time: 0 minutes
Nutrition
- Serving Size: 16 bars
- Calories: 250 kcal
- Fat: 15g
- Protein: 5g