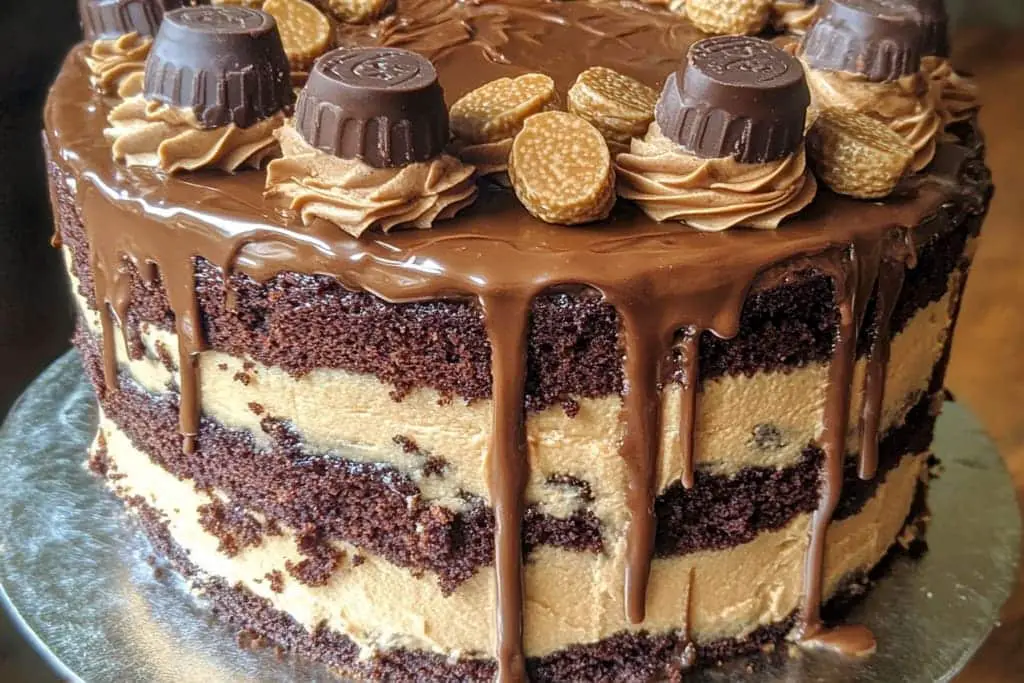
Reese’s Peanut Butter Cup Earthquake Cake is an incredible dessert that will leave your taste buds dancing with joy. This decadent delight combines the rich flavors of chocolate, the creaminess of peanut butter, and the delightful crunch of peanut butter cups for a truly extraordinary experience. If you’re a fan of chocolate and peanut butter, you’re in for a treat that’s perfect for any occasion. The captivating visual of this cake, with its gooey middle and melted toppings, makes it irresistible to anyone who lays their eyes on it.
The first bite of this unique cake reveals layers of texture and flavor that create a delightful explosion of sweetness. It’s not just a dessert; it’s a celebration of two beloved flavors perfectly intertwined. Whether you’re baking for a special event, a gathering, or simply to indulge your cravings, this cake is bound to impress. The delightful twist of peanut butter adds a warmth that envelops your palate, while the chocolate cake base keeps the dish rooted in classic comfort.
Let us explore why this Reese’s Peanut Butter Cup Earthquake Cake is a must-try and how you can prepare it at home. With easy-to-follow instructions and simple ingredients, you’ll be able to whip up this incredible dessert in no time, leaving your friends and family asking for seconds.
Why You’ll Love This Recipe
There are countless reasons to love the Reese’s Peanut Butter Cup Earthquake Cake. Here are just a few:
1. Easy to Make: This recipe features straightforward instructions, making it accessible for bakers of all levels.
2. Decadent Flavor: The delightful combination of chocolate, vanilla, and peanut butter is sure to astound your taste buds.
3. Gooey Center: As it bakes, the cake creates a molten-like center that enhances the overall eating experience.
4. Crowd-Pleaser: This cake consistently receives rave reviews, making it perfect for sharing at parties or family gatherings.
5. Customizable: You can easily tweak the recipe by adding your favorite ingredients or swapping out peanut butter cups for other sweets.
With this cake, there’s something for everyone, ensuring a unique experience with each bite!
Preparation and Cooking Time
Making the Reese’s Peanut Butter Cup Earthquake Cake will take approximately 1 hour and 15 minutes. Here’s the breakdown:
– Preparation Time: 30 minutes
– Cooking Time: 30-40 minutes
– Cooling Time: 15 minutes
These estimates may vary slightly depending on your kitchen equipment and experience. However, this overview provides a clear idea of what to expect.
Ingredients
– 1 box chocolate cake mix
– 1 cup water
– 1/2 cup vegetable oil
– 3 large eggs
– 1 cup creamy peanut butter
– 1 cup powdered sugar
– 1 cup semi-sweet chocolate chips
– 1 cup Reese’s Peanut Butter Cups, chopped
– 1/2 cup milk
– 1 teaspoon vanilla extract
Step-by-Step Instructions
Creating the Reese’s Peanut Butter Cup Earthquake Cake can be both fun and straightforward when following these steps:
1. Preheat Oven: Begin by preheating your oven to 350°F (175°C). Grease and flour a 9×13 inch baking pan.
2. Prepare Cake Mix: In a large bowl, combine the chocolate cake mix, water, vegetable oil, and eggs. Mix until the batter is smooth and well combined.
3. Pour Batter: Pour the chocolate cake batter into the prepared baking pan, spreading it evenly.
4. Mix Peanut Butter Filling: In another bowl, blend the creamy peanut butter, powdered sugar, milk, and vanilla extract until smooth and creamy.
5. Add Peanut Butter Mixture: Spoon dollops of the peanut butter mixture over the chocolate batter. Use a knife or skewer to gently swirl it into the batter, creating a marbled effect.
6. Add Toppings: Sprinkle the semi-sweet chocolate chips and chopped Reese’s Peanut Butter Cups evenly over the top of the batter.
7. Bake: Place the pan in the preheated oven and bake for 30-40 minutes or until a toothpick inserted into the center comes out clean.
8. Cool: Remove from the oven and let the cake cool in the pan for about 15 minutes before serving.
9. Slice and Enjoy: Once cooled, slice into squares and serve warm for a gooey chocolatey experience.
How to Serve
To elevate your Reese’s Peanut Butter Cup Earthquake Cake experience, consider the following serving suggestions:
1. Presentation: Serve in a beautiful dessert dish or on a cake stand to highlight its tempting layers.
2. Accompaniments: Consider pairing with a scoop of vanilla ice cream or whipped cream to elevate the dessert further.
3. Garnishes: Top with additional chopped Reese’s Peanut Butter Cups or a drizzle of chocolate syrup for added allure.
4. Temperature: This cake is best served warm, allowing the gooey peanut butter to flow with every spoonful.
5. Beverage Pairing: Pair with coffee or a glass of cold milk to enhance the dessert experience.
By taking the extra time to present and serve your Reese’s Peanut Butter Cup Earthquake Cake thoughtfully, you’ll create lasting memories for you and your guests. Enjoy this unique and delicious treat to its fullest!
Additional Tips
– Use Quality Ingredients: To enhance the flavor of your Reese’s Peanut Butter Cup Earthquake Cake, opt for high-quality chocolate and fresh peanut butter. This will elevate your cake and ensure a richer taste in every bite.
– Poke Holes for Extra Gooeyness: After baking, poke small holes in the surface of the cake to allow the melting peanut butter filling to seep through.
– Serve Warm: For the best experience, serve the cake warm. This allows the melted peanut butter and chocolate to create an even more decadent dessert.
– Use Confectioner’s Sugar: Sifting the powdered sugar before mixing it into the peanut butter filling will ensure a smoother texture, adding to the overall quality of your dessert.
– Garnish Creatively: Consider garnishing with chopped peanuts or a drizzle of caramel sauce for an added flavor element and visual appeal.
Recipe Variation
Feel free to customize your Reese’s Peanut Butter Cup Earthquake Cake to suit your tastes! Here are a few variations to consider:
1. Brownie Base: Instead of using chocolate cake mix, substitute it with brownie mix for a richer chocolate foundation.
2. Different Nut Butters: Swap out the creamy peanut butter for other nut butters like almond or cashew butter for a unique twist.
3. Mix-In Options: Incorporate additional toppings such as crushed Oreo cookies or M&M’s into the batter before baking for extra texture and flavor.
4. Gluten-Free Version: Use gluten-free chocolate cake mix and ensure that all other ingredients comply with gluten-free standards to cater to a gluten-intolerant audience.
Freezing and Storage
– Storage: Keep your Reese’s Peanut Butter Cup Earthquake Cake covered in an airtight container at room temperature for up to 3 days or in the refrigerator for up to 5 days to maintain its freshness.
– Freezing: You can freeze the cake for up to 3 months. Cut it into individual slices and wrap them tightly in plastic wrap, then place them in a freezer-safe container. Thaw in the refrigerator when ready to enjoy.
Special Equipment
To make the preparation of the Reese’s Peanut Butter Cup Earthquake Cake as effortless as possible, consider having these essential tools on hand:
– Mixing Bowls: Use varying sizes for different mixing tasks.
– Electric Mixer: This will help combine your ingredients quickly and effectively.
– Rubber Spatula: Great for scraping down the sides of bowls and ensuring no ingredients are left behind.
– 9×13 Inch Baking Pan: The standard size for this recipe, ensuring even baking.
– Parchment Paper: Consider lining the bottom of the pan with parchment paper for easier release after baking.
Frequently Asked Questions
How do I know when the cake is done baking?
To check if the cake is baked perfectly, insert a toothpick into the center. If it comes out clean, your cake is done.
Can I make this cake ahead of time?
Yes, preparing it a day in advance allows the flavors to meld, making it even tastier.
Is this cake suitable for dietary restrictions?
You can modify the recipe to be gluten-free by using gluten-free cake mix and ensuring all ingredients are gluten-free.
Is it necessary to add Reese’s Peanut Butter Cups on top?
While they enhance the flavor and presentation, you can skip them if you prefer a simpler version of the cake.
Can I add other flavors?
Absolutely! Feel free to mix in different ingredients like crushed cookies or flavored chips to create your own unique version.
Conclusion
The Reese’s Peanut Butter Cup Earthquake Cake is much more than just a dessert. It’s a delightful indulgence that caters to both chocolate and peanut butter lovers, ensuring that every bite is filled with flavor and joy. Whether you’re celebrating a special occasion or simply treating yourself, this cake is bound to impress. With its gooey center, rich flavors, and the ability to customize, it’s sure to become a beloved recipe in your baking repertoire. Gather your friends and family, and get ready to serve a slice of this decadent delight that will have everyone craving more!

Reese’s Peanut Butter Cup Earthquake Cake: An Incredible Dessert Delight
- Total Time: 0 hours
Ingredients
– 1 box chocolate cake mix
– 1 cup water
– 1/2 cup vegetable oil
– 3 large eggs
– 1 cup creamy peanut butter
– 1 cup powdered sugar
– 1 cup semi-sweet chocolate chips
– 1 cup Reese’s Peanut Butter Cups, chopped
– 1/2 cup milk
– 1 teaspoon vanilla extract
Instructions
Creating the Reese’s Peanut Butter Cup Earthquake Cake can be both fun and straightforward when following these steps:
1. Preheat Oven: Begin by preheating your oven to 350°F (175°C). Grease and flour a 9×13 inch baking pan.
2. Prepare Cake Mix: In a large bowl, combine the chocolate cake mix, water, vegetable oil, and eggs. Mix until the batter is smooth and well combined.
3. Pour Batter: Pour the chocolate cake batter into the prepared baking pan, spreading it evenly.
4. Mix Peanut Butter Filling: In another bowl, blend the creamy peanut butter, powdered sugar, milk, and vanilla extract until smooth and creamy.
5. Add Peanut Butter Mixture: Spoon dollops of the peanut butter mixture over the chocolate batter. Use a knife or skewer to gently swirl it into the batter, creating a marbled effect.
6. Add Toppings: Sprinkle the semi-sweet chocolate chips and chopped Reese’s Peanut Butter Cups evenly over the top of the batter.
7. Bake: Place the pan in the preheated oven and bake for 30-40 minutes or until a toothpick inserted into the center comes out clean.
8. Cool: Remove from the oven and let the cake cool in the pan for about 15 minutes before serving.
9. Slice and Enjoy: Once cooled, slice into squares and serve warm for a gooey chocolatey experience.
- Prep Time: 15 minutes
- Cook Time: 30-40 minutes
Nutrition
- Serving Size: 12
- Calories: 380 kcal
- Fat: 19g
- Protein: 8g