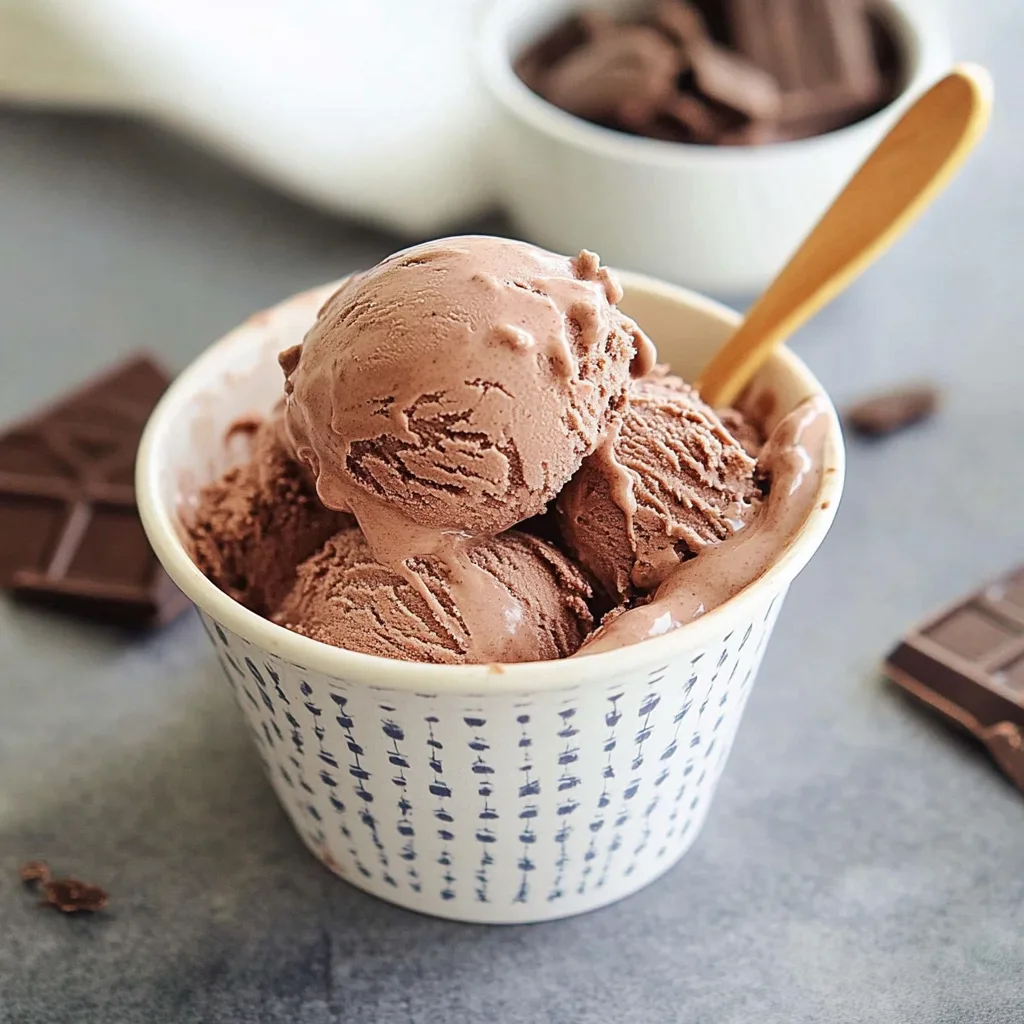
Homemade Chocolate Ice Cream is a delightful indulgence that captures the essence of summer fun in a creamy, rich dessert. Nothing beats the feeling of enjoying a bowl of this delectable treat on a hot day. From the melting chocolate in each bite to the silky-smooth texture, this homemade version promises a taste experience that store-bought ice creams cannot rival.
Making chocolate ice cream at home is not only incredibly simple but also allows you to customize flavors and sweetness levels perfectly to your taste. Imagine savoring a scoop of creamy chocolate ice cream, rich in flavor and made with wholesome ingredients found in your kitchen. Doesn’t that sound incredible? You’ll find joy in both the process and the delightful results.
In this article, we will explore the reasons why you’ll love this homemade chocolate ice cream recipe, detail the preparation and cooking time, list the ingredients you’ll need, provide step-by-step instructions, and offer tips on how to serve it beautifully. Whether you’re trying your hand at ice cream making for the first time or you’ve been doing it for years, this guide will ensure your homemade chocolate ice cream turns out wonderfully every single time.
Why You’ll Love This Recipe
You may wonder why you should invest time in creating Homemade Chocolate Ice Cream when it’s readily available in stores. Here are several reasons that make this recipe stand out:
1. Fresh Ingredients: You control what goes into your ice cream, ensuring quality and freshness.
2. Flexibility: Adjust the chocolate intensity or sweetness based on your preference.
3. Creamy Texture: Homemade ice cream often has a smoother texture than commercial varieties due to a lower use of air.
4. Unique Flavor Combinations: Add extras like nuts or fruits to make it your own.
5. Satisfaction of Creation: There’s immense satisfaction in making something delicious from scratch.
6. Perfect for Any Occasion: Whether it’s a birthday party or a cozy family night, this dessert is always a hit.
With Homemade Chocolate Ice Cream, the love you pour into each step translates into an exquisite final product that truly reflects your efforts.
Preparation and Cooking Time
Creating this luscious chocolate ice cream does take some time, but the process is incredibly rewarding. To help you plan ahead, here’s a breakdown of the required time:
– Preparation Time: 15 minutes
– Chilling Time: 2-4 hours (or overnight for optimal flavor)
– Churning Time: Approximately 30 minutes
– Total Time: About 3-4 hours (including chilling and churning, this may vary slightly depending on your equipment and kitchen temperature)
Now that you know how long it takes, you can anticipate the joy of tasting your homemade treat!
Ingredients
– 2 cups heavy cream
– 1 cup whole milk
– ¾ cup granulated sugar
– 1 cup unsweetened cocoa powder
– 1 teaspoon vanilla extract
– ½ teaspoon salt
– ½ cup semi-sweet chocolate chips (optional)
– 3 large egg yolks (optional, for a custardy texture)
Step-by-Step Instructions
Creating your homemade chocolate ice cream is an enjoyable project. Just follow these easy steps:
1. Combine Dairy Ingredients: In a medium saucepan, whisk together the heavy cream and whole milk over medium heat until warm. Do not bring it to a boil.
2. Mix Sugar and Cocoa Powder: In a bowl, blend together the granulated sugar, cocoa powder, and salt until evenly mixed.
3. Add Cocoa Mixture: Gradually stir the sugar mixture into the warm dairy, whisking continuously until fully incorporated.
4. Optional Custard Base: If you prefer a custard-style ice cream, whisk the egg yolks in a separate bowl. Slowly add a small amount of the warm chocolate mixture to the yolks to temper them. Then, transfer the yolk mixture back into the saucepan, stirring constantly until it thickens slightly (about 5 minutes).
5. Chill the Mixture: Remove the saucepan from heat and stir in the vanilla extract. Cover the mixture and refrigerate for at least 2-4 hours, or overnight for the best flavor.
6. Churn the Ice Cream: Once chilled, pour the mixture into your ice cream maker. Follow the manufacturer’s instructions to churn until it reaches a soft-serve consistency.
7. Fold in Chocolate Chips: If using, fold in the semi-sweet chocolate chips at this stage.
8. Freeze: Transfer the churned ice cream to an airtight container. Smooth the top and cover with plastic wrap before sealing the container. Freeze for at least 4 hours or until firm.
9. Serve: Once the ice cream has hardened, it’s ready to serve!
These steps will lead you to a homemade chocolate ice cream that is simply irresistible.
How to Serve
Serving your Homemade Chocolate Ice Cream can be just as delightful as making it. Here are some tips to elevate your presentation:
1. Presentation Bowls: Use elegant bowls or classic ice cream cones for an appealing look.
2. Toppings: Offer a variety of toppings such as sprinkles, crushed nuts, fresh berries, or a drizzle of chocolate sauce for added flair.
3. Garnish: Consider a sprig of mint or whipped cream on top for a touch of elegance.
4. Pairing Options: Serve alongside warm brownies or chocolate cake for an indulgent dessert experience.
5. Temperature Consideration: Let the ice cream sit out for a few minutes before scooping to achieve the perfect creamy texture.
By focusing on presentation and pairing, you can create an amazing experience that your guests will remember long after the last scoop. Each serving of this homemade chocolate ice cream is not just about taste; it’s about sharing joy and creating memories surrounded by loved ones. Enjoy making and sharing this delightful treat!
Additional Tips
– Use High-Quality Ingredients: Selecting premium cocoa powder and fresh cream can significantly enhance the flavor of your Homemade Chocolate Ice Cream.
– Chill Your Equipment: Before you churn the ice cream, place your ice cream maker’s bowl in the freezer for a few hours. This helps achieve a fluffer final texture.
– Let It Soften: Before serving, allow the ice cream to sit at room temperature for a few minutes. This will help it soften slightly, making it easier to scoop.
– Flavors Layering: Consider adding a swirl of chocolate fudge or caramel sauce into the mixture before freezing for an extra layer of flavor.
– Experiment with Spices: Adding a pinch of cinnamon or espresso powder can accentuate the chocolate flavor beautifully.
Recipe Variation
Feel free to get creative! Here are some delicious variations you can try:
1. Mint Chocolate Chip: Stir in mint extract while mixing the ingredients and fold in chocolate chips for a refreshing twist.
2. Dark Chocolate: Use dark cocoa powder and semi-sweet chocolate chunks for a richer flavor profile.
3. Mocha Mint: Add instant coffee granules and peppermint extract for a delightful coffee-flavored ice cream.
4. White Chocolate: Replace some semi-sweet chocolate chips with white chocolate chips for a unique sweetness.
Freezing and Storage
– Storage: Keep your Homemade Chocolate Ice Cream in an airtight container. It should remain fresh in the freezer for up to 2-3 weeks.
– Prevent Ice Crystals: To minimize ice crystals forming on the surface, press plastic wrap directly onto the surface of the ice cream before sealing the container.
– Scoop Before Serving: If stored for an extended period, let the ice cream sit at room temperature for 5-10 minutes before scooping for the best texture.
Special Equipment
You’ll need some specific tools to successfully make Homemade Chocolate Ice Cream:
– Ice Cream Maker: A good quality ice cream maker is essential for churning your ice cream to a smooth consistency.
– Medium Saucepan: To heat your dairy mixture and combine ingredients efficiently.
– Whisk: For blending the mixture properly and achieving a smooth texture.
– Airtight Container: To store your homemade ice cream in the freezer.
– Mixing Bowls: You will need several for mixing and cooling the chocolate mixture.
Frequently Asked Questions
Can I make this ice cream without an ice cream maker?
Yes, you can. Just pour the mixture into a shallow dish, freeze it for about an hour, then stir it vigorously with a fork every 30 minutes until it reaches the desired texture.
Can I use non-dairy alternatives?
Absolutely! Substituting heavy cream and whole milk with coconut milk or almond milk will work well. Adjust sugar accordingly if using sweetened versions.
How long does it take to thaw?
Leave your Homemade Chocolate Ice Cream to thaw at room temperature for about 5-10 minutes. This allows it to soften without melting completely.
Can I add mix-ins later?
Definitely! If you didn’t add mix-ins before churning, you can fold them in gently after the ice cream reaches soft-serve consistency.
What if my ice cream is too hard?
If your ice cream is too hard to scoop after freezing, let it sit out for a few minutes to soften before trying to scoop.
Conclusion
Homemade Chocolate Ice Cream is an incredibly rewarding treat that combines rich flavor with creamy texture. Making it from scratch not only lets you choose your ingredients but also offers a true delight in creating something delicious for your loved ones. As you savor each scoop, let the memories of your joy-filled afternoons come alive. By following this guide and experimenting with variations, you can ensure that each batch is a celebration of chocolatey bliss!
Homemade Chocolate Ice Cream: The Ultimate Amazing Recipe
- Total Time: 45 minutes
Ingredients
– 2 cups heavy cream
– 1 cup whole milk
– ¾ cup granulated sugar
– 1 cup unsweetened cocoa powder
– 1 teaspoon vanilla extract
– ½ teaspoon salt
– ½ cup semi-sweet chocolate chips (optional)
– 3 large egg yolks (optional, for a custardy texture)
Instructions
Creating your homemade chocolate ice cream is an enjoyable project. Just follow these easy steps:
1. Combine Dairy Ingredients: In a medium saucepan, whisk together the heavy cream and whole milk over medium heat until warm. Do not bring it to a boil.
2. Mix Sugar and Cocoa Powder: In a bowl, blend together the granulated sugar, cocoa powder, and salt until evenly mixed.
3. Add Cocoa Mixture: Gradually stir the sugar mixture into the warm dairy, whisking continuously until fully incorporated.
4. Optional Custard Base: If you prefer a custard-style ice cream, whisk the egg yolks in a separate bowl. Slowly add a small amount of the warm chocolate mixture to the yolks to temper them. Then, transfer the yolk mixture back into the saucepan, stirring constantly until it thickens slightly (about 5 minutes).
5. Chill the Mixture: Remove the saucepan from heat and stir in the vanilla extract. Cover the mixture and refrigerate for at least 2-4 hours, or overnight for the best flavor.
6. Churn the Ice Cream: Once chilled, pour the mixture into your ice cream maker. Follow the manufacturer’s instructions to churn until it reaches a soft-serve consistency.
7. Fold in Chocolate Chips: If using, fold in the semi-sweet chocolate chips at this stage.
8. Freeze: Transfer the churned ice cream to an airtight container. Smooth the top and cover with plastic wrap before sealing the container. Freeze for at least 4 hours or until firm.
9. Serve: Once the ice cream has hardened, it’s ready to serve!
These steps will lead you to a homemade chocolate ice cream that is simply irresistible.
- Prep Time: 15 minutes
- Cook Time: 30 minutes
Nutrition
- Serving Size: Approximately 6 servings
- Calories: 250 kcal
- Fat: 14g
- Protein: 3g